


SL-863 MHL AVLink/CBUS Analyzer 3.0
User Guide
Simplay-UG-1006-A
© 2014 Simplay Labs, LLC. All rights reserved.
11
CONFIDENTIAL
3.
SL-863 MHL Rx/Tx CBUS Analyzer 3.0 Application
The software application for SL-863 covers all test listed in MHL 3 CTS. With this application, you can load MHL 3 CDF
files, select test, and run the test in sequence. Brief test results are shown in the Graphic User Interface (GUI) Main
Window. Details of the test results can be found from the log file saved to your local disk.
Follow these steps to perform the CTS testing.
1.
Double click the “MHL 3 CTS Test Explorer” shortcut from your desktop to launch the GUI.
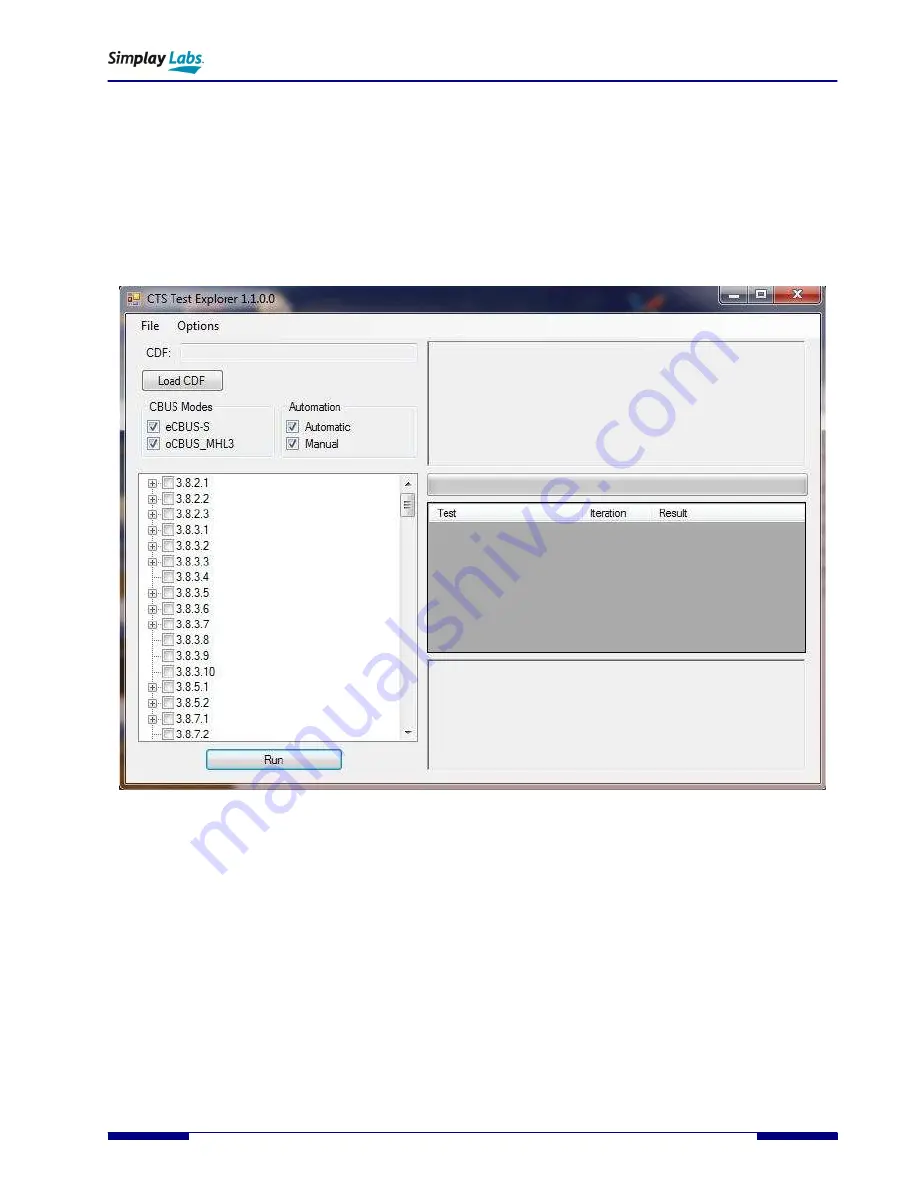
The main window for SL-863 MHL Rx/Tx CBUS Analyzer 3.0 is shown as follows (
Figure 3.1. Main Window of SL-863 MHL Rx/Tx CBUS Analyzer 3.0
2.
Click the “Load CDF” button to load the correct Customer Declaration Form (CDF) for source, sink, or dongle DUT.
The default CDFs are included with the software bundle, and store in the
C:\<users>\<user_name>\Documents\Simplay MHL 3.0 CTS Test
directory. You need to modify
the CDFs according to the Device Under Test (DUT) performance information.
All the requested test items show up in the left side of the GUI. Tests are sorted by CBUS mode. Each mode has
automated testing and manual testing.
3.
Check the desired test case. Single choice or multiple choices are allowed.
4.
Click the “Run” button to start the test.
5.
The log files are stored in the same folder as that of the CDF (
).


