Inscribir a un usuario
Enroll a user
IMPORTANTE
IMPORTANT
www.simon.es
1. DESCONECTAR el suministro eléctrico
1. Turn OFF the power supply
2. Poner el interruptor DIP Nº 5 en posición de ENCENDIDO
2. Push the dip switch no.5 in position ON
3. CONECTAR el suministro eléctrico - LED rojo - ENCENDIDO
3. Turn ON the power supply - Red LED - ON
4. En el lector 1, presentar las tarjetas maestras en este orden:
4. On Reader1, present the master cards in this order:
Master1&2
+ CUALQUIER código de 4 dígitos
Delete
+ CUALQUIER código de 4 dígitos
Reset APB
+ CUALQUIER código de 4 dígitos
Master1
+ CUALQUIER código de 4 dígitos
Master2
+ CUALQUIER código de 4 dígitos
Master1&2 + ANY 4 digit Code
Delete + ANY 4 digit Code
Reset APB + ANY 4 digit Code
Master1 + ANY 4 digit Code
Master2 + ANY 4 digit Code
Nota:
Al introducir la primera tarjeta, el LED verde parpadeará una vez, al introdu-
cir la segunda, lo hará dos veces... etc.
El sistema puede funcionar sin que todas las tarjetas estén introducidas (p.ej.,
puede estar activa solamente la tarjeta Master, Delete y APB). Como mínimo, debe
haber dos tarjetas maestras (Master1&2 y Delete)
Note: For the first inserted card, the green led will blink once, for the second,
the green led will blink twice...etc
System can work without all master cards inserted (ex. Only Master, Delete
and APB can be active). Minimum master cards are two (Master1&2 and
Delete)
5. Poner el interruptor DIP en posición de APAGADO (El SC24000 volverá al modo
operativo)
5. Put the dip switch in position OFF (SC24000 will return to operational mode)
NOTA:
Para cambiar las tarjetas Master y Delete se utiliza el mismo procedimien-
to. Las tarjetas Master/Delete antiguas se eliminan automáticamente.
NOTE: Changing Master and Delete Card is done with the same procedure. Old
Master/Delete Cards are deleted automatically.
1. Presentar la tarjeta CUALQUIER código
de 4 dígitos
1. Present Master Card + ANY 4 digit Code
2. Presentar la tarjeta Shad + CUALQUIER código
de 4 dígitos
2. Present Shadow Card + ANY 4 digit Code
3. Presentar la tarjeta de u CUALQUIER
código de 4 dígitos (o múltiples tarjetas de
u CUALQUIER código de 4 dígitos)
3. Present User Card + ANY 4 digit Code (or multiple
User cards + ANY 4 digit Code)
4. Presentar la tarjeta CUALQUIER código
de 4 dígitos
4. Present Master Card + ANY 4 digit Code
Nota
: Si se inscribe a un usuario con la tarjeta MASTER1, éste solo tendrá acceso
a la PUERTA 1.
Si se inscribe a un usuario con la tarjeta MASTER2, éste solo tendrá acceso a la
PUERTA 2.
Si se inscribe a un usuario con la tarjeta MASTER1&2, éste tendrá acceso a la
PUERTA 1 y a la PUERTA 2
Note: If the user is enrolled using MASTER1 card, the same user will have access
only on DOOR1.
If the user is enrolled using MASTER2 card, the same user will have access only
on DOOR2.
If the user is enrolled using MASTER1&2 card, the same user will have access on
DOOR1 and DOOR2.
Introducir tarjetas maestras
Insert Master Cards
Entrada
Input
Indicación
Indication
2 x cada tarjeta de
usuario
2 x each user card
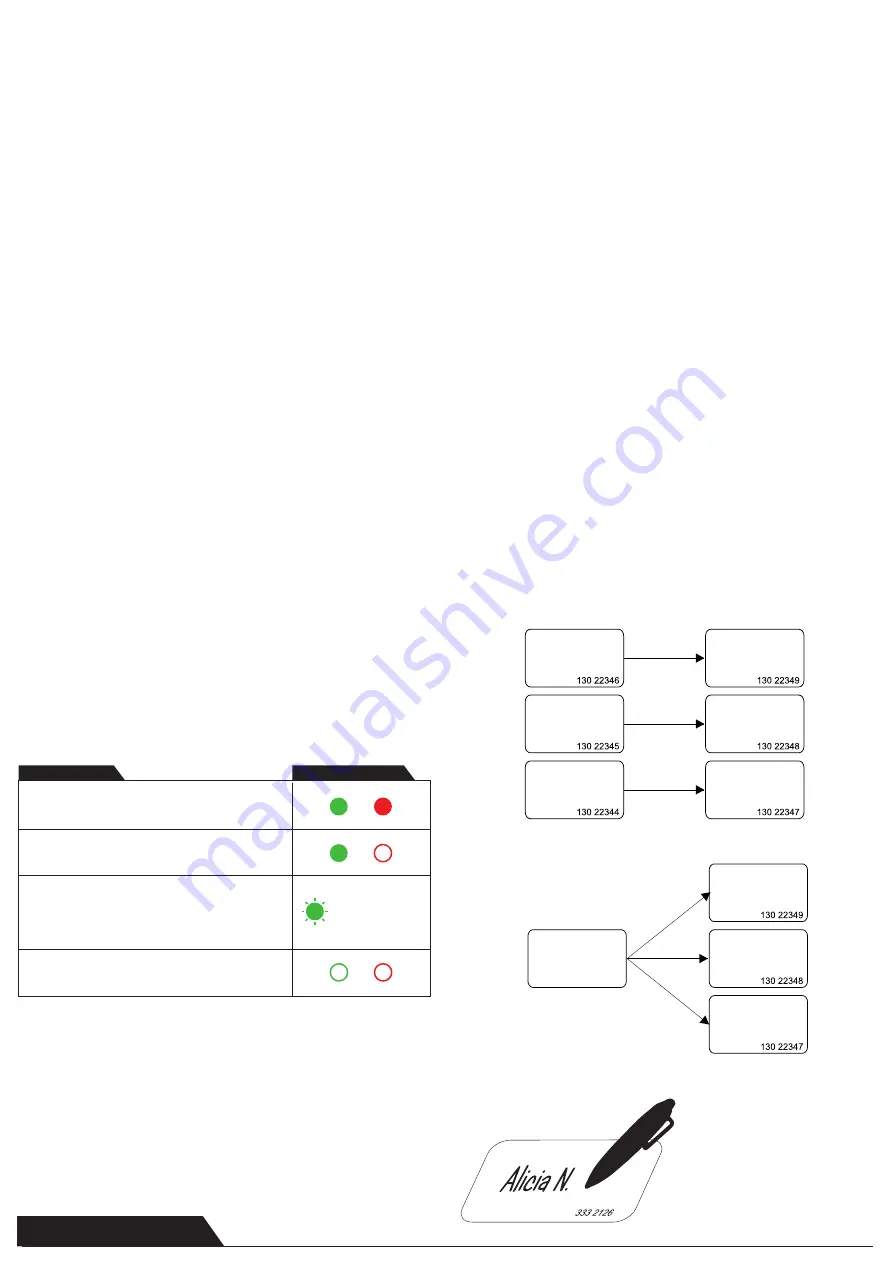
Con el procedimiento anterior, SOLAMENTE se guarda la tarjeta. Para guardar el
código PIN, hay que presentar la tarjeta recién inscrita (el LED naranja comenzará
a parpadear) y escribir el código PIN deseado.
En otras palabras, después de salir de la programación, la primera vez que se
perfore la tarjeta, el primer código PIN escrito pasará a ser el código asignado para
esa tarjeta exclusivamente.
Con esto se evita que el instalador conozca el código PIN del usuario. Éste podrá
escoger su propio código PIN.
With the procedure above, ONLY the Card is stored. To store the PIN Code,
present the newly enrolled Card
(the Orange LED will start blinking) and type the desired PIN code.
In other words, after exiting the programming, the first time the card is punched, the
first PIN Code typed becomes the Pin Code assigned to that card only.
This feature can prevent the installer to know the PIN Code of the user. The user
can choose his own PIN Code.
NOTA:
La tarjeta Shadow se puede configurar para 1 usuario o para un grupo de
usuarios. En ambos casos, escriba el nombre del usuario en esta tarjeta y guarde
todas las tarjetas Shadow en un lugar seguro.
NOTA:
Si en la misma tarjeta Shadow hay varios usuarios, al realizar un borrado
con ella se borrarán todos los usuarios
asociados.
NOTA:
Si fuese necesario cambiar una tarjeta Shadow, simplemente inscriba al
mismo usuario con otra tarjeta Shadow.
NOTE: Shadow card can be issued for 1 user or for group of users. In both cases,
write the name of the user on the shadow card and keep all of the shadow cards on
safe place.
NOTE:
If more than one user is associated to same shadow card, deleting with that
shadow card will result with deletion of all the Users associated to that shadow
card.
NOTE: If a shadow card needs to be changed, just enroll the same User with
different Shadow card.
Tarjeta Shadow 1
Shadow Card 1
Tarjeta Shadow 2
Shadow Card 2
Tarjeta Shadow 3
Shadow Card 3
Tarjeta usuario 1
User Card 1
Tarjeta usuario 2
User Card 2
Tarjeta usuario 3
User Card 3
Tarjeta usuario 1
User Card 1
Tarjeta usuario 2
User Card 2
Tarjeta usuario 3
User Card 3
Tarjeta Shadow
de grupo
Group Shadow
Card
O
Or


