background image

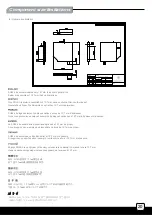
After all cables and wirings are 
connected, reinstall the top cover 
and secure it.


Подключите


все


необходимые


провода


и


кабели

после


чего


поставьте


на


место


верхнюю


крышку


и


закрепите


ее


шурупами

.


Nachdem alle Kabel und Drähte 
verbunden sind, installieren und 
befestigen Sie wieder die obere 
Abdeckung.

Après avoir branché tous les câbles, 
remettez le panneau supérieur et 
f ixez-le.

Después de conectar todos los 
cables, reinstale la cubierta 
superior y fíjela.

Dopo aver conesso tutti i cavi, 
reinstallare il pannello superior 
e fissarlo.

모든 케이블과 선들이 연결되었으면 상부 
커버를 재 설치한 후 나사로 고정시킵니다.

請在確認所有線材都已正確連接後裝回上蓋並
以螺絲鎖固.

请在确认所有线材都已正确连接后装回上盖并
以螺丝锁固.

全てのケーブルやリード線を接続してから、
上部カバーを元に戻してネジで固定します。

Attach the rubber standoff onto 
the chassis appropriately as 
required.


Прикрепите


к


корпусу


резиновые


опоры

.


Befestigen Sie den Gummi-Abstandhalter 
am Chassis wie benötigt

Collez les pieds en caoutchouc 
convenablement sous le boîtier 
comme exigé.

Enganche la base de goma en el 
chasis si es necesario.

Applicare i piedini in gomma sul telaio.

고무 받침을 필요한만큼 케이스에 부착합니다.

依需求將橡膠腳墊適當地貼附於機殼上。

依需求将橡胶脚垫适当地贴附于机壳上。

必要に応じてケースにゴム製スタンドを
取り付けます。


12

19.

20.

Содержание SUGO series

Страница 1: ...SG05 LITE The golden standard of Mini ITX cases...

Страница 2: ......

Страница 3: ...1 2 5 x 1 1 x 120mm intake fan 1200rpm Oversized vents Oversized vents External Internal Front Sides Top USB 3 0 x 2 Audio x 1 MIC x 1 Optional standard SFX Standard size long cards capable 10 width r...

Страница 4: ...NOT INCLUDDE 2 5 HDD NOT INCLUDDE SLIM OPTICAL DRIVE TRAY USB3 0 USB3 0 MIC EARPHONE RESET BUTTON POWER BUTTON MOTHERBOARD NOT INCLUDDE 12025 FAN FILTER BKT SFX PSU SOLD SEPARATELY Rubber feet SCREW...

Страница 5: ...de le soulever en dehors du bo tier Por favor quite los tornillos que sujetan la cubierta superior con un destornillador luego tire de ella hacia atr s para quitarla del chasis Rimuovere le viti del...

Страница 6: ...muovere le viti che fissano la gabbia degli hard drive quindi rimuoverla Remove the screws holding the optical drive bracket with a screw driver as shown then remove the bracket outward from the chass...

Страница 7: ...para soltar los enganches luego quite el panel frontal Premere nell area indicata per sbloccare i fermi quindi rimuovere il pannello frontale Pull the clip apart to remove the slim optical drive cove...

Страница 8: ...avec un tournevis Quite la presilla de la bah a del dispositivo ptico con un destornillador Rimuovere la mascherina del bay del lettore ottico con un cacciavite Reinstall the front panel onto the cha...

Страница 9: ...e c bles de ventilateurs connecteur 24pin de l alimentation Connecteur ATX 4 pin EPS12V 8pin du processeur connecteurs du panneau frontal et les connecteurs des ports E S frontaux A questo punto si ra...

Страница 10: ...drive is 15mm 2 5 2 5 15 Installieren Sie Ihre 2 5 Zoll Festplatte in der optischen Laufwerkshalterung wie abgebildet und befestigen Sie sie mit den beiliegenden Schrauben Die maximale H he der 2 5 Zo...

Страница 11: ...drive onto the bracket as shown and secure with screws then reinstall the bracket into the chassis and secure with screws 3 5 Installieren Sie Ihre 3 5 Zoll Festplatte in der Halterung wie abgebildet...

Страница 12: ...nda di collegare i connettori HDD SATA prima di installare la scheda video HDD SATA SATA SATA HDD SATA Please remove the screws holding the expansion card slot cover and remove it Please remove the sc...

Страница 13: ...e la scheda grafica o la scheda di espansione Reinstall the expansion card slot cover and secure with screws Installieren Sie die Expansionssteckplatzabdeckung wieder und befestigen Sie sie mit Schrau...

Страница 14: ...Despu s de conectar todos los cables reinstale la cubierta superior y f jela Dopo aver conesso tutti i cavi reinstallare il pannello superior e fissarlo Attach the rubber standoff onto the chassis ap...

Страница 15: ...13 Installation complete Die Installation ist vollst ndig Installation termin e Instalaci n completa Installazione completata 21...

Страница 16: ...es des connecteurs du panneau frontal et des broches des connecteurs du panneau syst me Les interrupteurs d allumage et de r initialisation ne poss de pas de polarit donc ils peuvent tre branch dans l...

Страница 17: ...l et desbroches des connecteurs du panneau syst me Les c bles color s en blanc noir sont n gatifs alors que ceux d une autre couleur sont positifs Les c bles de la LEDPower sont s par s afin d tre com...

Страница 18: ......

Страница 19: ...ocesseur d une taille inf rieure ou gale 82mm Limite droite Le dissipateur peut d passer de 8 mm par rapport aux bords de la carte m re Limite frontale L entr e d air du ventilateur SG05 Lite de 120 m...

Страница 20: ...nterst tzt SFX Standardnetzteile mit einer Tiefe von 100 mm Le SG05 Lite supporte une source d alimentation SFX standard avec une profondeur de 100mm La SG05 Lite acepta fuentes de alimentaci n SFX es...

Страница 21: ...length reference NVIDIA GeForce GTX 660 660Ti 670 9 5 AMD Radeon HD7870 9 75 NVIDIA GeForce GTX 680 10 Le SG05 Lite est compatible avec les cartes graphiques de 10 ou 254 mm Graphic card length refer...

Страница 22: ...ispiele zu optischen 12 7 mm Laufwerken SG05 Lite loge seulement un disque optique mince de 12 7 mm d paisseur Nous vous pr sentons quelques exemples de disques optiques de 12 7 mm d paisseur ci desso...

Страница 23: ...luche vont s accumuler avec le temps sur les filtres d aspiration et non sur les composants l int rieur du bo tier Pour conserver les excellentes performances de refroidissement du SG05 Lite au fil de...

Страница 24: ...r luego tire de ella hacia atr s para quitarla del chasis Rimuovere le viti del pannello superiore con un cacciavite spingerlo verso la parte posteriore e sollevarlo per asportarlo dal telaio A Press...

Страница 25: ...tallation der oberen Abdeckung f hren Sie die obigen Schritte in umgekehrter Reihenfolge aus Devissez les 4 vis pour retirer le ventilateur de l int rieur du bo tier Annulez les tapes ci dessus pour i...

Страница 26: ...warranty period please contact your retailer reseller SilverStone authorized distributors or SilverStone http www silverstonetek com Please note that i You must provide proof of original purchase of...

Страница 27: ......

Страница 28: ...G11218730 February...

Отзывы: