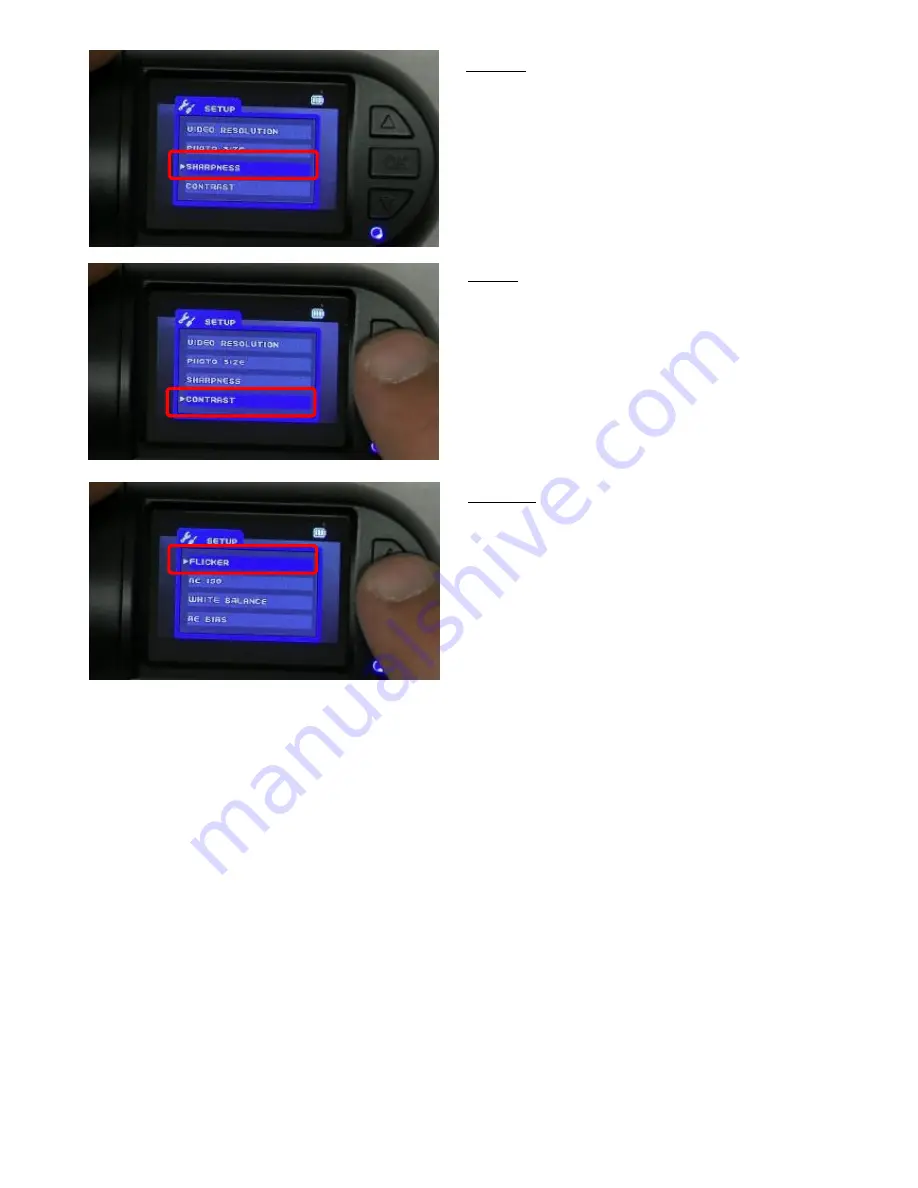
Silent Witness SW010 Скачать руководство пользователя страница 5

 5 

Sharpness 


This op


on Lets you alter the sharpness of the video and  

digital Pictures, 

We recommend this is set to AUTO 

Contrast 


This op


on lets you change the contrast of the video and  

digital pictures.  


We recommend this is set to AUTO 

Flicker Rate 


This op


on lets you change the 

icker rate of the device. 

European countries use 60Hz . 
If you are unsure  please set this op


on to AUTO 

Содержание SW010

Страница 1: ...1 FOR YOUR SW010...

Страница 2: ...icator Speed GPS Ba ery indicator Microphone Time Date Loop Indicator Digital Camera Automa c balance Mo on Detec on This picture shows the camera is Recording This picture shows the camera with the r...

Страница 3: ...e top of the camera from le to right computer usb port AV output Microphone AV Output This is used to connect the camera to a television that does not have the HDMI port This lead is included in the k...

Страница 4: ...SS OK to enter that op on PAUSED RECORDING This screen shows your device switched on and the recording has been PAUSED You can PAUSE this device by pressing the OK Video Resolu on Press OK to enter vi...

Страница 5: ...ecommend this is set to AUTO Contrast This op on lets you change the contrast of the video and digital pictures We recommend this is set to AUTO Flicker Rate This op on lets you change the icker rate...

Страница 6: ...lites Time Set Up Cont The 1st set of digits in yellow is the me zone this has to be correct for the GPS to obtain the me se ngs Bri sh standard me 00 Bri sh summer me 01 Use the UP and DOWN arrows to...

Страница 7: ...d is full the camera les will have to be deleted manually Sensor Flip This allows the camera to be installed 180 degrees so the screen and camera are showing the correct way This func on is only used...

Страница 8: ...func on allows a name vehicle reg to iden fy the Use the UP and DOWN arrows to choose a Le er or Number and press OK to con rm this will then move to the next icon on the screen G Sensor Precision G...

Страница 9: ...ge 2 Then choose the OUTTER CARD in the menu Please see page 3 picture 4 in quick guide GPS To enable the GPS func on on the camera the camera GPS needs to be set to OPEN if in the CLOSE posi on the G...

Страница 10: ...HOLD the DOWN arrow bu on Use the UP and DOWN arrow keys to choose the video File you wish to play PRESS the OK bu on to con rm To view the photos stored on the device PRESS and HOLD the DOWN arrow k...

Страница 11: ...11 HOW TO CONNECT YOUR CAMERA TO YOUR COMPUTER AND SOFTWARE...

Страница 12: ...to con gure 3 Auto Play should appear if not please go to my computer to locate the device 4 Click Open folder to view 5 Double Click on the folder called Player 6 Now you will see the so ware called...

Страница 13: ...se folder will appear on the screen Using the le menu locate the drive Le er and double click Double Click Removable Disk E Double Click DCIM folder Double click 100MEDIA Folder This will now display...

Страница 14: ...14 Highlight all the video les and then click OPEN This will open them into the so ware...

Страница 15: ...G Sensor Highlight and play Or double click Your Video plays here Google Maps Shows here Snapshot File Menu Skip Back Skip Forward Delete Volume Rewind Play Fast forward Please Note internet connec on...

Страница 16: ...User s Manual SW010 Please Read This Manual Carefully Before Using Please keep for future reference...

Страница 17: ...kaging doesn t match the attachment items please take the actual accessories as standard NOTICE Please note that this device is 12 24v with a 5v output please do not remove any adaptors and install di...

Страница 18: ...ch file u 1 5 inch screen to help you to watch video while make video recording in driving u Improve time date display no need to reset when re starting u Screenshots function can capture the video sc...

Страница 19: ...attery SD Card Motion Detection V MPH Car speed monitor after GPS is linked to a satellite White Balance Auto USB connecting Protected file FULL HD 1080P 720P Resolution 2008 01 01 01 07AM Date and Ti...

Страница 20: ...fluorescent cloudy TV type NTSC PAL AUTO power off The amount of time the camera will stay on after the power has been disconnected charge depending 1 min 3 min 5 min OFF Time Setup Set the Time Time...

Страница 21: ...menu Press and hold the UP arrow key and Press OK to resume recording Notes for Installing the device Always find a suitable place on the windscreen which will not obstruct your vision or cause an MO...

Страница 22: ...he Files Use a short press on the Up and Down arrow keys to navigate through the files and OK to confirm Play Pause Long press on the Down arrow to go back to video photo files When a file is highligh...

Страница 23: ...rd to the computer or the card formatted to enable it to record again Please see page 6 Format Stamp Time Date Date time GPS data driver number off 1 After you choose a stamp when you start recording...

Страница 24: ...ck GPSPLAYER exe and the software will now open 5 Click the symbol 6 Locate your Camera SD card and double click to open the file 7 Open DCIM folder and then single click on the 100Media folder and cl...

Страница 25: ...o 4X Digital Zooming 1440 1080P Playback still image Digital Zoom 8X Maximum Audio Built in microphone speaker AAC Exposure compensation 2 0EV 2 0EV Loop Recording OFF 1 mins 3 mins 5mins Auto Power O...

Страница 26: ...d not OFF it won t auto start recording when loop recording is OFF please also check you have not paused recording Press OK button to see the red ball in the top right of the screen please also check...

Отзывы: