


14
ATTACHING AND REMOVING THE FLASH TO AND FROM THE CAMERA
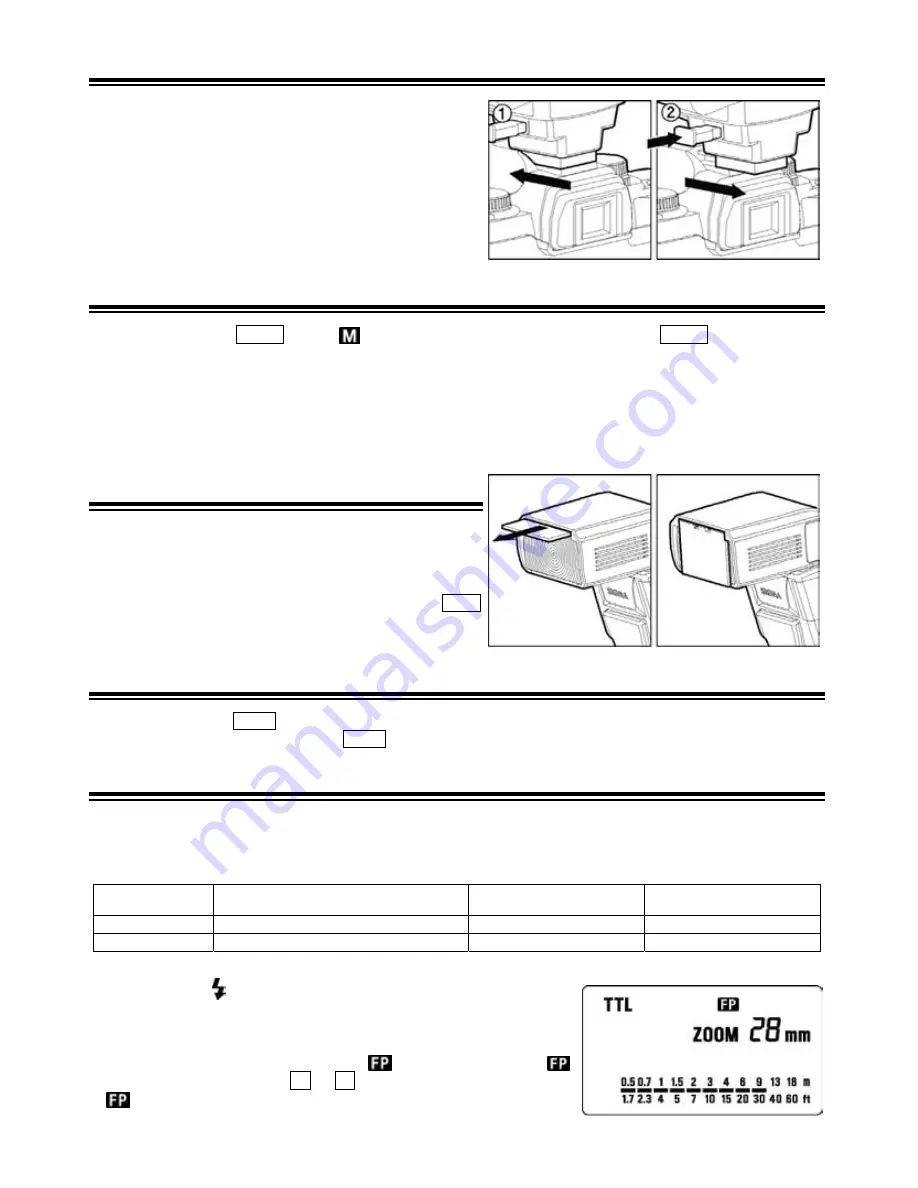
Be sure turn off the Power Switch. Then insert the Shoe Base
into the hot shoe of the camera until it clicks and locks.
①
◆
When you attach or remove the flash, grasp the
bottom of the flash to prevent damage to the shoe foot
and camera’s hot shoe.
◆
If the camera’s built-in flash is set in up position,
please close it before you attach the flash unit.
When you remove the flash, slide the flash unit out of the
camera’s hot shoe, while pressing the release button.
②
SETTING OF FLASH COVERAGE ANGLE
When you press the ZOOM button
symbol appears. Each time you press the ZOOM button, the LCD
panel display will change and indicate the zoom position in sequence, as follows.
24mm
→
28mm
→
35mm
→
50mm
→
70mm
→
85mm
→
105mm
→
(
Auto)
Generally, in the TTL mode, the flash will automatically set the zoom position according to the focal length of your lens.
◆
When you turn on the main switch, the flash will memorize and set the zoom head position to the last setting used.
◆
If you use a lens wider than the flash head setting, there may be under exposed areas around the edge of the picture.
◆
Depending on the flash head setting, the flash’s Guide Number will be changed.
WIDE PANEL
This flash is equipped with built in type wide panel, which can
provide ultra wide 17mm angle of coverage. Slide out the wide
panel and flip it down to cover flash’s head. Then the coverage
angle setting of the flash will be set to 17mm automatically.
◆
If the built-in wide panel comes off accidentally, the
ZOOM
button will not function. In this case please contact the store
where you have purchased the flash, or a service station.
LCD PANEL ILLUMINATION
When you press the
LIGHT
button, the LCD panel will illuminate for about 8 seconds. The illumination stays
on longer than 8sec, if you press the
LIGHT
button once again.
TTL AUTO FLASH
In the TTL AUTO Mode, the camera will control the amount of flash lighting, to get the appropriate exposure
for the subject.
◆
Depending on the camera model and lens combination, TTL Flash procedure varies. Please see the
below chart. (In all combinations, TTL will be displayed on the LCD)
D-SLR / Maxxum 70, 50, 7, 5, 4, 3
Dynax 7D, 60, 40, 7, 5, 4, 3L
Maxxum 9
Dynax 9
Other Camera Models
D type Lens
ADI metering
Pre-flash metering
Ordinary TTL metering
Non-D type lens
Pre-flash metering
Pre-flash metering
Ordinary TTL metering
◆
Depending on the Camera or Exposure mode, this equipment will choose fill flash or auto flash. When fill
flash is chosen
will blink on the LCD panel of flash.
4. Set the camera’s exposure mode to
P
Mode.
5. Turn on the power switch of the flash, the TTL mark will appear on
the LCD panel and the flash will start charging.
◆
With D-SLRs, please make sure that
indicator is on. If the
indicator is off, press the + or – button and make the indicate
indicator appear on the LCD panel, otherwise exposure will not
be correct.
Содержание EF-530
Страница 3: ...2 EF 530 DG SUPER SO ADI AF 1m AF 9000 7000 5000 3700i...
Страница 5: ...4 ON OFF ZOOM 24mm 28mm 35mm 50mm 70mm 85mm 105mm TTL ON 17mm 17mm ZOOM LIGHT 8 LIGHT 8...
Страница 10: ...9 SEL AF 7 Sweet B 2 MODE SEL SEL SEL MODE SEL SEL AF C 9 7 807si 707si 507si 9xi MODE...
Страница 77: ...76 AA Ni Cd Ni MH 30 Ni Cd Ni MH 1 OFF 2 AA 3 4 ON 5 3 TTL Er Er...
Страница 86: ...85 EF 530 DG SUPER SO ADI AF SLR 1m AF SLR...
Страница 98: ...97 Up and Down 1 2 ZOOM ZOOM 24mm 28mm 35mm 50mm 70mm 85mm 105mm Auto TTL 17 17 ZOOM LIGHT 8 8 LIGHT...