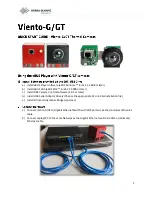
manualshive.com logo in svg
background image


10 


For all configuration files you must ensure that the Tamarisk is also set to the complementary imaging 
mode (8bit, 14bit, or SuperFrame).  This can be accomplished in the DRS Camera Control Software or 
with the SOTI GUI. 


Use 

Image seen in eBUS Player 

14 bit Mono Through  

Use when Pre-AGC raw 14-bit data is 
needed.


This can be used to create 

usable video when histogram scaling is 
applied. 

Live display will show low 
contrast greyscale video with 
no AGC applied, no symbology. 

8 bit Mono Shift 

Use when Post AGC numeric data is 
needed.  This can be used to create 
usable video when histogram scaling is 
applied.  (No pixel temperature data 
will be available on GT models) 

eBus Player live image should 
be good contrast greyscale 
video with AGC applied. 

SuperFrame Data_16 bit 

Viento-G cameras – Use when Pre-
AGC raw 14-bit data is needed.  This 
data is the same data as is provided by 
the 14-bit Mono Through mode. 
Viento-GT cameras – Use when 16-bit 
temperature calibrated data values for 
every pixel is needed 

Live display initially shows 
almost flat image, very little 
contrast, this will improve once 
the histogram scaling is auto-
configured. 

SuperFrame Color 
(YUV422 video) 

Use when YUV422 video that includes 
AGC, Image Overlays, and Color 
Palettes is needed.  No calibrated pixel 
temperature data will be available. 

Live display will show a high 
contrast image with AGC, color 
palette and image overlays 
applied. 
Viento GT cameras will also 
show temperature scale and 
region of interest with 
temperature. 


Содержание Viento-G

Страница 1: ...are 1 9 3 or later d Install USB Serial Adaptor Drivers Choose the appropriate 32 or 64 bit installation file e Install Eltima Virtual Serial Bridge vspd exe a Connect Viento G GT to Gigabit Ethernet Switch with POE ports via Cat5e minimum Ethernet cable b Connect Laptop PC to the same Network as the Gigabit Ethernet switch via Cat5e minimum Ethernet cable ...

Страница 2: ...exe b Under the Manage ports tab of the Serial ports explorer choose Add pair to create a virtual COM port pair bridge on the next two available ports note which ports these are for use later when you set up the Serial Communication Bridge inside of the eBUS player this guide section 5b c Once complete under the virtual ports section you should now see the two ports which are paired a b c ...

Страница 3: ...l order to ensure proper operation a Open eBUS player application from its installed location on the PC Laptop or from the start menu default Start Menu All Programs Pleora Technologies Inc eBUS SDK eBUS Player b Click on Select Connect a b ...

Страница 4: ...4 c Select the camera and hit ok c NOTE In some instances you will be required to set the camera IP address if it is not currently set up on your network ...

Страница 5: ...s Choose the appropriate Viento G 320 or 640 version to match the camera hardware See the Appendix on Pleora GigE Interface Configurations for more information on when to use other configuration files A dialogue box will show an alert that you are changing the settings of the Viento G GigE Encoder click Yes to continue opening the file e d ...

Страница 6: ...find the SignalRouting section PlcEquationApply will be blank i If PlcEquationStatus reads LUT now out of sync with PlcEquations PlcEquationApply required then Click on the PlcEquationApply section to reveal the PlcEquationApply button Click on this button the PlcEquationStatus should now read ok Close the Device Control window _X_ f h i g ...

Страница 7: ...7 j Click on the play button k The video should be high contrast with Automatic Gain Control AGC applied j ...

Страница 8: ...ial Device appeared on when configuring the Virtual Serial Bridge during setup step 3b of this manual This will be the port that the eBUS Player communicates out from The other COM port noted in step 3b is the COM port that should be used by an external application such as the DRS Camera Control Software to communicate back to the eBUS Player c If not already set to 57600 baud click the configure ...

Страница 9: ...n menu DRS Tamarisk 320 or DRS Tamarisk 640 depending on whether your Viento G is 320 or 640 d Keep Communication Type as RS232 Serial Change the COM port to the other Virtual Serial port that you created during step 3b of this manual Change the baud rate to 57600 and change the Comm Port e Click on Add Device f The Camera Control Software may take up to 30 seconds to retrieve the camera settings ...

Страница 10: ...ailable on GT models eBus Player live image should be good contrast greyscale video with AGC applied SuperFrame Data_16 bit Viento G cameras Use when Pre AGC raw 14 bit data is needed This data is the same data as is provided by the 14 bit Mono Through mode Viento GT cameras Use when 16 bit temperature calibrated data values for every pixel is needed Live display initially shows almost flat image ...

Отзывы: