background image


Mounting 


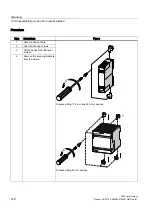
8.9 Removing 22.5 mm/17.5 mm devices with device connectors from a standard mounting rail 

3SK1 safety relays 
Manual, 04/2013, A5E02526190021A/RS-AA/01 

137


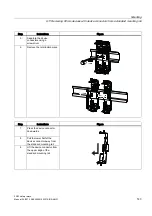
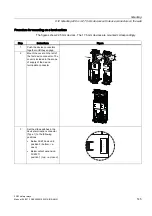
Step 

Instructions 

Figure 

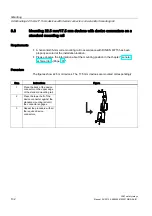
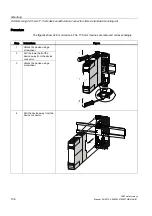
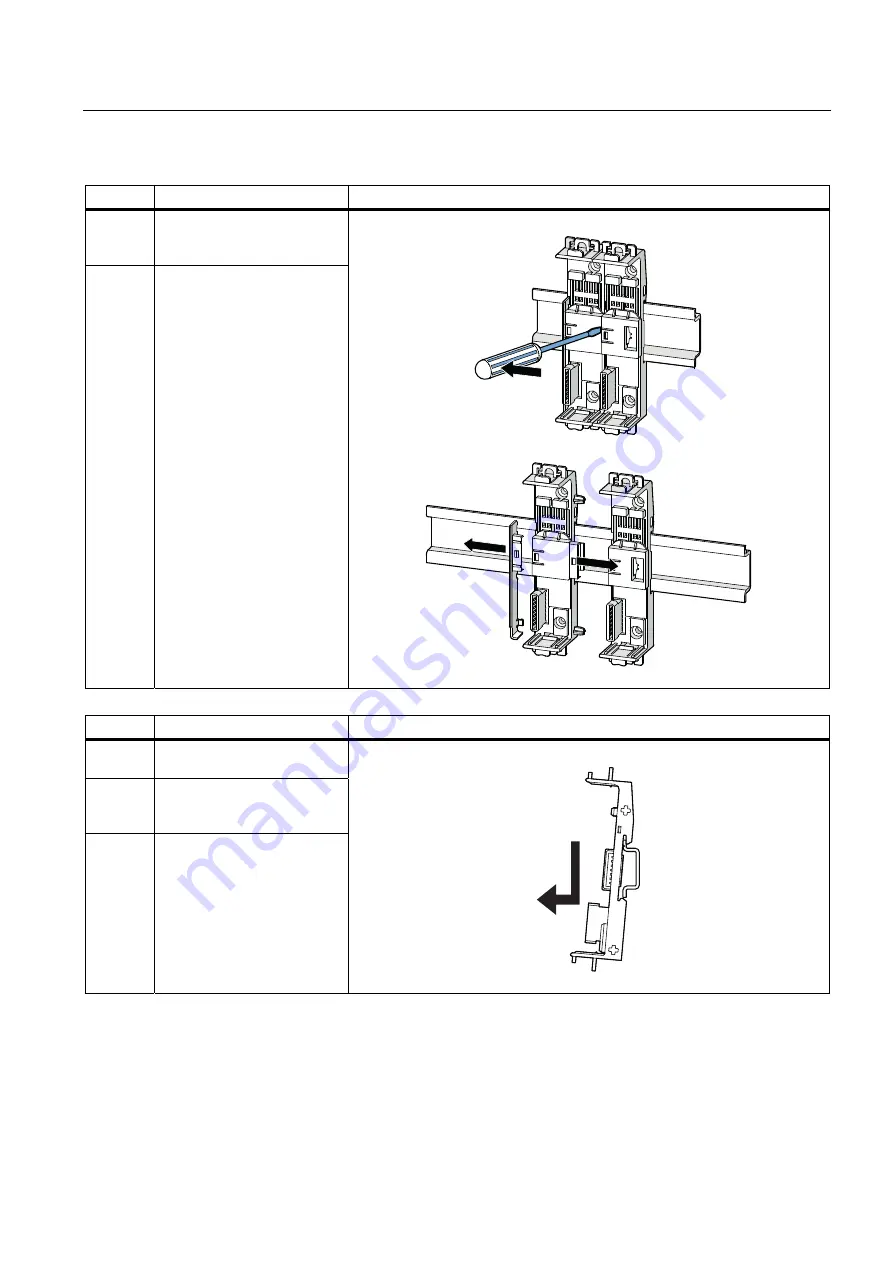
Separate the device 

connectors using a 

screwdriver 

Remove the cover 


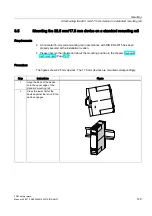
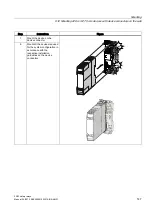
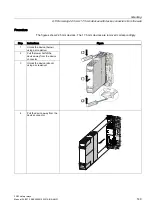
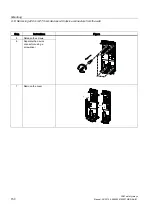
Step 

Instructions 

Figure 

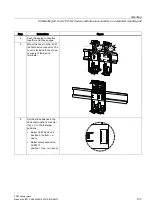
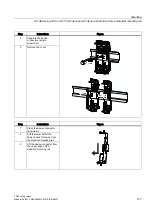
Press the device connector 

downwards 

Pull the lower half of the 

device connector away from 

the standard mounting rail 

Lift the device connector from 

the upper edge of the 

standard mounting rail 


Содержание SIRIUS 3SK1

Страница 1: ...Manual Industrial Controls Safety Engineering SIRIUS 3SK1 Safety Relays 04 2013 Edition Answers for industry ...

Страница 2: ......

Страница 3: ..._____________ ___________________ ___________________ Industrial Controls Safety engineering 3SK1 safety relays Manual 04 2013 A5E02526190021A RS AA 01 Introduction 1 Product specific safety information 2 Product overview for 3SK1 3 Safety systems General information 4 3SK1 devices 5 System configuration 6 Circuit diagrams 7 Mounting 8 Connection 9 Configuration operation 10 Commissioning 11 Displ...

Страница 4: ... operated only by personnel qualified for the specific task in accordance with the relevant documentation in particular its warning notices and safety instructions Qualified personnel are those who based on their training and experience are capable of identifying risks and avoiding potential hazards when working with these products systems Proper use of Siemens products Note the following WARNING ...

Страница 5: ...laration of conformity 18 3 Product overview for 3SK1 19 3 1 Overview 19 3 2 Overview of components and accessory parts 22 3 3 Functional scope of the 3SK1 basic units 23 3 4 Introduction 24 3 5 3SK1 system 25 3 5 1 Standard 25 3 5 1 1 Typical system configuration 25 3 5 2 Advanced 26 3 5 2 1 Typical system configuration 26 4 Safety systems General information 29 4 1 What is safety 29 4 2 Safety f...

Страница 6: ...Function description 50 5 1 4 3 Design 51 5 1 4 4 Terminal assignment 52 5 1 4 5 Inputs 52 5 1 4 6 Outputs 53 5 1 4 7 Display of the operating state 53 5 1 4 8 Function setting 54 5 2 3SK1 Advanced 56 5 2 1 General information 56 5 2 2 Applications 56 5 2 3 General device features 57 5 2 4 Function description 57 5 2 5 Functions 58 5 2 6 3SK1121 Advanced basic unit instantaneous with relay outputs...

Страница 7: ...nput expansion 3SK1220 87 5 4 1 1 Device features 87 5 4 1 2 Applications 87 5 4 1 3 Design 88 5 4 1 4 Terminal assignment 88 5 4 1 5 Display of the operating state 89 5 4 1 6 Function setting 89 5 4 2 Power supply 3SK1230 91 5 4 2 1 Device features 91 5 4 2 2 Applications 91 5 4 2 3 Design 92 5 4 2 4 Terminal assignment 93 5 4 2 5 Display of the operating state 93 6 System configuration 95 6 1 Ge...

Страница 8: ...ting rail 141 8 12 Mounting 22 5 mm 17 5 mm devices with device connectors on the wall 144 8 13 Removing 22 5 mm 17 5 mm devices with device connectors from the wall 148 8 14 Mounting 90 mm devices with device connectors on the wall 151 8 15 Removing 90 mm devices with device connectors from wall 155 8 16 Mounting the sealable cover 158 9 Connection 159 9 1 22 5 mm 17 5 mm devices 159 9 1 1 Termin...

Страница 9: ...Technical data for 3SK1121 Advanced relay instantaneous basic unit 210 13 2 2 3 Technical data for 3SK1121 Advanced relay time delayed basic unit 214 13 2 2 4 Technical data for 3SK1122 Advanced solid state instantaneous basic unit 219 13 2 2 5 Technical data for 3SK1122 Advanced solid state time delayed basic unit 223 13 3 Expansion modules 228 13 3 1 Output expansions 228 13 3 1 1 Technical data...

Страница 10: ...Table of contents 3SK1 safety relays 10 Manual 04 2013 A5E02526190021A RS AA 01 ...

Страница 11: ...machine that has not been designed by Siemens Nor can Siemens assume liability for recommendations that appear or are implied in the following description No new guarantee warranty or liability claims beyond the scope of the Siemens general terms of supply are to be derived or inferred from the following description 1 2 Required basic knowledge A general knowledge of the following areas is needed ...

Страница 12: ...ation content is displayed without spaces This machine readable information simplifies and accelerates handling of the respective devices As well as fast access to the serial numbers of the respective devices for unique identification the DataMatrix codes simplify communication with Siemens Technical Support The DataMatrix codes enable in particular extremely fast and convenient access to all the ...

Страница 13: ...01 13 1 6 Correction sheet The appendix to this manual contains a correction sheet for evaluation and feedback Please use it to record your suggestions for improvements additions and corrections and return the sheet to us This will help us to improve the next edition of the manual Thank you ...

Страница 14: ...Introduction 1 6 Correction sheet 3SK1 safety relays 14 Manual 04 2013 A5E02526190021A RS AA 01 ...

Страница 15: ...te Safe state The basis of the safety function is the definition of the safe state In the case of safety relays this is the OFF state i e an open contact for sensors or shutdown of the actuators WARNING Protection against electrically conductive contamination The devices must be protected against conductive contamination while taking account of the ambient conditions One way you can do this is to ...

Страница 16: ...upply unit in this regard Note Operational faults and malfunctions in communication If the EMC Directive 2004 108 EC is not complied with when plants and devices are installed communication breaks may occur Note Cover the 3ZY12 device connector on the left hand side using the cover supplied with the device termination connector WARNING 3SK1 1 and 3SK1 3 devices with outputs using contacts In conti...

Страница 17: ...tage Can Cause Death Serious Injury or Property Damage Proper use of hardware products This equipment is only allowed to be used for the applications described in the catalog and in the technical description and only in conjunction with non Siemens equipment and components recommended by Siemens Correct transport storage installation and assembly as well as careful operation and maintenance are re...

Страница 18: ...tter containing information on product developments and features that are or could be relevant to operation of safety related systems By subscribing to the appropriate newsletter you will ensure that you are always up to date and able to make changes to your system when necessary SIEMENS newsletter Sign on to the following newsletter under Products Solutions Control Components and System Engineeri...

Страница 19: ...tputs 24 V DC 3SK1112 xBB40 x 1 screw terminals x 2 push in terminals 3SK1 Advanced basic units Designation Voltages MLFB Basic unit 3SK1 Advanced instantaneous with relay outputs 24 V DC 3SK1121 xAB40 Basic unit 3SK1 Advanced time delayed with relay outputs 24 V DC 3SK1121 xCB4y Basic unit 3SK1 Advanced instantaneous with solid state outputs 24 V DC 3SK1122 xAB40 Basic unit 3SK1 Advanced time del...

Страница 20: ...xAL20 Input expansion 3SK1220 24 V DC 3SK1220 xAB40 Power supply 3SK1230 110 240 V AC DC 3SK1230 xAW20 x 1 screw terminals x 2 push in terminals Overview of the enabling circuits Type and number of enabling circuits Relay Solid state Advanced Instantaneous Delayed Instantaneous Delayed Signaling circuits Device connectors 3SK1121 xAB40 3 1 3SK1121 xCB4x 2 2 3SK1122 xAB40 3 1 3SK1122 xCB4x 2 2 3SK1...

Страница 21: ...figuration the SIRIUS 3SK1 safety relay configurator is at your disposal on the Internet www siemens com industrial controls configurators You can select and order the correct safety relays here and generate the complete product documentation Product data sheet Dimension drawings CAD data in 2 D and 3 D model images Ordering data Product photo ...

Страница 22: ...fety relay basic unit expansion unit Top cover flap Bottom cover flap Terminals 3 pole push in 1 x 2 5 mm Terminals 3 pole screw type 1 x 2 5 mm Terminals 2 pole push in 1 x 2 5 mm Terminals 2 pole screw type 1 x 2 5 mm Coding pins Push in lugs for wall mounting Cover Device connector type 1 17 5 mm Device connector type 1 22 5 mm Device termination connector type 1 22 5 mm Sealable cover ...

Страница 23: ...r can be increased Not possible Cascading only Parameters Type of start autostart monitored start Sensor connection 2x single channel 1x two channel Using wiring Cross circuit detection OFF ON Using wiring Start up test OFF ON No start up test Monitoring of two hand control units No No Enabling circuits Instantaneous Time delayed None None Expandable with relay enabling circuits Using wiring Using...

Страница 24: ...eck and monitor the sensors actuators and the safety related functions of the safety relay Applications Depending on the version of the device and the external connection of sensors and actuators applications up to SIL CL 3 in accordance with IEC 62061 SIL 3 in accordance with IEC 61508 and PL e Cat 4 in accordance with ISO 13849 1 can be implemented Monitoring the switch position of the sensors M...

Страница 25: ...y instantaneous see also 3SK1111 Standard basic unit instantaneous with relay outputs Page 44 Basic unit 3SK1112 Standard solid state instantaneous see also 3SK1112 Standard basic unit instantaneous with solid state outputs Page 50 Output expansions Output expansion 3SK1211 see also Output expansion 3SK1211 Page 80 Output expansion 3SK1213 see also Output expansion 3SK1213 Page 84 The devices are ...

Страница 26: ...us see also 3SK1122 Advanced basic unit instantaneous with solid state outputs Page 67 Basic unit 3SK1122 Advanced solid state time delayed see also 3SK1122 Advanced basic unit time delayed with solid state outputs Page 71 Basic unit 3SK1120 Advanced 17 5 mm solid state instantaneous see also 3SK1120 Advanced basic unit instantaneous with solid state outputs Page 75 Input expansions Power supply 3...

Страница 27: ...K1 system 3SK1 safety relays Manual 04 2013 A5E02526190021A RS AA 01 27 Typical 3SK1 Advanced system configuration Power supply 3SK1230 Input expansion 3SK1220 Basic unit 3SK1 Advanced Output expansion 3SK1211 Output expansion 3SK1213 ...

Страница 28: ...Product overview for 3SK1 3 5 3SK1 system 3SK1 safety relays 28 Manual 04 2013 A5E02526190021A RS AA 01 ...

Страница 29: ...re Safety of machines and plants which is available here as a download Functional safety http wwwsiemens com safety 4 2 Safety function A safety function describes the reaction of a machine plant to the occurrence of a specific event e g opening of a protective door Execution of the safety function s is carried out by a safety related control system This usually comprises three subsystems detectin...

Страница 30: ...ormation 4 2 Safety function 3SK1 safety relays 30 Manual 04 2013 A5E02526190021A RS AA 01 Reacting actuators Switching off the hazard by means of downstream actuators Detecting sensors Evaluating safety relay Reacting actuators ...

Страница 31: ...L 3 in accordance with IEC 61508 and PL e Cat 4 in accordance with ISO 13849 1 also necessary for SIL 2 PL d under certain circumstances The simplest form of redundancy is two channel redundancy If a circuit fails two channel redundancy ensures that the safety function is maintained In a redundant system configuration the subsystems for detecting and reacting must also be implemented with two chan...

Страница 32: ...cuits by means of signals with different clock pulses If the clocked signals overlap the device detects a cross circuit With 3SK1 basic units cross circuit detection can be deactivated to allow electronic sensors to be evaluated that monitor themselves as well as the cable to the evaluation unit 4 3 3 Enabling circuit An enabling circuit provides a safety related output signal From an external vie...

Страница 33: ...g circuits can only be activated with the feedback circuit closed Note When 3SK1 expansion units are used on 3ZY1 device connectors with 3SK1 Advanced basic units it is not necessary to incorporate the expansion modules in the feedback circuit wiring This is implemented internally via the device connector 4 3 6 Stop categories Stop category 0 Non controlled shutdown by immediately switching off th...

Страница 34: ...down mats can use the automatic start function if this does not pose any risk Note An automatic start is not permitted for EMERGENCY STOP devices 4 3 8 Manual start For a manual start the device is started by operating the START button but only after the input image has been checked and a positive test of the safety relay has been conducted On a manual start the START button is not monitored for c...

Страница 35: ... the START button cannot be bypassed misuse For PL e ISO 13849 1 as well as SIL 3 IEC 62061 the monitored start must be used in the case of EMERGENCY STOP For other safety sensors functions the necessity for a monitored start command depends on the risk assesment If the START button is operated for more than 2 seconds the 3SK1 basic unit detects a wiring short circuit in the START button and switc...

Страница 36: ...O NC evaluation Dip switches 1 Autostart Dip switches 3 2 x single channel Note The 3SK1 Advanced safety relays support exclusively two hand control units with two NO contacts 4 3 11 Cascading Cascading of safety relays is used for tripping safety relays in series Several safety functions can then be logically connected to a shared shutdown path Several enabling circuits can be created for selecti...

Страница 37: ...ing The plant operator decides whether startup testing should be performed risk assessment No general statements apply Note In the delivery state of 3SK1 safety relays startup testing is deactivated 4 3 13 Connection of actuators Note To achieve the Performance Level Safety Integrity Level given in the following examples the actuators shown must be monitored in the feedback circuit of the correspo...

Страница 38: ...iring up to PL e Cat 4 in accordance with ISO 13849 1 or SILCL 3 in accordance with IEC 62061 13 23 14 24 Q1 Q2 4 4 0 Figure 4 6 PL e Cat 4 in accordance with ISO 13849 1 or SILCL 3 in accordance with IEC 62061 WARNING PL e Cat 4 in accordance with ISO 13849 1 or SILCL 3 in accordance with IEC 62061 can only be achieved with 3SK1111 and 3SK1121 and cross circuit proof short circuit to P proof layi...

Страница 39: ...n accordance with IEC 62061 with the wiring shown above Actuator wiring up to PL e Cat 4 in accordance with ISO 13849 1 or SILCL 3 in accordance with IEC 62061 13 23 14 24 Q1 Q2 Q2 4 4 0 A1 Qx Qy Q1 Figure 4 7 PL e Cat 4 in accordance with ISO 13849 1 or SILCL 3 in accordance with IEC 62061 WARNING For 3SK1 2 devices with solid state outputs In continuous operation the key safety values apply in t...

Страница 40: ...TOP command devices It is possible to connect EMERGENCY STOP command elements in series up to the highest safety level SILCL 3 in accordance with IEC 62061 SIL 3 in accordance with IEC 61508 and PL e Cat 4 in accordance with ISO 13849 1 because it is assumed that only one EMERGENCY STOP is operated at a time This ensures that errors and defects can be detected 6 0 5 1 6723 Q 0 5 1 6723 ...

Страница 41: ...at several protective doors are not regularly opened simultaneously otherwise a fault cannot be detected For safety level SILCL3 in accordance with IEC 62061 SIL3 in accordance with IEC 61508 and PL e Cat 4 in accordance with ISO 13849 1 however they must never be connected in series because every hazardous error must be detected independently of the operating personnel 6 6 6 6 6 3URWHFWLYH GRRU 3...

Страница 42: ...Safety systems General information 4 3 Basic terminology 3SK1 safety relays 42 Manual 04 2013 A5E02526190021A RS AA 01 ...

Страница 43: ...e 5 1 2 Applications The safety relay can be used in EMERGENCY OFF EMERGENCY STOP devices in accordance with ISO 13850 and in safety circuits in accordance with VDE 0113 1 and or DIN EN 60204 1 Depending on the external circuit it is possible to achieve SILCL 3 in accordance with IEC 62061 SIL 3 in accordance with IEC 61508 and PL e Cat 4 in accordance with ISO 13849 1 Application examples EMERGEN...

Страница 44: ...ing the operating states Slide switch for function setting Single channel or two channel connection Cross circuit detection between sensor channels 1 and 2 Enclosure width 22 5 mm Removable terminals 5 1 3 2 Function description The device is a two channel safety relay for EMERGENCY OFF and EMERGENCY STOP equipment in accordance with EN 60204 1 The 3SK1111 Standard basic unit is equipped with a po...

Страница 45: ... relays Manual 04 2013 A5E02526190021A RS AA 01 45 5 1 3 3 Design Top cover flap Top cover flap internal inscription Display LEDs Slide switch Bottom cover flap Bottom cover flap internal inscription DataMatrix code Device identification label ...

Страница 46: ...erated in two channel mode with cross circuit detection Single channel activation is only possible via the supply voltage connection A1 In this case circuits T1 IN1 T2 IN2 and T3 IN3 24 V devices only must be jumpered Sensor input INF S is used to monitor a START button and or external feedback circuits When a START button is implemented and external feedback circuits are monitored the floating co...

Страница 47: ...ircuit relays NC contacts 41 42 5 1 3 7 Display of the operating state Display of the operating state Two LEDs and a slide switch indicate the operating state and functioning of the device DEVICE OUT LED displays LED Operation DEVICE OUT Line supply Sensor START button Enabling circuit Green Green Not pressed Pressed Closed Green OFF Pressed Not pressed Open Green OFF ON Not pressed Not pressed Op...

Страница 48: ...rams 3SK1111 INF feedback Inputs IN1 IN2 sensor circuit Enabling circuit Signaling circuit Outputs 3SK1111 xAB30 autostart 200 ms 8 ms 90 ms 65 ms A1 A2 3SK1111 xAB30 monitored start IN1 IN2 sensor circuit Inputs INF S feedbck Enabling circuit Signaling circuit Outputs 8 ms 150 ms 15 ms 65 ms A1 A2 20 ms ...

Страница 49: ... 49 3SK1111 xAW20 autostart A1 A2 IN1 IN2 sensor circuit Enabling circuit Signaling circuit Inputs Outputs INF feedbck 110 ms 8 ms 200 ms 320 ms Inputs INF feedbck IN1 IN2 sensor circuit Enabling circuit Signaling circuit Outputs 3SK1111 xAW20 monitored start 15 ms 8 ms 150 ms 200 ms A1 A2 ...

Страница 50: ...minals WARNING In continuous operation for PL e Cat 4 in accordance with ISO 13849 1 or SILCL 3 in accordance with IEC 62061 the key safety values apply in the case of a function test interval state change of the outputs 1 year 5 1 4 2 Function description The 3SK1112 safety relay has two safety related solid state safe outputs and one non safety related signaling circuit On the front of the devic...

Страница 51: ... Manual 04 2013 A5E02526190021A RS AA 01 51 5 1 4 3 Design Top cover flap Top cover flap internal inscription Display LEDs DIP switch SET RESET button Bottom cover flap Bottom cover flap internal inscription DataMatrix code Device identification label ...

Страница 52: ...ading circuit cascading input normal switching duty The cascading circuit is AND connected with the sensor inputs IN1 and IN2 ON button circuit and cascading circuit are activated with a static 24 V DC signal With cross circuit detection activated the following inputs are checked for cross circuits IN1 T1 IN2 T2 The supply is taken in this case from test outputs T1 and T2 INF T2 is only checked fo...

Страница 53: ...ng circuit switching to P potential The safe outputs and the safety related signaling circuit are short circuit proof 5 1 4 7 Display of the operating state Display of the operating state Four LEDs and one DIP switch indicate the operating state and functioning of the device 1 DEVICE 2 OUT 3 IN 4 SF The four LEDs show the following Operating mode Diagnostics Configuration mode DIP setting For an e...

Страница 54: ...onnection Start up test ON 1 2 3 4 4 Start up test OFF In the delivery state all the DIP switches are in switch position right Table 5 2 SET RESET button Function of the SET RESET button Status of the indicating LEDs Function SET DEVICE LED flashing yellow Press key for about 1 s The parameterization is loaded DEVICE LED red DEVICE LED flashing green yellow RESET SF LED red Press key for about 1 s...

Страница 55: ...iagrams 3SK1112 INF Feedback IN1 IN2 Sensor circuit Enabling circuit Signaling output Inputs Outputs 3SK1112 xBB40 Autostart A1 A2 80 ms 30 ms 0 ms 3SK1112 xBB40 monitored start INF feedback IN1 IN2 Sensor circuit Enabling circuit Signaling output Inputs Outputs INS A1 A2 20 ms 30 ms 35 ms 150 ms 0 ms ...

Страница 56: ...ay series is on Single devices that can be flexibly parameterized Expandability using 3ZY12 device connector on both input and output side Basic units with time delayed enabling circuits outputs 5 2 2 Applications EMERGENCY OFF EMERGENCY STOP monitoring Monitoring of protective doors with electromechanical position switches solid state position switches or solenoid switches Monitoring of contact f...

Страница 57: ...ning the devices runs a self test in which the internal electronics and firmware are checked for correct functioning All internal parts of the circuit are cyclically monitored for faults during operation The semiconductor outputs run through a dark test for up to 2 ms dynamically to verify their correct function The safety relays can be expanded using 3ZY device connectors with input and output ex...

Страница 58: ...rt up test OFF In the delivery state all the DIP switches are in switch position right Terminal parameterization Jumper on terminals T1 PAR NO NC evaluation Table 5 4 SET RESET button Function of the SET RESET button Status of the indicating LEDs Function SET DEVICE LED flashing yellow Press key for about 1 s The parameterization is loaded DEVICE LED red DEVICE LED flashing green yellow RESET SF L...

Страница 59: ...ch position Parameterizing without cross circuit detection If without cross circuit detection is set on the device inputs IN1 and IN2 are not checked for cross circuits Inputs IN1 and IN2 then no longer have to be supplied from clock outputs T1 or T2 but can also be supplied from a 24 V DC signal for example from the same current source from which the device is supplied The clock outputs are never...

Страница 60: ...121 Advanced basic unit instantaneous with relay outputs 5 2 6 1 Device features MLFB 3SK1121 xAB40 24 V DC x 1 screw type terminal 2 push in terminal 5 2 6 2 Function description The 3SK1121 Advanced basic unit has three safety related relay enabling circuits and one non safety related signaling circuit ...

Страница 61: ... Manual 04 2013 A5E02526190021A RS AA 01 61 5 2 6 3 Design Top cover flap Top cover flap internal inscription Display LEDs DIP switch SET RESET button Bottom cover flap Bottom cover flap internal inscription DataMatrix code Device identification label ...

Страница 62: ... contact evaluation INS START pushbutton circuit INF Feedback circuit INK Cascading circuit T1 Test output 1 for IN1 PAR T2 Test output 2 for IN2 INF 13 14 23 24 33 34 Enabling circuits NO relay contact 41 42 Signaling circuits NC relay contact State diagram 3SK1121 INF feedback A1 A2 Enabling circuits Signaling circuit 3SK1121 xAB40 autostart Inputs Outputs IN1 IN2 sensor circuit or INK 85 ms 35 ...

Страница 63: ...eatures MLFB 3SK1121 xCB4y 24 V DC x 1 screw type terminal 2 push in terminal y time delay 1 0 05 3 s 2 0 5 30 s 4 5 300 s Additional alternative device characteristics 2 instantaneous enabling circuits safety related circuits NO contacts 2 time delayed enabling circuits safety related circuits NO contacts Potentiometer for setting the delay time Time function With OFF delay ...

Страница 64: ...E02526190021A RS AA 01 5 2 7 2 Design Top cover flap Top cover flap internal inscription Display LEDs Potentiometer for setting the delay time DIP switch SET RESET button Bottom cover flap Bottom cover flap internal inscription DataMatrix code Device identification label ...

Страница 65: ...2 PAR NO contact NC contact evaluation INS START pushbutton circuit INF Feedback circuit INK Cascading circuit T1 Test output 1 for IN1 PAR T2 Test output 2 for IN2 INF 13 14 Instantaneous enabling circuit 1 NO relay contact 23 24 Instantaneous enabling circuit 2 NO relay contact 37 38 Time delayed enabling circuit 1 NO relay contact 47 48 Time delayed enabling circuit 2 NO relay contact ...

Страница 66: ...B4y INF Feedback A1 A2 Enabling circuits Enabling circuits tv 3SK1121 xCB4y autostart Inputs Outputs IN1 IN2 sensor circuit or INK 85 ms 35 ms 35 ms tv INF feedbck INS A1 A2 Enabling circuit Enabling circuits tv 3SK1121 xCB4y monitored start Inputs Outputs IN1 IN2 sensor circuit or INK 150 ms 35 ms tv 35 ms 35 ms 35 ms ...

Страница 67: ...3SK1122 xAB40 24 V DC x 1 screw type terminal 2 push in terminal Additional or alternative device features 3 safety related solid state outputs 1 solid state signaling circuit WARNING In continuous operation for PL e Cat 4 in accordance with ISO 13849 1 or SILCL 3 in accordance with IEC 62061 the key safety values apply in the case of a function test interval state change of the outputs 1 year ...

Страница 68: ... 68 Manual 04 2013 A5E02526190021A RS AA 01 5 2 8 2 Design Top cover flap Top cover flap internal inscription Display LEDs DIP switch SET RESET button Bottom cover flap Bottom cover flap internal inscription DataMatrix code Device identification label ...

Страница 69: ...uation INS START pushbutton circuit INF Feedback circuit INK Cascading circuit T1 Test output 1 for IN1 PAR T2 Test output 2 for IN2 INF Q1 Safety related output 1 switching to P potential 24 V DC solid state Q2 Safety related output 2 switching to P potential 24 V DC solid state Q3 Safety related output 3 switching to P potential 24 V DC solid state QM1 Signaling circuit 1 switching to P potentia...

Страница 70: ...1122 xAB40 INF feedback A1 A2 Enabling circuits Signaling output 3SK1122 xAB40 Autostart Inputs Outputs IN1 IN2 sensor circuit or INC 30 ms 0 ms 80 ms INF feedback INS A1 A2 Enabling circuits Signaling output 3SK1122 xAB40 monitored start Inputs Outputs IN1 IN2 sensor circuit or INC 150 ms 0 ms 20 ms 30 ms 35 ms ...

Страница 71: ... delay 1 0 05 3 s 2 0 5 30 s 4 5 300 s Additional alternative device characteristics 2 instantaneous solid state outputs 2 time delayed solid state outputs Potentiometer for setting the delay time Time function With OFF delay WARNING Continuous operation In continuous operation for PL e Cat 4 in accordance with ISO 13849 1 or SILCL 3 in accordance with IEC 62061 the key safety values apply in the ...

Страница 72: ...E02526190021A RS AA 01 5 2 9 2 Design Top cover flap Top cover flap internal inscription Display LEDs Potentiometer for setting the delay time DIP switch SET RESET button Bottom cover flap Bottom cover flap internal inscription DataMatrix code Device identification label ...

Страница 73: ...Feedback circuit INK Cascading circuit normal switching duty T1 Test output 1 for IN1 PAR T2 Test output 2 for IN2 INF Q1 Instantaneous safety related output 1 switching to P potential 24 V DC solid state Q2 Instantaneous safety related output 2 switching to P potential 24 V DC solid state Qt1 Time delayed safety related output 1 switching to P potential 24 V DC solid state Qt2 Time delayed safety...

Страница 74: ...4y INF feedback A1 A2 Enabling circuits Enabling circuits tv 3SK1122 xCB4y autostart Inputs Outputs IN1 IN2 sensor circuit or INK 150 ms 0 ms tv 80 ms INF feedback INS A1 A2 Enabling circuits Enabling circuits tv 3SK1122 xCB4y monitored start Inputs Outputs IN1 IN2 sensor circuit or INK 150 ms 0 ms tv 80 ms 30 ms 35 ms ...

Страница 75: ...ors WARNING Operation without using device connectors In operation without using device connectors up to PL c Cat 2 in accordance with ISO 13849 1 or SILCL 2 in accordance with IEC 62061 can be achieved Operation using device connectors Note In operation using device connectors and using at least one output expansion 3SK1211 3SK1213 up to PL e Cat 4 in accordance with ISO 13849 1 or SILCL 3 in acc...

Страница 76: ...76 Manual 04 2013 A5E02526190021A RS AA 01 5 2 10 2 Design Top cover flap Top cover flap internal inscription Display LEDs DIP switch SET RESET button Bottom cover flap Bottom cover flap internal inscription DataMatrix code Device identification label ...

Страница 77: ...ignment Terminal Explanation A1 A2 IN1 Sensor channel 1 IN2 Sensor channel 2 PAR NO contact NC contact evaluation INS START pushbutton circuit INF Feedback circuit INK Cascading circuit T1 Test output 1 for IN1 PAR T2 Test output 2 for IN2 INF Q1 Safety related output 1 switching to P potential 24 V DC solid state ...

Страница 78: ...ol of the basic unit using the slide switch of the output expansion see also the chapter System configuration rules Page 100 Note Using the output expansions with conventional wiring The slide switch has no function here If you require outputs of Stop category 1 with the output expansion terminals A1 A2 of the output expansion must be connected to outputs 38 or 48 and on the 3SK1 basic units they ...

Страница 79: ...CE Control supply voltage Enabling circuits OFF OFF Open Green ON Closed 5 3 4 Function setting Setting the activation slide switch only for 24 V variants The interface input for activating the output expansion can be selected using a slide switch on the front of the device Slide switch Interface input Top Outputs switch with time delay as in basic unit Bottom Outputs switch instantaneously When u...

Страница 80: ...4 V AC Activation via 24 V transformer is possible 24 V DC An SELV PELV power supply must be used for the infeed 110 240 V AC DC Direct line supply connection L N Device properties Slide switch for selecting the activation type time delayed instantaneous 1 LED for status display 4 enabling circuits safe circuits NO contacts 1 NC circuit as feedback contact for output expansion 3SK1211 to the up ci...

Страница 81: ...fety relays Manual 04 2013 A5E02526190021A RS AA 01 81 5 3 5 2 Design of 3SK1211 B 0 Top cover flap Top cover flap internal inscription Display LEDs Bottom cover flap Bottom cover flap internal inscription DataMatrix code Device identification label ...

Страница 82: ...lays 82 Manual 04 2013 A5E02526190021A RS AA 01 5 3 5 3 Design of 3SK1211 BB40 Top cover flap Top cover flap internal inscription Display LEDs Slide switch Bottom cover flap Bottom cover flap internal inscription DataMatrix code Device identification label ...

Страница 83: ... 4 Terminal assignment Terminal Explanation A1 L for 3SK1211 BW20 A2 N for 3SK1211 BW20 13 14 Enabling circuit 1 NO relay contact 23 24 Enabling circuit 2 NO relay contact 33 34 Enabling circuit 3 NO relay contact 43 44 Enabling circuit 4 NO relay contact 51 52 NC circuit as feedback contact NC relay contact ...

Страница 84: ... connection L N Device properties Slide switch for selecting the activation type time delayed instantaneous 1 LED for status display 3 enabling circuits safe circuits NO contacts 1 NC circuit as feedback contact for output expansion 3SK1213 for the up circuit basic unit 3ZY device connectors Enclosure width 90 mm Removable terminals For 24 V DC variant only When using 3ZY device connectors The out...

Страница 85: ... 3SK1 safety relays Manual 04 2013 A5E02526190021A RS AA 01 85 5 3 6 2 Design of 3SK1213 AB40 Top cover flap Display LEDs Slide switch DataMatrix code Bottom cover flap Device identification label Screw type terminals Spring loaded terminals ...

Страница 86: ...splay LEDs DataMatrix code Bottom cover flap Device identification label Screw type terminals Spring loaded terminals 5 3 6 4 Terminal assignment Terminal Description A1 A2 13 14 Enabling circuit 1 NO relay contact 23 24 Enabling circuit 2 NO relay contact 33 34 Enabling circuit 3 NO relay contact 41 42 NC circuit as feedback contact NC relay contact ...

Страница 87: ...ET button 4 LEDs for status and function display 1 input ON button circuit 2 test outputs Enclosure width 17 5 mm Removable terminals Mounting exclusively on 3ZY12 device connectors 5 4 1 2 Applications The number of sensor inputs for a basic unit can be expanded using input expansions Input expansions must always be mounted to the left of a basic unit The input expansion 3SK1220 is certified to S...

Страница 88: ...scription Display LEDs DIP switch SET RESET button Bottom cover flap Bottom cover flap internal inscription DataMatrix code Device identification label 5 4 1 4 Terminal assignment Terminal Explanation IN1 Sensor channel 1 IN2 Sensor channel 2 PAR NO contact NC contact evaluation INS ON button circuit T1 Test output 1 for IN1 PAR T2 Test output 2 for IN2 INF ...

Страница 89: ... 1 5 Display of the operating state Display of the operating state You can find additional information on this under Advanced in the Chapter Function description Page 57 5 4 1 6 Function setting DIP switch settings You can find additional information on this under Advanced in the Chapter Functions Page 58 ...

Страница 90: ...04 2013 A5E02526190021A RS AA 01 State diagrams 3SK1220 Signal to Basic device 3SK1220 Autostart Inputs Outputs IN1 IN2 sensor circuit 30 ms 0 ms 80 ms INS Signal to Basic device 3SK1220 monitored start Inputs Outputs IN1 IN2 sensor circuit 30 ms 0 ms 20 ms 150 ms 35 ms ...

Страница 91: ...SK1230 0 6 A the use of 3SK1 basic units with solid state outputs is only possible to a limited extent The output current of all semiconductor outputs can be up to 0 4 A here depending on the system configuration 5 4 2 2 Applications The power supply 3SK1230 generates a stabilized output voltage of 24 V DC from 110 240 V AC DC The 3SK1230 power supply can supply the 3SK1 Advanced device series wit...

Страница 92: ...3SK1 safety relays 92 Manual 04 2013 A5E02526190021A RS AA 01 5 4 2 3 Design Top cover flap Top cover flap internal inscription Display LEDs Bottom cover flap Bottom cover flap internal inscription DataMatrix code Device identification label ...

Страница 93: ...assignment Terminal Explanation A1 L A2 N 24 V DC 24 V DC Mass Mass 5 4 2 5 Display of the operating state Display of the operating state The operating state and functioning of the device are indicated by an LED 1 DEVICE Operating states LED State Meaning DEVICE Green Output voltage OK Flashing Overload OFF No voltage ...

Страница 94: ...3SK1 devices 5 4 3SK1 input expansions 3SK1 safety relays 94 Manual 04 2013 A5E02526190021A RS AA 01 ...

Страница 95: ...tion on the Advanced system Expandable using 3ZY12 device connector on both input and output side The output expansions are activated and the feedback circuit is evaluated via the connection interface When using the Advanced device series with output expansion on the device connector described all enabling and signaling circuits of the basic unit and output expansion can be used as required The in...

Страница 96: ...cting the operating voltage Power OFF ON is a mandatory requirement Maximum system configuration when supplying with 24 V DC on the basic unit WARNING Only one 3SK1 basic unit is permitted per system The safety function is not guaranteed when more than one basic unit is used Connection of 24 V DC to the basic unit up to 5 expansions are permitted to the left of the basic unit and 5 expansions are ...

Страница 97: ... power supply Individual devices occupy a different number of system units Note With this configuration too up to 5 expansions are permitted to the left of the basic unit and 5 expansions are permitted on the right Device System unit Input expansion 3SK1220 1 Power supply 3SK1230 0 Basic units 3SK1 0 Output expansion 3SK1211 2 Output expansion 3SK1213 2 Example 1x 3SK1230 power supply 5 x 3SK1220 ...

Страница 98: ...ype 1 22 5 mm 3ZY1212 2DA00 Device termination connector type 1 22 5 mm 3ZY1212 2EA00 Device connector type 2 22 5 mm 3ZY1212 2FA00 Device termination connector type 2 22 5 mm 3ZY1212 0FA01 Device termination connector type 2 set for enclosures 45 mm Use of device connectors A device connector is always required when a basic unit is expanded using input or output expansions A device termination co...

Страница 99: ...y 3SK1230 x Devices Device connector type 2 22 5 mm 3ZY1212 2EA00 Device termination connector type 2 22 5 mm 3ZY1212 2FA00 Device termination connector type 2 set for enclosures 45 mm 3ZY1212 0FA01 Basic units 3SK1 Advanced 3SK1121 3SK1122 3SK1120 Output expansions 3SK1 3SK1211 4RO 3SK1213 3RO x Input expansions 3SK1 3SK1220 Power supply 3SK1230 Note If a basic unit is expanded on the right hand ...

Страница 100: ... with its sensor statuses Device termination connector type 1 Below basic unit the switch of the device termination connector must be open i e in position 2 at the bottom Below 3SK1211 output expansion the switch of the device termination connector must be closed i e in position 1 at top The 3ZY12 device connector used below the final device must be fitted with a cover on the left side supplied wi...

Страница 101: ...er configuration notes NOTICE Only one 3SK1 Advanced basic unit is permitted per system The safety function is not guaranteed when more than one basic unit is used NOTICE Supply voltage must only be fed in on the basic unit The supply voltage of 24 V DC must only be fed in on the basic unit otherwise the safety function is bypassed Power supply When device connectors are used only one 3SK1230 powe...

Страница 102: ...System configuration 6 3 System configuration rules 3SK1 safety relays 102 Manual 04 2013 A5E02526190021A RS AA 01 ...

Страница 103: ...526190021A RS AA 01 103 Circuit diagrams 7 7 1 Internal circuit diagrams 7 1 1 Internal circuit diagrams for 3SK1 Standard basic units Basic unit 3SK1111 AB30 Standard relay instantaneous 24 V XWRVWDUW 0RQLWRUHG 6WDUW RJLF 6 1 7 1 7 1 7 1 7 ...

Страница 104: ...A 01 Basic unit 3SK1111 AW20 Standard relay instantaneous 110 240 V XWRVWDUW 0RQLWRUHG 6WDUW RJLF 6 1 7 1 7 1 7 Basic unit 3SK1112 BB40 Standard solid state _ 6WDUWXS 7HVW HV QR _ VLQJOH FK VHQVRUV GRXEOH FK VHQVRU _ URVV IDXOW GHWHFWLRQ 2 21 _ XWRVWDUW 0RQLWRUHG 6WDUW 6 7 5 6 7 RJLF 40 4 4 16 1 1 7 1 7 1 ...

Страница 105: ...21 AB40 Advanced relay instantaneous _ 6WDUWXS 7HVW HV QR _ VLQJOH FK VHQVRUV GRXEOH FK VHQVRU _ URVV IDXOW GHWHFWLRQ 2 21 _ XWRVWDUW 0RQLWRUHG 6WDUW 6 7 5 6 7 RJLF 16 1 7 1 3 5 7 1 1 6 6 Basic unit 3SK1121 CB4 Advanced relay time delayed RJLF 6 6 6 7 5 6 7 _ XWRVWDUW 0RQLWRUHG 6WDUW _ URVV IDXOW GHWHFWLRQ 2 21 _ VLQJOH FK VHQVRUV GRXEOH FK VHQVRU _ 6WDUWXS 7HVW HV QR 1 1 7 3 5 1 7 1 16 ...

Страница 106: ...F 6 6 6 7 5 6 7 _ XWRVWDUW 0RQLWRUHG 6WDUW _ URVV IDXOW GHWHFWLRQ 2 21 _ VLQJOH FK VHQVRUV GRXEOH FK VHQVRU _ 6WDUWXS 7HVW HV QR 1 1 7 3 5 1 7 1 16 4 4 4 40 Basic unit 3SK1122 CB4 Advanced solid state time delayed RJLF _ XWRVWDUW 0RQLWRUHG 6WDUW _ URVV IDXOW GHWHFWLRQ 2 21 _ VLQJOH FK VHQVRUV GRXEOH FK VHQVRU _ 6WDUWXS 7HVW HV QR 6 6 6 7 5 6 7 1 1 7 3 5 1 7 1 16 4 4 4W 4W ...

Страница 107: ...s Manual 04 2013 A5E02526190021A RS AA 01 107 Basic unit 3SK1120 AB40 Advanced 17 5 mm solid state instantaneous RJLF 6 6 6 7 5 6 7 _ XWRVWDUW 0RQLWRUHG 6WDUW _ URVV IDXOW GHWHFWLRQ 2 21 _ VLQJOH FK VHQVRUV GRXEOH FK VHQVRU _ 6WDUWXS 7HVW HV QR 1 1 7 3 5 1 7 1 16 4 ...

Страница 108: ... circuit diagrams 3SK1 safety relays 108 Manual 04 2013 A5E02526190021A RS AA 01 7 1 3 Internal circuit diagrams for expansion units Output expansion 3SK1211 110 240 V RJLF Output expansion 3SK1211 24 V DC RJLF 6 6 8QGHOD HG HOD HG ...

Страница 109: ... Manual 04 2013 A5E02526190021A RS AA 01 109 Output expansion 3SK1213 6 6 RJLF 8QGHOD HG HOD HG Input expansion 3SK1220 RJLF 6 7 5 6 7 _ XWRVWDUW 0RQLWRUHG 6WDUW _ URVV IDXOW GHWHFWLRQ 2 21 _ VLQJOH FK VHQVRUV GRXEOH FK VHQVRU _ 6WDUWXS 7HVW HV QR 6 6 1 7 3 5 1 7 16 ...

Страница 110: ...Circuit diagrams 7 1 Internal circuit diagrams 3SK1 safety relays 110 Manual 04 2013 A5E02526190021A RS AA 01 Power supply 3SK1230 9 9 6 6 7 ...

Страница 111: ...with autostart 6 X Sensors with solid state outputs without cross circuit detection with autostart 7 DIP switch Typical circuit 1 2 3 4 Description Basic units 3SK1 Standard Advanced right right right 1 x two channel with cross circuit detection with monitored start 8 left right right 1 x two channel with cross circuit detection with autostart 9 right left right Electronic sensor without cross cir...

Страница 112: ...cal circuit 1 2 3 4 Description Basic units 3SK1 Advanced right right right 1NC 1NO sensor with cross circuit detection with monitored start 14 left right right 1NC 1NO sensor with cross circuit detection with autostart 15 left right right Two hand operation with cross circuit detection with autostart 16 Not relevant ...

Страница 113: ...RQLWRUHG 6WDUW XWR 0RQLWRUHG Typical circuits for basic unit 3SK1111 Standard relay Table 7 1 Typical circuit 1 Single channel with monitored start Monitored start 3SK1111 Standard relay Sensor 1 NC contact Slide switch Auto Monitored ON bottom Up to PL in accordance with ISO 13849 1 c XWR 0RQLWRUHG 6 1 1 1 7 7 1 7 7 4 4Q 4 0 4Q 0 For 3SK1111 AB30 basic unit only Up to Safety Integrity Level SILCL...

Страница 114: ...ttom Up to PL in accordance with ISO 13849 1 c XWR 0RQLWRUHG 6 1 1 1 7 7 1 7 7 4 4Q 4 0 4Q 0 Up to Safety Integrity Level SILCL to IEC 62061 1 Table 7 3 Typical circuit 3 single channel with autostart Autostart 3SK1111 Standard relay Sensor 1 NC contact Slide switch Auto Monitored ON top Up to PL in accordance with ISO 13849 1 c 6 1 1 1 7 7 1 7 7 XWR 0RQLWRUHG 4 4Q 4 0 4Q 0 For 3SK1111 AB30 basic ...

Страница 115: ... 1 1 7 7 1 7 7 XWR 0RQLWRUHG 4 4Q 4 0 4Q 0 Up to Safety Integrity Level SILCL to IEC 62061 1 Table 7 5 Typical circuit 5 EMERGENCY STOP two channel with cross circuit detection with monitored start Monitored start With cross circuit detection Sensor 2 NC contacts 3SK1111 Standard relay Slide switch Auto Monitored ON bottom Up to PL in accordance with ISO 13849 1 e 6 1 1 1 7 7 1 7 7 4 4Q XWR 0RQLWR...

Страница 116: ...annel with cross circuit detection with autostart Autostart With cross circuit detection Sensor 2 NC contacts 3SK1111 Standard relay Slide switch Auto Monitored ON top Up to PL in accordance with ISO 13849 1 e 6 1 1 1 7 7 1 7 7 4 4Q XWR 0RQLWRUHG 4 4Q 0 For 3SK1111 AB30 basic unit only Up to Safety Integrity Level SILCL to IEC 62061 3 ...

Страница 117: ...ntegrity Level SILCL to IEC 62061 3 Typical circuits for 3SK1 Standard solid state basic units or 3SK1 Advancedbasic units Table 7 8 Typical circuit 8 EMERGENCY STOP two channel with cross circuit detection with monitored start Monitored start With cross circuit detection 1 x two channel Sensor 2 NC contacts 3SK1112 Standard solid state and 3SK112 3SK122 Advanced DIP switch 1 2 3 4 ON right ON rig...

Страница 118: ...HFWLRQ 2 21 VLQJOH FK VHQVRUV GRXEOH FK VHQVRU 6WDUWXS 7HVW HV QR 6 7 5 6 7 4 4Q 0 Up to Safety Integrity Level SILCL to IEC 62061 3 Table 7 10 Typical circuit 10 Electronic sensor 2 channel without cross circuit detection with monitored start Monitored start Without cross circuit detection 1 x two channel Sensor 2 channel non floating 3SK1112 Standard solid state and 3SK112 Advanced DIP switch 1 ...

Страница 119: ...sor 2 channel non floating 3SK1112 Standard solid state and 3SK112 Advanced DIP switch 1 2 3 4 OFF left OFF left ON right Up to PL in accordance with ISO 13849 1 e 4 4Q 1 1 7 1 16 7 1 XWRVWDUW 0RQLWRUHG 6WDUW URVV IDXOW GHWHFWLRQ 2 21 VLQJOH FK VHQVRUV GRXEOH FK VHQVRU 6WDUWXS 7HVW HV QR 6 7 5 6 7 4 4Q 0 Up to Safety Integrity Level SILCL to IEC 62061 3 Note Single channel connection If only one s...

Страница 120: ...HG 6WDUW URVV IDXOW GHWHFWLRQ 2 21 VLQJOH FK VHQVRUV GRXEOH FK VHQVRU 6WDUWXS 7HVW HV QR 6 7 5 6 7 4 0 4Q 0 Up to Safety Integrity Level SILCL to IEC 62061 1 Table 7 13 Typical circuit 13 2x single channel without cross circuit detection with autostart Autostart Without cross circuit detection 2 x single channel Sensor two single channel NC contacts 3SK1112 Standard solid state and 3SK112 Advanced...

Страница 121: ...5 1 1 16 7 1 4 4Q XWRVWDUW 0RQLWRUHG 6WDUW URVV IDXOW GHWHFWLRQ 2 21 VLQJOH FK VHQVRUV GRXEOH FK VHQVRU 6WDUWXS 7HVW HV QR 6 7 5 6 7 4 4Q 0 Up to Safety Integrity Level SILCL to IEC 61508 3 Table 7 15 Typical circuit 15 1NC 1NO sensor with cross circuit detection with autostart Autostart With cross circuit detection 1 x two channel Jumper T1 PAR for NC NO evaluation Sensor NC NO sensor 3SK112 Adva...

Страница 122: ...er T1 PAR for NC NO evaluation Sensor Two hand NO NO sensor 3SK112 Advanced DIP switch 1 2 3 4 OFF left ON right OFF left PL in accordance with ISO 13849 1 e 1 7 3 5 1 1 16 7 1 4 4Q XWRVWDUW 0RQLWRUHG 6WDUW URVV IDXOW GHWHFWLRQ 2 21 VLQJOH FK VHQVRUV GRXEOH FK VHQVRU 6WDUWXS 7HVW HV QR 6 7 5 6 7 4 4Q 0 Safety Integrity Level SILCL to IEC 61508 3 For more information on two hand operation please re...

Страница 123: ... RS AA 01 123 Mounting 8 8 1 Warning notices Warning notices before installation wiring and commissioning WARNING Hazardous voltage Can cause electric shock and burns Turn off and lock out all power supplying this device before working on this device ...

Страница 124: ...04 2013 A5E02526190021A RS AA 01 8 2 Terminal coding You can provide the terminals with coding pins 3ZY1440 1AA00 This helps you to avoid errors when replacing the terminals Figure 8 1 Module with coding pins Figure 8 2 Stud position rotated by 60 in each case ...

Страница 125: ...eneral technical data Page 193 Two properly executed drill holes with thread or plug on the level surface For details of the distances between the drilled holes please refer to the relevant dimension drawings in the chapter Dimension drawings for 3SK1 devices Page 243 Two screws 17 5 mm or 22 5 mm devices or four screws 90 mm devices to fit the holes M4 x 12 in accordance with DIN 784 Two plastic ...

Страница 126: ... 1 Insert the securing brackets into the openings provided on the device until they engage 2 Hold the device up to the surface prepared for screw fastening 3 Insert the screws through the oblong holes in the securing brackets 4 Screw the device onto the level surface so that it is secure Tightening torque 1 Nm 17 5 mm and 22 5 mm devices 90 mm device ...

Страница 127: ...2526190021A RS AA 01 127 8 4 Disassembling devices from a level surface WARNING Hazardous Voltage Can Cause Death Serious Injury or Property Damage Before starting work therefore disconnect the system and devices from the power supply Requirements The terminals have been removed or disconnected ...

Страница 128: ...anual 04 2013 A5E02526190021A RS AA 01 Procedure Step Instructions Figure 1 Hold the device firmly 2 Unscrew the cap screws 3 Lift the device from the level surface 4 Remove the securing brackets from the device Disassembling 17 5 mm and 22 5 mm devices Disassembling 90 mm devices ...

Страница 129: ...accordance with DIN EN 60715 has been properly secured at the installation location Please observe the information about the mounting position in the chapter General technical data Page 193 Procedure The figures show 22 5 mm devices The 17 5 mm devices are mounted correspondingly Step Instructions Figure 1 Hang the back of the device onto the upper edge of the standard mounting rail 2 Press the lo...

Страница 130: ...al 35 mm wide mounting rail in accordance with DIN EN 60715 has been properly secured at the installation location Please observe the information about the mounting position in the chapter General technical data Page 193 Procedure Step Instructions Figure 1 Hang the back of the device onto the upper edge of the standard mounting rail 2 Press the lower half of the device against the rail until the ...

Страница 131: ...Can Cause Death Serious Injury or Property Damage Before starting work therefore disconnect the system and devices from the power supply Requirements The terminals have been removed or disconnected Procedure Step Instructions Figure 1 Press the device downwards 2 Pull the lower half of the device away from the standard mounting rail 3 Lift the device from the upper edge of the standard mounting ra...

Страница 132: ... been properly secured at the installation location Please observe the information about the mounting position in the chapter General technical data Page 193 Procedure The figures show 22 5 mm devices The 17 5 mm devices are mounted correspondingly Step Instructions Figure 1 Place the back of the device connector on the upper edge of the standard mounting rail 2 Press the lower half of the device ...

Страница 133: ... the device connectors together until they engage 5 Mount the cover on the left of the first device connector The cover is included in the scope of supply of the device terminator click click 6 Set the slide switches in the device termination connector Type 1 to the following positions Below 3SK1 basic unit position 2 bottom i e open Below output expansion 3SK1211 position 1 top i e closed ...

Страница 134: ... rail 3SK1 safety relays 134 Manual 04 2013 A5E02526190021A RS AA 01 Step Instructions Figure 7 Mount the device on the device connector 8 Mount all the devices required for the system configuration in accordance with the respective installation guidelines on the device connectors click click ...

Страница 135: ...2526190021A RS AA 01 135 8 9 Removing 22 5 mm 17 5 mm devices with device connectors from a standard mounting rail WARNING Hazardous Voltage Can Cause Death Serious Injury or Property Damage Before starting work therefore disconnect the system and devices from the power supply Requirements The terminals have been removed or disconnected ...

Страница 136: ... A5E02526190021A RS AA 01 Procedure The figures show 22 5 mm devices The 17 5 mm devices are removed correspondingly Step Instructions Figure 1 Unlock the device using a screwdriver 2 Pull the lower half of the device away from the device connector 3 Unlock the device using a screwdriver 4 Pull the device away from the device connector ...

Страница 137: ...190021A RS AA 01 137 Step Instructions Figure 5 Separate the device connectors using a screwdriver 6 Remove the cover Step Instructions Figure 7 Press the device connector downwards 8 Pull the lower half of the device connector away from the standard mounting rail 9 Lift the device connector from the upper edge of the standard mounting rail ...

Страница 138: ...ion location Please observe the information about the mounting position in the chapter General technical data Page 193 Use device connectors type 2 for enclosures 45 mm Please observe the obligatory mounting rules in Section System configuration rules Page 100 Procedure Step Instructions Figure 1 Hang the back of the device connector onto the upper edge of the standard mounting rail 2 Press the lo...

Страница 139: ...A RS AA 01 139 Step Instructions Figure 4 Push the device connectors together until they engage 5 Mount the cover on the left of the first device connector piece and the device connectors supplied in the set for enclosures of 45 mm upwards right hand side click click 6 Note the clearances required for the 90 mm devices 90 112 5 45 22 5 ...

Страница 140: ...relays 140 Manual 04 2013 A5E02526190021A RS AA 01 Step Instructions Figure 7 Mount output expansion 3SK1213 on the device connectors 8 Mount all the devices required for the system configuration in accordance with the respective installation guidelines on the device connectors click click click click ...

Страница 141: ...2526190021A RS AA 01 141 8 11 Removing 90 mm devices with device connectors from a standard mounting rail WARNING Hazardous Voltage Can Cause Death Serious Injury or Property Damage Before starting work therefore disconnect the system and devices from the power supply Requirements The terminals have been removed or disconnected ...

Страница 142: ...SK1 safety relays 142 Manual 04 2013 A5E02526190021A RS AA 01 Procedure Step Instructions Figure 1 Unlock the device using a screwdriver 2 Pull the lower half of the device away from the device connector 3 Unlock the device using a screwdriver 4 Pull the device away from the device connector ...

Страница 143: ... AA 01 143 Step Instructions Figure 5 Separate the device connectors using a screwdriver 6 Remove the termination piece Step Instructions Figure 7 Press the device connector downwards 8 Pull the lower half of the device connector away from the standard mounting rail 9 Lift the device connector from the upper edge of the standard mounting rail ...

Страница 144: ...t the mounting position in the chapter General technical data Page 193 Two properly executed drill holes per device connector with thread or plug on the level surface For details of the distances between the drilled holes please refer to the relevant dimension drawings in the chapter Dimension drawings 3SK1 device connectors Page 251 Two screws per device connector to fit the holes M4 x12 in accor...

Страница 145: ...d correspondingly Step Instructions Figure 1 Push the device connectors together until they engage 2 Mount the cover on the left of the first device connector The cover is included in the scope of supply of the device termination connector click click 3 Set the slide switches in the device termination connector Type 1 to the following positions Below 3SK1 basic unit position 2 bottom i e open Belo...

Страница 146: ...2013 A5E02526190021A RS AA 01 Step Instructions Figure 4 Hold the device connector on the level surface prepared for screw fastening 5 Insert each screw through the relevant holes in the device connectors 6 Screw the device connector to the level surface so that it is secure Tightening torques Top 0 1 Nm Bottom 1 Nm ...

Страница 147: ...K1 safety relays Manual 04 2013 A5E02526190021A RS AA 01 147 Step Instructions Figure 7 Mount the device on the device connector 8 Mount all the devices required for the system configuration in accordance with the respective installation guidelines on the device connectors click click ...

Страница 148: ...A5E02526190021A RS AA 01 8 13 Removing 22 5 mm 17 5 mm devices with device connectors from the wall WARNING Hazardous Voltage Can Cause Death Serious Injury or Property Damage Before starting work therefore disconnect the system and devices from the power supply Requirements The terminals have been removed or disconnected ...

Страница 149: ...RS AA 01 149 Procedure The figures show 22 5 mm devices The 17 5 mm devices are removed correspondingly Step Instructions Figure 1 Unlock the device below using a screwdriver 2 Pull the lower half of the device away from the device connector 3 Unlock the device above using a screwdriver 4 Pull the device away from the device connector ...

Страница 150: ...17 5 mm devices with device connectors from the wall 3SK1 safety relays 150 Manual 04 2013 A5E02526190021A RS AA 01 Step Instructions Figure 5 Release the screws 6 Separate the device connectors using a screwdriver 7 Remove the cover ...

Страница 151: ... mounting position in the chapter General technical data Page 193 Please note the spacing of the drilled holes in the chapter Dimension drawings for 3SK1 devices Page 243 and Dimension drawings 3SK1 device connectors Page 251 Two properly executed drill holes with thread or plug on the level surface per device connector Two screws per device connector to fit the holes M4 x12 in accordance with DIN...

Страница 152: ... Step Instructions Figure 1 Push the device connectors together until they engage 2 Mount the cover on the left of the first device connector click click 3 Note the clearances required for the 90 mm devices Mount the device connector supplied in the set for enclosures of 45 mm upwards right hand side Tightening torques Top 0 1 Nm Bottom 1 Nm ෘ ...

Страница 153: ...s Manual 04 2013 A5E02526190021A RS AA 01 153 Step Instructions Figure 4 Hold the device connector on the level surface prepared for screw fastening 5 Insert each screw through the relevant holes in the device connectors 6 Screw the device connector to the level surface so that it is secure ...

Страница 154: ... 2013 A5E02526190021A RS AA 01 Step Instructions Figure 7 Mount output expansion 3SK1213 on the device connectors 8 Mount all the devices required for the system configuration in accordance with the respective installation guidelines on the device connectors click click click click click click click click ...

Страница 155: ...2526190021A RS AA 01 155 8 15 Removing 90 mm devices with device connectors from wall WARNING Hazardous Voltage Can Cause Death Serious Injury or Property Damage Before starting work therefore disconnect the system and devices from the power supply Requirements The terminals have been removed or disconnected ...

Страница 156: ...ys 156 Manual 04 2013 A5E02526190021A RS AA 01 Procedure Step Instructions Figure 1 Unlock the device bottom using a screwdriver 2 Pull the lower half of the device away from the device connector 3 Unlock the device top using a screwdriver 4 Pull the device away from the device connector ...

Страница 157: ...Removing 90 mm devices with device connectors from wall 3SK1 safety relays Manual 04 2013 A5E02526190021A RS AA 01 157 Step Instructions Figure 5 Release the screws 6 Separate the device connectors 7 Remove the cover ...

Страница 158: ...ays against unauthorized or unintended readjustment As an alternative Siemens also offers a sealable membrane 3TK2820 0AA00 for securing the safety relays The sealable membrane is fixed to the front of the safety relay and secures the DIP switches and the buttons and rotary switches against unintentional readjustment Mounting the sealable cover Step Instructions Figure 1 Attach the hooks on the co...

Страница 159: ... mm 17 5 mm devices 9 1 1 Terminal assignment Location of the connections The inside faces of the terminal covers are labeled with the designations of the relevant terminals The position of the label corresponds to the position of the respective terminal Figure 9 1 Upper terminal cover ...

Страница 160: ...Connection 9 1 22 5 mm 17 5 mm devices 3SK1 safety relays 160 Manual 04 2013 A5E02526190021A RS AA 01 Figure 9 2 Lower terminal cover ...

Страница 161: ... Push In terminals Screwdriver Cross tip screwdriver Size PZ 1x80 4 5 mm Torque 0 6 to 0 8 Nm Screwdriver 3RA2908 1A Size 3 mm for operating the springs DIN 5264 A 0 5 x 3 Rigid cable A 10 mm 1 x 0 5 2 5 mm 2 x 1 0 1 5 mm A 10 mm 1 x 0 5 1 5 mm 2 x 0 5 1 5 mm Flexible conductor with end sleeve A 10 mm 1 x 0 5 2 5 mm 2 x 0 5 1 0 mm A 10 mm 1 x 0 5 1 0 mm 2 x 0 5 1 0 mm Flexible cable Not permissibl...

Страница 162: ...he system and devices from the power supply Requirements Cross tip screwdriver size PZ 1 x 80 For suitable connection cross sections of the cables see the chapter Connection data for terminals Page 161 Procedure Step Instructions Figure 1 Insert the relevant cable into square on the screw type terminal until it engages 2 Hold the cable in the screw type terminal 3 Tighten the screw with a torque o...

Страница 163: ...RNING Hazardous Voltage Can Cause Death Serious Injury or Property Damage Before starting work therefore disconnect the system and devices from the power supply Requirements Cross tip screwdriver size PZ 1 x 80 Procedure Step Instructions Figure 1 Unscrew the screw of the screw type terminal 2 Remove the cable from the unscrewed screw type terminal ...

Страница 164: ...out tools for rigid conductors or conductors equipped with end sleeves For wiring finely stranded or stranded conductors without end sleeves on push in connections a screwdriver is required Requirements 0 5 x 3 mm screwdriver DIN 5264 for finely stranded conductors only For suitable connection cross sections of the cables see the chapter Connection data for terminals Page 161 Procedure Table 9 1 R...

Страница 165: ...RS AA 01 165 Table 9 2 Finely stranded conductors Step Instructions Figure 1 Insert the screwdriver in the rectangular opening to open the terminal oval opening 2 Insert the cable as far as it will go into the oval opening and remove the screwdriver 3 Pull on the cable to ensure it is tight ...

Страница 166: ...erious Injury or Property Damage Before starting work therefore disconnect the system and devices from the power supply Requirements Screwdriver DIN 5264 of the size 0 5 x 3 mm Procedure Step Instructions Figure 1 Insert the flat head screwdriver into the rectangular opening of the spring loaded terminal until it engages 2 Remove the cable from the oval opening 3 Remove the screwdriver ...

Страница 167: ... Before starting work therefore disconnect the system and devices from the power supply Requirements You must have removed the terminal blocks for the purpose of replacing a device for example Procedure when plugging in the terminal blocks Step Instructions Figure 1 Insert the removable terminal block into the guide rail of the device 2 Slide the removable terminal block back until it audibly enga...

Страница 168: ...n Cause Death Serious Injury or Property Damage Before starting work therefore disconnect the system and devices from the power supply Removing terminal blocks from the device Step Instructions Figure 1 Press the clip of the terminal block upwards 2 Pull the terminal block out to the front 3 Lift the terminal block out of the guide rail of the device ...

Страница 169: ...crew type terminal 2 Remove the cable from the unscrewed screw type terminal Push in terminals Disconnecting the conductor Step Instructions Figure 1 Insert the flat head screwdriver into the square opening of the push in terminal until it engages Please observe a 10 horizontal angular deviation of the screwdriver to the oval opening 2 Remove the cable from the oval opening 3 Remove the screwdrive...

Страница 170: ...G Hazardous Voltage Can Cause Death Serious Injury or Property Damage Before starting work therefore disconnect the system and devices from the power supply Positions of the terminals and opening the terminal cover Ther removable terminals are located under the lower terminal cover To open the terminal cover press on it in the middle and lift it up ...

Страница 171: ... tip screwdriver Size PZ 1 4 mm Torque 0 8 to 1 2 Nm Screwdriver Size 0 or 1 width to 3 mm for raising the terminal springs DIN 5264 A 0 5 x 3 Rigid cable A 10 mm 1 x 0 5 4 0 mm2 2 x 0 5 2 5 mm2 A 10 mm 1 x 0 5 1 5 mm 2 x 0 5 1 5 mm Flexible cable with end sleeve cable lug A 10 mm 1 x 0 5 2 5 mm 2 x 0 5 1 5 mm A 10 mm 1 x 0 5 1 5 mm 2 x 0 5 1 5 mm Flexible cable Not permissible A 10 mm 1 x 0 5 1 5...

Страница 172: ...Before starting work therefore disconnect the system and devices from the power supply Procedure for screw type terminal blocks Step Instructions Figure 1 Insert the relevant cable into square on the screw type terminal until it engages 2 Hold the cable in the screw type terminal 3 Tighten the screw of the terminal in which the cable is inserted 4 Pull on the cable to ensure it is screwed tight ...

Страница 173: ...ping springs insert the flat head screwdriver as far as it will go into the square opening of the spring loaded terminal Please observe a 10 horizontal angular deviation of the screwdriver to the oval opening 2 Insert the cable into the oval opening as far as it will go 3 Hold the cable in the spring loaded terminal 4 Remove the screwdriver 5 Pull on the cable to ensure it is tight ...

Страница 174: ...ystem and devices from the power supply Requirements You must have removed the terminal blocks for the purpose of replacing a device for example Procedure for mounting terminal blocks Step Instructions Figure 1 Insert the removable terminal block into the guide rail of the device 2 Slide the removable terminal block back until it audibly engages 3 Check that the clip of the removable terminal bloc...

Страница 175: ...ious Injury or Property Damage Before starting work therefore disconnect the system and devices from the power supply Removing terminals from the device Step Instructions Figure 1 Insert a flat head screwdriver between the clip of the terminals and the front panel 2 Pull the terminals out to the front 3 Lift the terminals out of the guide rail of the device ...

Страница 176: ...rew of the screw type terminal 3 Remove the cable from the unscrewed screw type terminal Disconnecting spring loaded terminals Step Instructions Figure 1 Insert the flat head screwdriver into the rectangular opening of the spring loaded terminal until it engages Please observe a 10 horizontal angular deviation of the screwdriver to the oval opening 2 Remove the cable from the oval opening 3 Remove...

Страница 177: ...ore details Replacing the module WARNING Hazardous Voltage Can Cause Death Serious Injury or Property Damage Carry out function test of the plant To ensure the safety of the system a full functional test must be conducted and a successful result obtained after a device has been replaced Note Only replace a defective device with a device of an identical order number 1 Disconnect the defective devic...

Страница 178: ...onnectors on the wall Page 144 Chapter Mounting 90 mm devices with device connectors on the wall Page 151 4 Connect the defective device at the terminals Chapter for 22 5 mm devices Connecting the screw type terminals Page 162 Connecting the push in terminals Page 164 and Attaching the terminals Page 167 Chapter for 90 mm devices Connecting terminals Page 172 and Mounting terminals Page 174 After ...

Страница 179: ...sired function 2 Connect the power supply 3 If the device detects a modified configuration it remains in configuration mode LEDs flash during power up 4 Confirm the new configuration by operating the SET RESET pushbutton for more than 1s 5 The configuration has been accepted and the device changes to safety mode Note Configuration and setting the delay time A change to the configuration must only ...

Страница 180: ... on terminals IN2 and INF it expects the test signal of T2 The device detects a sensor fault if the signal at terminals IN1 PAR or IN2 INF does not agree with test signals T1 T2 Cross circuit detection must be deactivated if electronic sensors such as light arrays or laser scanners are connected The 3SK1 now no longer monitors the sensor inputs for cross circuit detection Usually the outputs of sa...

Страница 181: ...c in accordance with ISO 13849 1 or SIL1 in accordance with IEC 62061 can be achieved if the cascading input is wired with single channel positive opening safety sensors supply via A1 24 V identical potential to A1 and if the connecting cable is laid in a protected fashion The start function for the cascading input INK corresponds to the start response of sensor inputs IN1 and IN2 autostart or mon...

Страница 182: ...switch instantaneously while the outputs of stop category 1 have a time delay The sequence cannot be interrupted Exception Switching off the power supply NOTICE If the safe state is restored during the time delay e g the protective door is closed and the START button is actuated the enabling circuits switch to the active position immediately after the delay time has elapsed The actuation of the ST...

Страница 183: ...P PAR potentiometer input expansion output expansion it does not change automatically to safety mode after power up but instead remains in configuration mode In configuration mode the LEDs yellow whose DIP switch position is ON right flash all other parameter settings are not explicitly indicated The configuration is accepted by pressing the SET RESET button for approximately 1s In configuration m...

Страница 184: ...es to the safe state 10 4 Response times 10 4 1 Response times Verification of response times in the case of safety circuits When safety equipment is commissioned steps must be taken to verify that a safety related output will switch off within a maximum permissible response time if the input signal changes at the relevant input To provide this verification you must determine the total response ti...

Страница 185: ...t for about 1 s lamp test The LEDs then go out for approx 0 5 s The configuration of the device is then displayed on the configuration LEDs for approx 3 s If a valid configuration is set and the potentiometer setting has been left unchanged the device is now ready for operation and is in safety mode If no configuration change DIP PAR potentiometer input expansion output expansion has been detected...

Страница 186: ...Commissioning 3SK1 safety relays 186 Manual 04 2013 A5E02526190021A RS AA 01 ...

Страница 187: ...p hardware test Green flashing Missing startup testing Short circuit on the SET RESET button Yellow Power up DIP 1 position right Yellow flashing Configuration mode DIP 1 position right Green yellow flashing Configuration changed 1 DEVICE Red Device error OFF Output inactive Configuration mode DIP 2 position left Green Output active Power up hardware test Green flashing Feedback circuit error Shor...

Страница 188: ...f input expansion Group error Cross circuit at input Configuration mode DIP 3 position right Flickering yellow Configuration mode Special configuration two hand operation 3 IN Flickering red Configuration mode impermissible configuration OFF No group error Configuration mode DIP 4 position left Green Power up hardware test Green flashing Short circuit on the SET RESET button Yellow Power up DIP 4 ...

Страница 189: ...e configuration 3 IN Off 2 x single channel Yellow or yellow flashing Startup testing off 4 SF Off Startup testing ON 12 3 Error statuses LED Display Explanation 1 DEVICE Red Device error Red Group error 4 SF Red flashing Fault message 12 4 Diagnostics Power up Explanation DEVICE OUT IN SF Hardware test Note input expansions remain in this state until acknowledged by the device on the right hand s...

Страница 190: ...Explanation DEVICE OUT IN SF No startup testing Green flashing Off Off Off Device ready for operation all outputs OFF Green Off Off Off Device ready for operation all outputs ON Green Green Green Off Device ready for operation instantaneous outputs OFF time delayed outputs ON Green Green yellow flashing Off Off For monitored start START button not yet pressed Green Off Green flashing Off With inpu...

Страница 191: ... Off3 Group error restart possible by pressing the SET RESET button Off3 Off3 Off3 Red Group error cross circuit at the input restart possible by pressing the SET RESET button Off3 Off3 Flashing yellow3 Red System stop restart possible by disconnecting and re connecting the operating voltage Red Off3 Off3 Red 3 On time delayed devices the LED flashes green yellow provided the time delayed outputs ...

Страница 192: ...Display and diagnostics 12 4 Diagnostics 3SK1 safety relays 192 Manual 04 2013 A5E02526190021A RS AA 01 ...

Страница 193: ... for the respective device according to SN 31205 hPa 900 1060 Relative air humidity During operation without condensation 10 95 Maximum operating altitude above MSL m 2000 Vibration resistance according to IEC 60068 2 6 5 500 Hz 0 75 mm Degree of pollution 3 Overvoltage category III Distance to be maintained at the side with side by side mounting mm 0 Distance to be maintained at the side from gro...

Страница 194: ...n connection Maintenance The 3SK1 safety relays are maintenance free Certificate of suitability TÜV approval UL certification CSA approval Yes except 3SK1230 Yes Yes Electrical service life B10 values of the 3SK1 safety relays Note When using the devices to equip furnaces to DIN EN 50156 1 the load utilization category listed below must not be exceeded Electrical service life 250000 operating cycl...

Страница 195: ...W20 3SK1211 BB40 3SK1211 BB00 3SK1211 BW20 Utilization category Ue V Ie A B10d value operating cycles 5 500000 4 860000 AC 1 240 2 1300000 4 300000 3 850000 AC 15 240 1 1100000 5 300000 2 2000000 DC 13 24 1 7000000 Device version 3SK1121 CB4 Utilization category Ue V Ie A B10d value operating cycles 5 500000 4 600000 AC 1 240 2 1000000 3 400000 AC 15 240 0 1 10000000 3 450000 DC 13 24 1 2000000 ...

Страница 196: ...te in accordance with IEC 61508 Safety relay PFH 1 h less than PFDavg less than 3SK1111 AB30 1 7 E 09 1 0 E 06 3SK1111 AW20 1 5 E 09 1 0 E 06 3SK1112 BB40 1 0 E 09 7 0 E 06 3SK1121 AB40 2 5 E 09 7 0 E 06 3SK1121 CB41 3 7 E 09 7 0 E 06 3SK1121 CB42 3 7 E 09 7 0 E 06 3SK1121 CB44 3 7 E 09 7 0 E 06 3SK1122 AB40 1 3 E 09 7 0 E 06 3SK1122 CB41 1 5 E 09 7 0 E 06 3SK1122 CB42 1 5 E 09 7 0 E 06 3SK1122 CB...

Страница 197: ...el 1 Design of the cascading none Type of the safety related wiring of the inputs single channel and two channel Product feature transverse contact secure Yes Safety Integrity Level SIL according to IEC 61508 SIL3 for delayed release circuit according to IEC 61508 Performance Level PL according to ISO 13849 1 e for delayed release circuit according to ISO 13849 1 Category according to ISO 13849 1 ...

Страница 198: ...ntact safety related delayed switching as NO contact safety related instantaneous switching 3 as contact less semiconductor switching element for reporting function delayed switching as contact less semiconductor switching element for reporting function non delayed 0 as contact less semiconductor switching element safety related delayed switching 0 as contact less semiconductor switching element s...

Страница 199: ... 5 at 230 V A 1 5 Thermal current of the contact affected switching element maximum A 5 Total current maximum A 12 Mechanical operating cycles as operating time typical 10 000 000 Max permissible voltage for safe isolation between electronic evaluation device and enabling circuit according to EN 60947 1 V Design of the fuse link for short circuit protection of the NO contacts of the relay outputs ...

Страница 200: ...ay time after opening of the safety circuits typical s 0 01 at mains power cut typical s 0 065 0 2 maximum s 0 075 0 3 Adjustable backslide delay time after opening of the safety circuits s Recovery time after opening of the safety circuits typical s 0 01 after mains power cut typical s 0 09 0 32 Pulse duration of the sensor input minimum s 0 15 of the ON pushbutton input minimum s 0 015 of the ca...

Страница 201: ...coil 0 85 at 50 Hz for AC 1 1 0 85 at 60 Hz for AC 1 1 0 85 for DC 1 2 1 1 Active power loss typical W 2 2 5 Contact reliability of the auxiliary contacts Product function parameterizable Sensor floating sensor non floating monitored start autostart Sensor floating monitored start autostart Suitability for use device connector 3ZY12 No Suitability for interaction pressing control No Suitability fo...

Страница 202: ...tegory according to ISO 13849 1 4 T1 value for proof test interval or service life according to IEC 61508 a 20 Safety device type according to IEC 61508 2 Type B Number of outputs as contact affected switching element as NC contact for reporting function instantaneous switching 0 as NO contact for reporting function instantaneous switching 0 as NC contact for reporting function delayed switching 0...

Страница 203: ...30 V A at AC 15 at 115 V A at 230 V A Switching capacity current of the NC contacts of the relay outputs at DC 13 at 24 V A at 115 V A at 230 V A at AC 15 at 115 V A at 230 V A Thermal current of the contact affected switching element maximum A Total current maximum A Mechanical operating cycles as operating time typical Max permissible voltage for safe isolation between electronic evaluation devi...

Страница 204: ...r opening of the safety circuits typical s 0 04 at mains power cut typical s 0 maximum s 0 Adjustable backslide delay time after opening of the safety circuits s Recovery time after opening of the safety circuits typical s 0 03 after mains power cut typical s 6 5 Pulse duration of the sensor input minimum s 0 06 of the ON pushbutton input minimum s 0 15 of the cascading entrance minimum s Type of ...

Страница 205: ...t 60 Hz for AC 0 8 for DC 1 2 Active power loss typical W 2 Contact reliability of the auxiliary contacts Product function parameterizable Sensor floating sensor non floating monitored start autostart 1 channel 2 channel sensor connection cross circuit detection startup testing Suitability for use device connector 3ZY12 No Suitability for interaction pressing control No Suitability for use safety ...

Страница 206: ...ory according to ISO 13849 1 4 T1 value for proof test interval or service life according to IEC 61508 a 20 Safety device type according to IEC 61508 2 Type B Number of outputs as contact affected switching element as NO contact safety related as contact affected switching element as NC contact for reporting function instantaneous switching 0 as NO contact for reporting function instantaneous swit...

Страница 207: ... 24 V A at 115 V A at 230 V A at AC 15 at 115 V A at 230 V A Switching capacity current of the NC contacts of the relay outputs at DC 13 at 24 V A at 115 V A at 230 V A at AC 15 at 115 V A at 230 V A Thermal current of the contact affected switching element maximum A Total current maximum A Mechanical operating cycles as operating time typical Max permissible voltage for safe isolation between ele...

Страница 208: ...r opening of the safety circuits typical s 0 04 at mains power cut typical s 0 maximum s 0 Adjustable backslide delay time after opening of the safety circuits s Recovery time after opening of the safety circuits typical s 0 03 after mains power cut typical s 6 5 Pulse duration of the sensor input minimum s 0 06 of the ON pushbutton input minimum s 0 15 of the cascading entrance minimum s Type of ...

Страница 209: ... for DC 1 2 Active power loss typical W 2 Contact reliability of the auxiliary contacts Product function parameterizable Sensor floating sensor non floating monitored start autostart 1 channel 2 channel sensor connection cross circuit detection startup testing antivalent sensors 2 hand switches Suitability for use device connector 3ZY12 Yes Suitability for interaction pressing control No Suitabili...

Страница 210: ...1 Category according to ISO 13849 1 4 T1 value for proof test interval or service life according to IEC 61508 a 20 Safety device type according to IEC 61508 2 Type B Number of outputs as contact affected switching element as NC contact for reporting function instantaneous switching 1 as NO contact for reporting function instantaneous switching 0 as NC contact for reporting function delayed switchi...

Страница 211: ...ty current of the NC contacts of the relay outputs at DC 13 at 24 V A 1 at 115 V A 0 2 at 230 V A 0 1 at AC 15 at 115 V A 1 5 at 230 V A 1 5 Thermal current of the contact affected switching element maximum A 5 Total current maximum A 12 Mechanical operating cycles as operating time typical 10 000 000 Max permissible voltage for safe isolation between electronic evaluation device and enabling circ...

Страница 212: ...ening of the safety circuits typical s 0 04 at mains power cut typical s 0 03 maximum s 0 05 Adjustable backslide delay time after opening of the safety circuits s Recovery time after opening of the safety circuits typical s 0 03 after mains power cut typical s 6 5 Pulse duration of the sensor input minimum s 0 075 of the ON pushbutton input minimum s 0 15 of the cascading entrance minimum s Type ...

Страница 213: ... for DC 1 2 Active power loss typical W 2 Contact reliability of the auxiliary contacts Product function parameterizable Sensor floating sensor non floating monitored start autostart 1 channel 2 channel sensor connection cross circuit detection startup testing antivalent sensors 2 hand switches Suitability for use device connector 3ZY12 Yes Suitability for interaction pressing control No Suitabili...

Страница 214: ... Design of the cascading yes Type of the safety related wiring of the inputs single channel and two channel Product feature transverse contact secure Yes Safety Integrity Level SIL according to IEC 61508 SIL3 for delayed release circuit according to IEC 61508 SIL3 Performance Level PL according to ISO 13849 1 e for delayed release circuit according to ISO 13849 1 e Category according to ISO 13849 ...

Страница 215: ...s NO contact for reporting function delayed switching 0 as NC contact safety related instantaneous switching 0 as NO contact safety related instantaneous switching 2 as NC contact safety related delayed switching 0 as NO contact safety related delayed switching 2 as contact less semiconductor switching element safety related delayed switching 0 non delayed 0 for reporting function delayed switchin...

Страница 216: ...A at 115 V A at 230 V A at AC 15 at 115 V A at 230 V A Thermal current of the contact affected switching element maximum A 5 Total current maximum A 12 Mechanical operating cycles as operating time typical 10 000 000 Max permissible voltage for safe isolation between electronic evaluation device and enabling circuit according to EN 60947 1 V Design of the fuse link for short circuit protection of ...

Страница 217: ...r opening of the safety circuits typical s 0 04 at mains power cut typical s 0 03 maximum s 0 04 Adjustable backslide delay time 0 05 0 5 5 after opening of the safety circuits s 3 30 300 Recovery time after opening of the safety circuits typical s 0 03 after mains power cut typical s 6 5 Pulse duration of the sensor input minimum s 0 075 of the ON pushbutton input minimum s 0 15 of the cascading ...

Страница 218: ...r AC 0 8 for DC 1 2 Active power loss typical W 2 5 Contact reliability of the auxiliary contacts Product function parameterizable Sensor floating sensor non floating monitored start autostart 1 channel 2 channel sensor connection cross circuit detection startup testing antivalent sensors 2 hand switches time delay Suitability for use device connector 3ZY12 Yes Suitability for interaction pressing...

Страница 219: ...49 1 Category according to ISO 13849 1 4 T1 value for proof test interval or service life according to IEC 61508 a 20 Safety device type according to IEC 61508 2 Type B Number of outputs as contact affected switching element as NC contact for reporting function instantaneous switching 0 as NO contact for reporting function instantaneous switching 0 as NC contact for reporting function delayed swit...

Страница 220: ...30 V A at AC 15 at 115 V A at 230 V A Switching capacity current of the NC contacts of the relay outputs at DC 13 at 24 V A at 115 V A at 230 V A at AC 15 at 115 V A at 230 V A Thermal current of the contact affected switching element maximum A Total current maximum A Mechanical operating cycles as operating time typical Max permissible voltage for safe isolation between electronic evaluation devi...

Страница 221: ...r opening of the safety circuits typical s 0 04 at mains power cut typical s 0 maximum s 0 Adjustable backslide delay time after opening of the safety circuits s Recovery time after opening of the safety circuits typical s 0 03 after mains power cut typical s 6 5 Pulse duration of the sensor input minimum s 0 06 of the ON pushbutton input minimum s 0 15 of the cascading entrance minimum s Type of ...

Страница 222: ... for DC 1 2 Active power loss typical W 2 Contact reliability of the auxiliary contacts Product function parameterizable Sensor floating sensor non floating monitored start autostart 1 channel 2 channel sensor connection cross circuit detection startup testing antivalent sensors 2 hand switches Suitability for use device connector 3ZY12 Yes Suitability for interaction pressing control No Suitabili...

Страница 223: ... 1 Design of the cascading yes Type of the safety related wiring of the inputs single channel and two channel Product feature transverse contact secure Yes Safety Integrity Level SIL according to IEC 61508 SIL3 for delayed release circuit according to IEC 61508 SIL3 Performance Level PL according to ISO 13849 1 e for delayed release circuit according to ISO 13849 1 e Category according to ISO 1384...

Страница 224: ...afety related instantaneous switching 0 as NO contact safety related instantaneous switching as NC contact safety related delayed switching 0 as NO contact safety related delayed switching as contact less semiconductor switching element safety related delayed switching 2 non delayed 2 for reporting function delayed switching non delayed 0 Stop category according to DIN EN 60204 1 0 1 Design of the...

Страница 225: ...24 V A at 115 V A at 230 V A at AC 15 at 115 V A at 230 V A Thermal current of the contact affected switching element maximum A Total current maximum A Mechanical operating cycles as operating time typical Max permissible voltage for safe isolation between electronic evaluation device and enabling circuit according to EN 60947 1 V Design of the fuse link for short circuit protection of the NO cont...

Страница 226: ...after opening of the safety circuits typical s 0 04 at mains power cut typical s 0 maximum s 0 Adjustable backslide delay time 0 05 0 5 5 after opening of the safety circuits s 3 30 300 Recovery time after opening of the safety circuits typical s 0 03 after mains power cut typical s 6 5 Pulse duration of the sensor input minimum s 0 06 of the ON pushbutton input minimum s 0 15 of the cascading ent...

Страница 227: ...or AC 0 8 for DC 1 2 Active power loss typical W 2 Contact reliability of the auxiliary contacts Product function parameterizable Sensor floating sensor non floating monitored start autostart 1 channel 2 channel sensor connection cross circuit detection startup testing antivalent sensors 2 hand switches time delay Suitability for use device connector 3ZY12 Yes Suitability for interaction pressing ...

Страница 228: ...e against shock 10g 11 ms Number of sensor inputs 1 channel or 2 channel Type of the safety related wiring of the inputs Product feature transverse contact secure Safety Integrity Level SIL according to IEC 61508 SIL3 SIL claim limit for a subsystem according to EN 62061 3 Performance level PL according to ISO 13849 1 e Category according to ISO 13849 1 4 T1 value for proof test interval or servic...

Страница 229: ...aneous switching 0 as NC contact for reporting function delayed switching 0 as NO contact for reporting function delayed switching 0 as NC contact safety related instantaneous switching 0 as NO contact safety related instantaneous switching 4 as NC contact safety related delayed switching 0 as NO contact safety related delayed switching 0 Stop category according to DIN EN 60204 1 0 Design of the i...

Страница 230: ... 230 V A Thermal current of the contact affected switching element maximum A 5 Total current maximum A 12 Mechanical operating cycles as operating time typical 10 000 000 Max permissible voltage for safe isolation between electronic evaluation device and enabling circuit according to EN 60947 1 V Design of the fuse link for short circuit protection of the NO contacts of the relay outputs required ...

Страница 231: ...e after opening of the safety circuits typical s at mains power cut typical s 0 045 0 01 0 2 maximum s 0 05 0 015 0 3 Adjustable backslide delay time after opening of the safety circuits initial value s final value s Recovery time after opening of the safety circuits typical s after mains power cut typical s 0 06 0 015 0 32 Pulse duration of the sensor input minimum s of the ON pushbutton input mi...

Страница 232: ...ply voltage rated value of the magnet coil 0 85 0 85 at 50 Hz for AC 1 1 1 1 0 85 0 85 at 60 Hz for AC 1 1 1 1 0 8 0 85 for DC 1 2 1 1 Active power loss typical W 2 5 2 Contact reliability of the auxiliary contacts Product function parameterizable undelayed delayed only with system connector Suitability for interaction pressing control Suitability for use device connector 3ZY12 No Yes No Suitabili...

Страница 233: ...o ISO 13849 1 4 T1 value for proof test interval or service life according to IEC 61508 a 20 Safety device type according to IEC 61508 2 Type A Number of outputs as contact affected switching element as NC contact for reporting function instantaneous switching 0 as NO contact for reporting function instantaneous switching 0 as NC contact for reporting function delayed switching 0 as NO contact for...

Страница 234: ... 230 V A at AC 15 at 115 V A at 230 V A Thermal current of the contact affected switching element maximum A 10 Total current maximum A Mechanical operating cycles as operating time typical 10 000 000 Max permissible voltage for safe isolation between electronic evaluation device and enabling circuit according to EN 60947 1 V 300 Design of the fuse link for short circuit protection of the NO contac...

Страница 235: ...lay time after opening of the safety circuits typical s at mains power cut typical ms 20 15 maximum ms 20 15 Adjustable backslide delay time after opening of the safety circuits initial value s final value s Recovery time after opening of the safety circuits typical s after mains power cut typical s 0 Pulse duration of the sensor input minimum s of the ON pushbutton input minimum s of the cascadin...

Страница 236: ... supply voltage rated value of the magnet coil 0 85 at 50 Hz for AC 1 1 0 85 at 60 Hz for AC 1 1 0 8 for DC 1 2 Active power loss typical W 5 5 4 3 5 Contact reliability of the auxiliary contacts Product function parameterizable undelayed delayed only with system connector Suitability for interaction pressing control Suitability for use device connector 3ZY12 Yes No Suitability for use monitoring ...

Страница 237: ...to ISO 13849 1 4 T1 value for proof test interval or service life according to IEC 61508 a 20 Safety device type according to IEC 61508 2 Type B Number of outputs as contact affected switching element as NC contact for reporting function instantaneous switching 0 as NO contact for reporting function instantaneous switching 0 as NC contact for reporting function delayed switching 0 as NO contact fo...

Страница 238: ...ement maximum A Total current maximum A Mechanical operating cycles as operating time typical Max permissible voltage for safe isolation between electronic evaluation device and enabling circuit according to EN 60947 1 V Design of the fuse link for short circuit protection of the NO contacts of the relay outputs required Cable length between sensor and electronic evaluation device with Cu 1 5 mm a...

Страница 239: ...mains power cut typical s Pulse duration of the sensor input minimum s 0 06 of the ON pushbutton input minimum s 0 15 of the cascading entrance minimum s Type of voltage of the controlled supply voltage DC Control supply voltage frequency 1 rated value Hz 2 rated value Hz Control supply voltage for DC rated value V 24 minimum V maximum V at 50 Hz at AC rated value V minimum V maximum V at 60 Hz at...

Страница 240: ...onitored start autostart 1 channel 2 channel sensor connection cross circuit detection startup testing antivalent sensors 2 hand switches Suitability for interaction pressing control No Suitability for use device connector 3ZY12 Yes Suitability for use monitoring of floating sensors Yes monitoring of non floating sensors Yes safety cut out switch Yes magnetically operated switches monitoring Yes s...

Страница 241: ...minal value V 24 Output current nominal range ultimate value A 0 6 Resistive loss W 17 Design of the short circuit protection automatically start up Operating range factor control supply voltage rated value at 50 Hz for AC initial value 0 85 final value 1 1 at 60 Hz for AC initial value 0 85 final value 1 1 for DC initial value 0 85 final value 1 1 Control supply voltage at 50 Hz at AC rated value...

Страница 242: ...Technical data 13 3 Expansion modules 3SK1 safety relays 242 Manual 04 2013 A5E02526190021A RS AA 01 ...

Страница 243: ...3SK1 safety relays Manual 04 2013 A5E02526190021A RS AA 01 243 Dimension drawings 14 14 1 Dimension drawings for 3SK1 devices Figure 14 1 Enclosure 17 5 mm for safety relays 3SK1120 3SK1220 ...

Страница 244: ...Dimension drawings 14 1 Dimension drawings for 3SK1 devices 3SK1 safety relays 244 Manual 04 2013 A5E02526190021A RS AA 01 ෘ Figure 14 2 Drilling diagram enclosure 17 5 mm ...

Страница 245: ...Dimension drawings 14 1 Dimension drawings for 3SK1 devices 3SK1 safety relays Manual 04 2013 A5E02526190021A RS AA 01 245 Figure 14 3 Enclosure 22 5 mm short for safety relays 3SK1112 ...

Страница 246: ...on drawings 14 1 Dimension drawings for 3SK1 devices 3SK1 safety relays 246 Manual 04 2013 A5E02526190021A RS AA 01 Figure 14 4 Enclosure 22 5 mm long for safety relays 3SK1111 3SK1121 3SK1122 3SK1211 3SK1230 ...

Страница 247: ...Dimension drawings 14 1 Dimension drawings for 3SK1 devices 3SK1 safety relays Manual 04 2013 A5E02526190021A RS AA 01 247 ෘ Figure 14 5 Drilling diagram enclosure 22 5 mm ...

Страница 248: ...Dimension drawings 14 1 Dimension drawings for 3SK1 devices 3SK1 safety relays 248 Manual 04 2013 A5E02526190021A RS AA 01 Figure 14 6 Dimension drawing 3SK1 device on device connector ...

Страница 249: ...Dimension drawings 14 1 Dimension drawings for 3SK1 devices 3SK1 safety relays Manual 04 2013 A5E02526190021A RS AA 01 249 Figure 14 7 Enclosure 90 mm for safety relays 3SK1213 ...

Страница 250: ...Dimension drawings 14 1 Dimension drawings for 3SK1 devices 3SK1 safety relays 250 Manual 04 2013 A5E02526190021A RS AA 01 ෘ Figure 14 8 Drilling diagram enclosure 90 mm ...

Страница 251: ...n drawings 14 2 Dimension drawings for 3SK1 device connector 3SK1 safety relays Manual 04 2013 A5E02526190021A RS AA 01 251 14 2 Dimension drawings for 3SK1 device connector Figure 14 9 Device connector 17 5 mm ...

Страница 252: ...Dimension drawings 14 2 Dimension drawings for 3SK1 device connector 3SK1 safety relays 252 Manual 04 2013 A5E02526190021A RS AA 01 Figure 14 10 Device connector type 1 22 5 mm ...

Страница 253: ...Dimension drawings 14 2 Dimension drawings for 3SK1 device connector 3SK1 safety relays Manual 04 2013 A5E02526190021A RS AA 01 253 Figure 14 11 Device termination connector type 1 22 5 mm ...

Страница 254: ...Dimension drawings 14 2 Dimension drawings for 3SK1 device connector 3SK1 safety relays 254 Manual 04 2013 A5E02526190021A RS AA 01 Figure 14 12 Device connector type 2 22 5 mm ...

Страница 255: ...Dimension drawings 14 2 Dimension drawings for 3SK1 device connector 3SK1 safety relays Manual 04 2013 A5E02526190021A RS AA 01 255 Figure 14 13 Device termination connector type 2 22 5 mm ...

Страница 256: ...Dimension drawings 14 2 Dimension drawings for 3SK1 device connector 3SK1 safety relays 256 Manual 04 2013 A5E02526190021A RS AA 01 ෘ Figure 14 14 Drilling plan for 17 5 mm and 22 5 mm device connectors ...

Страница 257: ...DA00 SIRIUS device connector type 2 22 5 mm 3ZY1212 2EA00 SIRIUS device termination connector type 2 22 5 mm 3ZY1212 2FA00 SIRIUS device termination connector type 2 set for enclosures of 45 mm upwards 3ZY1212 0FA01 SIRIUS push in lugs for wall mounting contents 12 units 3ZY1311 0AA00 SIRIUS sealable cover 17 5 mm 3ZY1321 1AA00 SIRIUS sealable cover 22 5 mm 3ZY1321 2AA00 Coding pins for SIRIUS ter...

Страница 258: ...Accessories 3SK1 safety relays 258 Manual 04 2013 A5E02526190021A RS AA 01 ...

Страница 259: ... form to tell us about them We welcome comments and suggestions for improvement Fax response From please complete To SIEMENS AG I IA CE MK ST 3 92220 Amberg Germany Name Company Department Address _________________________________________________________________________________ Fax 49 0 9621 80 3337 Manual title Table A 1 Errors comments and suggestions for improvements ...

Страница 260: ...Appendix A 1 Correction sheet 3SK1 safety relays 260 Manual 04 2013 A5E02526190021A RS AA 01 ...

Страница 261: ......

Страница 262: ...mens com sirius infomaterial Newsletter always up to date www siemens com sirius newsletter E Business in the Industry Mall www siemens com sirius mall Online Support www siemens com sirius support Contact for all technical information Technical Assistance Tel 49 911 895 5900 e mail technical assistance siemens com www siemens com sirius technical assistance Industrial Controls SIRIUS www siemens ...

Отзывы: