


Mounting
8.3 Mounting the devices on a level surface
3SK1 safety relays
126
Manual, 04/2013, A5E02526190021A/RS-AA/01
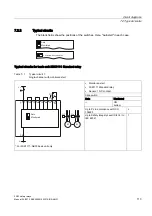
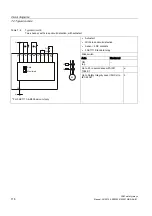
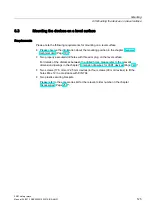
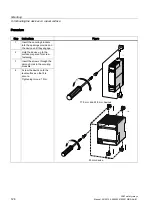
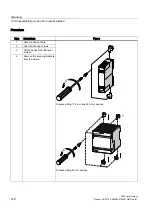
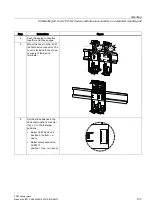
Procedure
Step Instructions
Figure
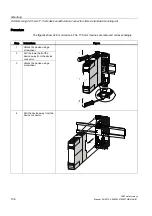
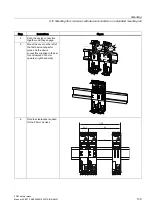
1
Insert the securing brackets
into the openings provided on
the device until they engage.
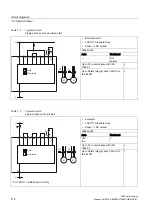
2
Hold the device up to the
surface prepared for screw
fastening.
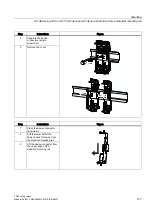
3
Insert the screws through the
oblong holes in the securing
brackets.
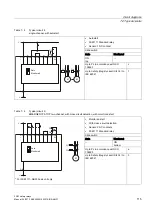
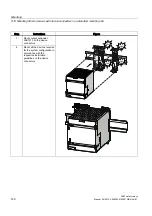
4
Screw the device onto the
level surface so that it is
secure.
Tightening torque: 1 Nm
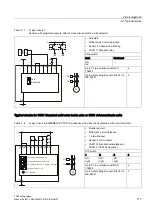
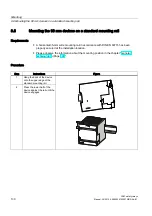
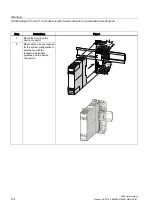
17.5 mm and 22.5 mm devices
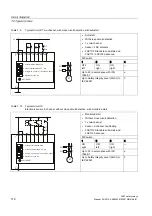
90 mm device
Содержание SIRIUS 3SK1
Страница 2: ......
Страница 10: ...Table of contents 3SK1 safety relays 10 Manual 04 2013 A5E02526190021A RS AA 01 ...
Страница 14: ...Introduction 1 6 Correction sheet 3SK1 safety relays 14 Manual 04 2013 A5E02526190021A RS AA 01 ...
Страница 28: ...Product overview for 3SK1 3 5 3SK1 system 3SK1 safety relays 28 Manual 04 2013 A5E02526190021A RS AA 01 ...
Страница 94: ...3SK1 devices 5 4 3SK1 input expansions 3SK1 safety relays 94 Manual 04 2013 A5E02526190021A RS AA 01 ...
Страница 102: ...System configuration 6 3 System configuration rules 3SK1 safety relays 102 Manual 04 2013 A5E02526190021A RS AA 01 ...
Страница 186: ...Commissioning 3SK1 safety relays 186 Manual 04 2013 A5E02526190021A RS AA 01 ...
Страница 192: ...Display and diagnostics 12 4 Diagnostics 3SK1 safety relays 192 Manual 04 2013 A5E02526190021A RS AA 01 ...
Страница 242: ...Technical data 13 3 Expansion modules 3SK1 safety relays 242 Manual 04 2013 A5E02526190021A RS AA 01 ...
Страница 258: ...Accessories 3SK1 safety relays 258 Manual 04 2013 A5E02526190021A RS AA 01 ...
Страница 260: ...Appendix A 1 Correction sheet 3SK1 safety relays 260 Manual 04 2013 A5E02526190021A RS AA 01 ...
Страница 261: ......