36 / 44
Siemens
VAV compact controller KNX/PL-Link G..B181.1E/KN
CE1P3547en
Building Technologies
2017-03-23
6.3.2 KNX S-mode commissioning
For KNX S-mode, the usual S-mode commissioning procedures apply for ETS3 or
ETS4. The HMI (push button and LED) conforms to the KNX standard. A short key
press sets the device into programming mode (cf. section
2.4
).
6.3.3 KNX LTE-mode commissioning
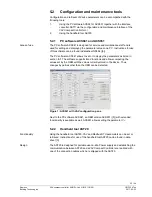
VAV compact controllers, KNX LTE-mode controller and operating units are
connected to the power supply. Refresh, and then open the
ACS790 device list
.
⇓
variant 1 (with collected address labels)
1. Select a VAV compact controller from the device list by ID
(IDs are collected during mounting),
2. Double click the selected row to open the dialog box
“Address assignment”
,
or
⇓
variant 2
1. Set a VAV compact controller to addressing mode
(Push button on device
⇓
LED shines red)
2. In ACS790, click button “Programming mode”
⇓
Address assignment
⇓
enter physical address
⇓
click “Write”
⇓
Enter a physical address and short description for the selected VAV compact
controller,
⇓
Click
“Write”
to close dialog box,
⇓
Repeat steps for all VAV compact controllers for commissioning.
Continue: Further configuration with ACS790.
6.3.4 PL-Link
commissioning
Multiple VAV compact controllers can be connected simultaneously to the power
supply or individually. For plug&play commissioning, the PL-Link capable
automation station must be preconfigured as described in section
6.2.3
.
The PL-Link automation station is online.
The VAV compact controllers are not connected to the power supply.
⇓
Simultaneously connect all VAV compact controllers to the power supply (or
individually as applicable)
⇓
PL-Link automation station and VAV compact controllers execute registration
and address assignment. Configuration is uploaded from the automation
station to the VAV compact controllers.
⇓
Optional: Middle key press for connection test (>2 sec and <20 sec).


