Configuration
Configuring IP settings via NW8202
6
31
Building Technologies
A6V10403182_a_en
Fire Safety & Security Products
30.09.2014
3. Set to ON the correct DIP switch of S101 (DIP switch 1 to use Ethernet 1, DIP
switch 2 to use Ethernet 2) and press the reset button S1.
4. Connect the Service PC to the correct Ethernet port of the NK8237.
5. Access [➙ 25] the NK823x Web Server with Administrator profile.
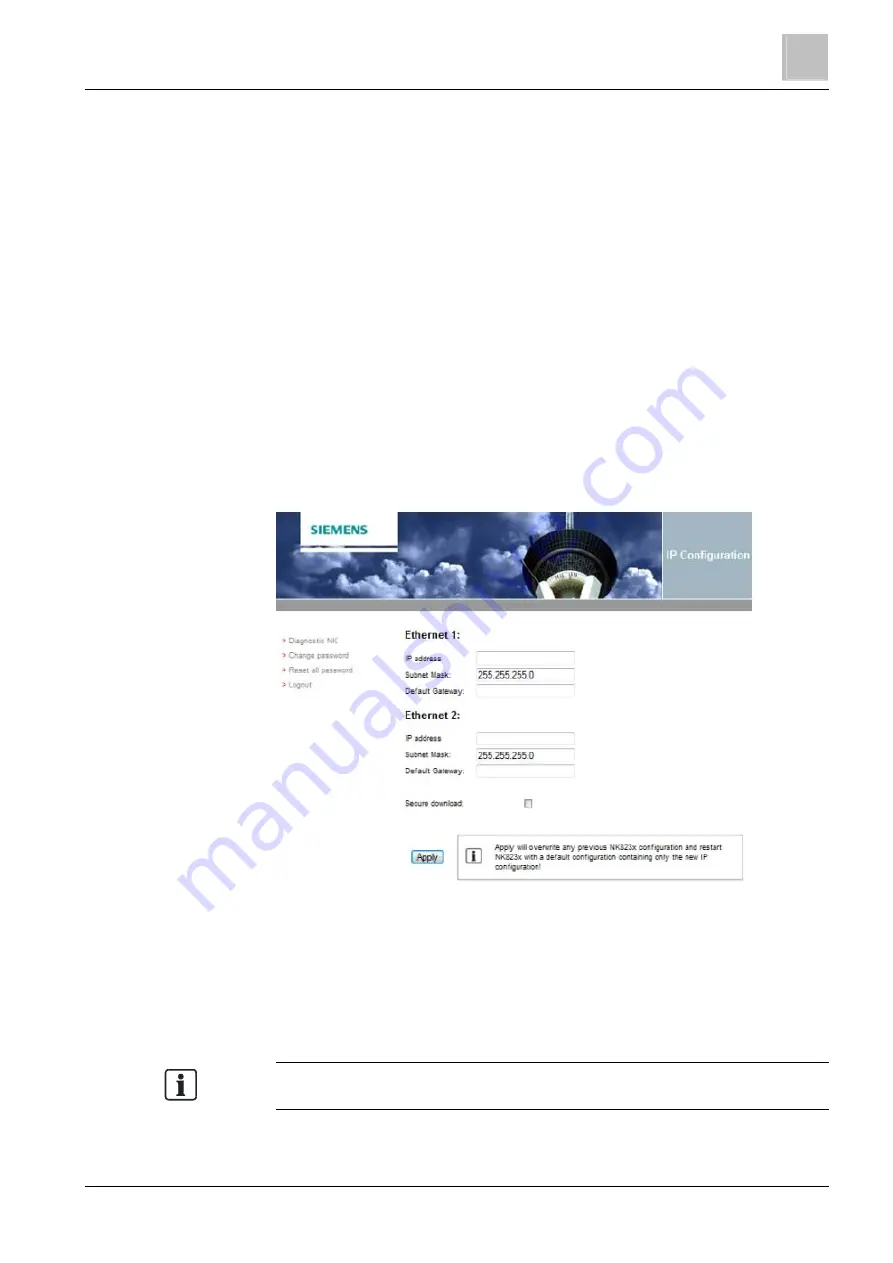
6. Type IP Address, Subnet Mask and Default Gateway for Ethernet 1 and
Ethernet 2 ports.
7.
(Optional) select the Secure Download check box to enable the secure
8. Click Apply.
The NK8237 IP addresses are configured.
NOTICE! The IP configuration will reset all other settings to default values!
If the unit was previously configured, you need to download the
configuration again.
9. Disconnect the NK8237 from the Service PC, and replace the cover.
10. Reset the Service PC IP address back to the original address.
Now the NK8237 is reachable from the DMS, and is ready to receive the full
configuration download, which is performed from Composer.
Configuring IP settings via the NK823x Web Server
6.3
Configuring IP settings via NW8202
This configuration must be performed before the NK8237 can be configured at the
client’s site. This procedure details how to send the IP configuration information;
that is, the IP address, Subnet mask, and Default address to the NK8237 via the
NW8202 Tool.
Note: This configuration procedure can be performed prior to shipping the
NK8237 to the client, or at a later time at the client’s site.


