If the changed fields have been transferred to the device as described, SOPAS will
also display these in the monitor, displaying the infringed fields in yellow. If you wish to
observe another field set, it must first be activated accordingly using the digital inputs.
7.2.4
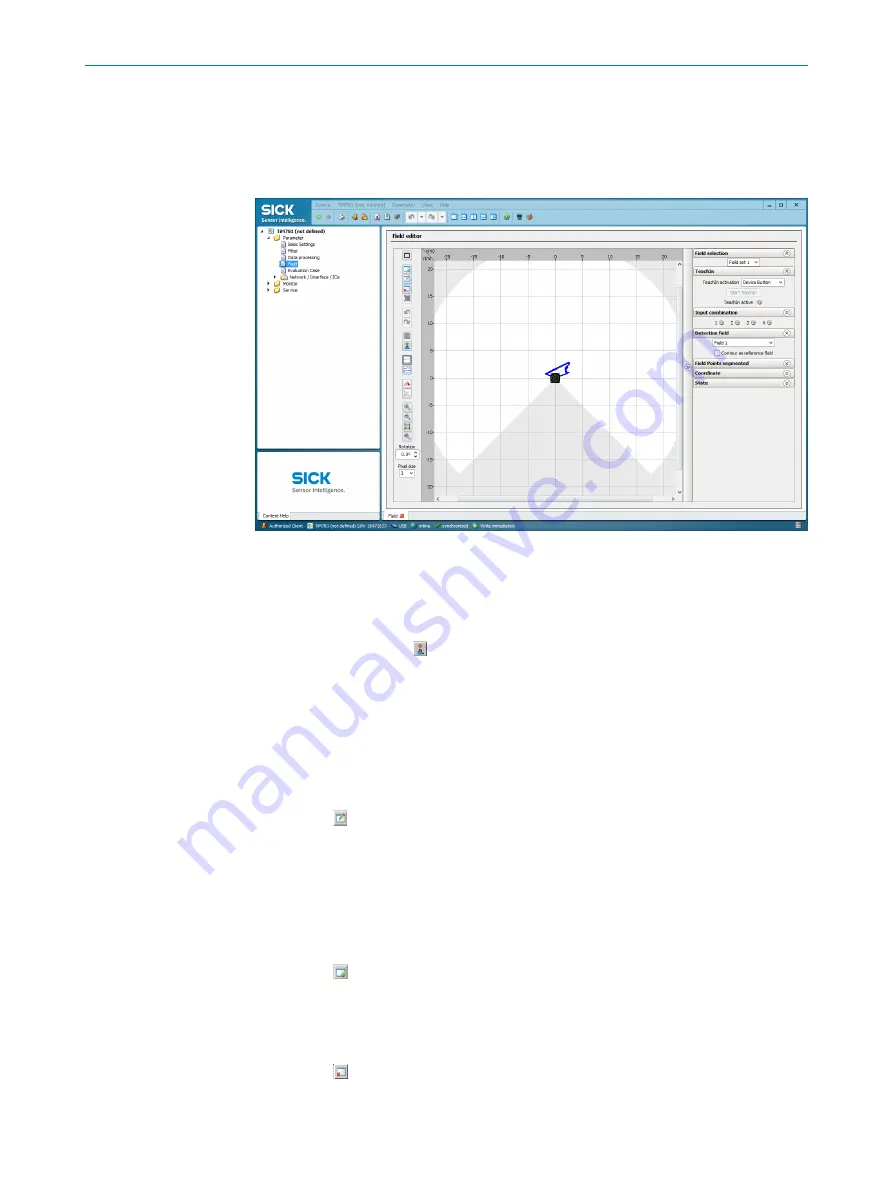
Parameter - fields
Figure 32: Device window: Parameter - fields
The user can change parameters in the right part of the window. SOPAS immediately
transfers these changes to the device (default setting).
However, fields that have been changed in size and shape must always be manually
transferred to the device using the button. All changed parameters are only tempora‐
rily stored in the device for the time being and are not stored on the computer.
In order to optimize the dimensions of the monitoring fields:
1.
Under Field selection, for example, select field set 1.
2.
Select the field to be configured.
3.
Make the required optimizations, see description in the following section.
Shifting field positions
1.
Button .
2.
Click on the green marking rectangle of the desired field position in the outer field.
✓
The color of the marking rectangle changes to blue.
3.
Re-click the rectangle and drag it to the desired position, then release the push‐
button.
✓
SOPAS controls the available positioning area during shifting.
Inserting additional field positions
1.
Button .
2.
Click on the desired position on the limits of the outer field.
✓
SOPAS inserts a new green marker square. This can also be shifted.
Deleting field points
1.
Button .
2.
Click on the green marking rectangle of the field position to be deleted in the outer
field.
7
OPERATION
46
O P E R A T I N G I N S T R U C T I O N S | TiM3xx
8024851//2021-07-21 | SICK
Subject to change without notice


