2
3
1
4
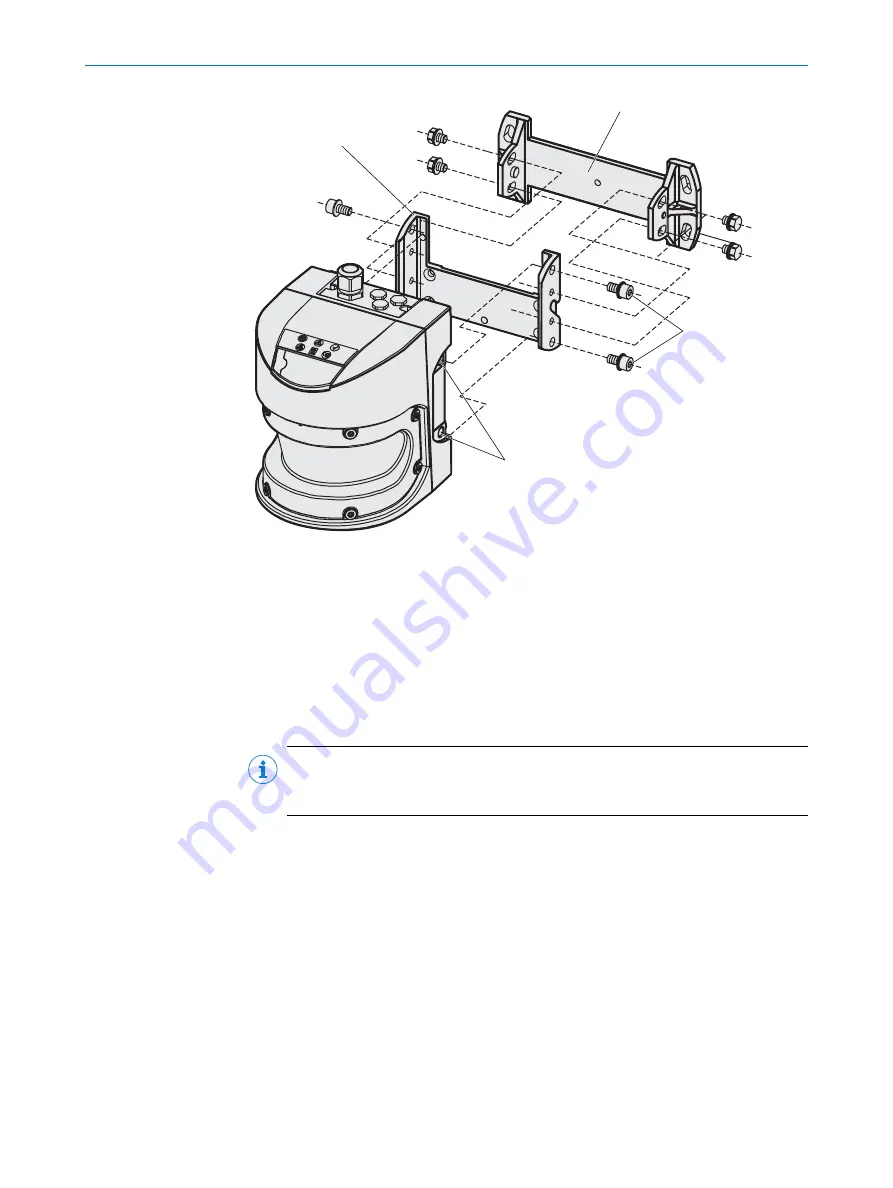
Figure 43: Mounting using mounting kit 2
1
Mounting kit 1
2
Mounting kit 2
3
Threaded mounting holes M8×9
4
Fixing screws
Approach
1.
Mount kit 2 on the mounting surface.
2.
Mount kit 1 on mounting kit 2.
3.
Mount the safety laser scanner on mounting kit 1.
NOTE
Observe the maximum permissible tightening torque of 16 Nm for the M8 × 9
threaded mounting holes.
4.
Adjust the safety laser scanner along the longitudinal and transversal axis.
5.2.4
Mounting using mounting kit 3
Overview
You can use mounting kit 3 (only in conjunction with mounting kit 1 and 2) to mount the
device so that the scan plane is parallel to the mounting surface. This enables, for
example, stable floor mounting or ensures that mounting kit 2 remains precisely
adjustable crosswise on uneven wall surfaces.
MOUNTING
5
8013291/ZA19/2019-11-14 | SICK
O P E R A T I N G I N S T R U C T I O N S | S3000 PROFINET IO, S3000 PROFINET IO-OF
55
Subject to change without notice


