- 13 -
*
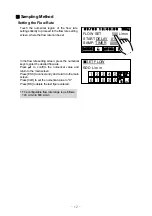
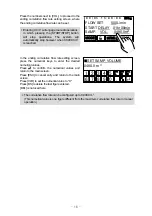
Entering 0 hour and 0 minute will engage manual
operation (i.e. pressing the [START/STOP] button
will immediately start operations)
.
*
The time can be configured up to 99 hours and 59 minutes.
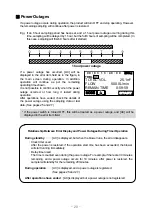
Setting the Operation Start Timer
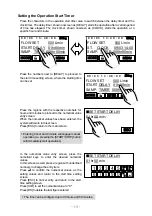
Press the characters in the operation start timer area to switch between the delay timer and the
clock timer. The delay timer, shown onscreen as [DELAY], starts the operation after a certain period
of time has elapsed. The clock timer, shown onscreen as [CLOCK], starts the operation at a
specific hour and minute.
Press the numbers next to [DELAY] to proceed to
the start time setting screen, where the starting time
can be set.
Press the regions with the respective numbers for
hours and minutes to proceed to the numerical value
entry screen.
When the numerical values have been entered, the
system will return to this screen.
Press [ESC] to return to the main screen.
In the numerical value entry screen, press the
numerical keys to enter the desired numerical
values.
In this screen as well, press a region with underlined
numbers to change the entry item.
Press
to confirm the numerical values as the
setting values and return to the start time setting
screen.
Press [ESC] to cancel entry and return to the start
time setting screen.
Press [CLR] to set the numerical value to "0."
Press [BS] to delete the last figure entered.
SET START DELAY
ES
C
0
9
5
4
8
7
3
2
6
1
B
S
CL
R
01 hr 00 min
SET START DELAY
ESC
01 hr 00 min
MENU
FLOW SET 500 L/min
ST. CLOCK 09/03 14:00
SAMP. TIMER 008hr00min
25deg
0 9 / 0 3 1 3 : 4 0 : 0 0
LAST
DATA
MENU
FLOW SET 500 L/min
START DELAY
01hr00min
SAMP. TIMER 008hr00min
25deg
0 9 / 0 3 1 3 : 4 0 : 0 0
MODE
MODE
LAST DATA
MENU
FLOW SET 500 L/min
START DELAY
01hr00min
SAMP. TIMER 008hr00min
25deg
0 9 / 0 3 1 3 : 4 0 : 0 0
MODE
LAST DATA
Содержание 090130-31
Страница 10: ... 8 Rear Exhaust side Handle Exhaust Power connector Circuit protector ...
Страница 47: ... ...


