background image

gEttiNg StARtEd

16

STATUS INDICATORS

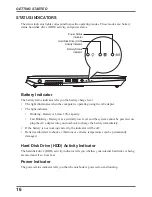
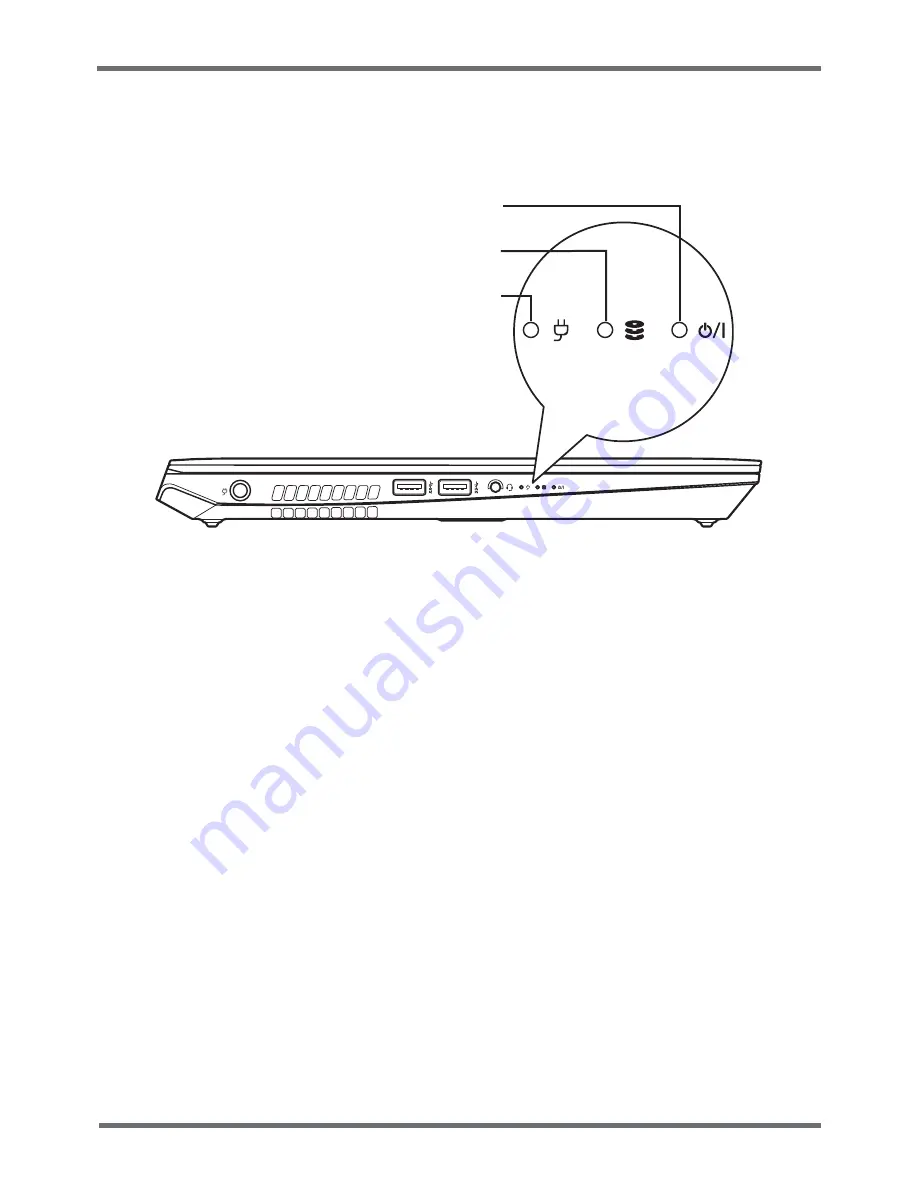
The status indicator lights correspond to specific operating modes. These modes are: battery 

status, hard disk drive (HDD) activity, and power status.

Hard Disk Drive (HDD) 

Activity Indicator

Battery Status 

Indicator

Power Status 

Indicator

Battery Indicator

The battery status indicator tells you the battery charge level.
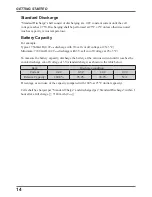
•  The light illuminates when the computer is operating using the AC adapter.
•  The light indicates:

•  Blinking - Battery is below 10% capacity.
•  Fast Blinking - Battery is at a critically low level and the system cannot be powered on, 

plug the AC adapter into your notebook to charge the battery immediately.

•  If the battery is not working correctly, the indicator will be off.
•  Batteries subjected to shocks, vibrations or extreme temperatures can be permanently 

damaged.

Hard Disk Drive (HDD) Activity Indicator

The hard disk drive (HDD) activity indicator tells you whether your internal hard drive is being 
accessed and, if so, how fast.

Power Indicator

The power status indicator tells you that the notebook is powered on and running.

Содержание NL5

Страница 1: ...NL5 USER MANUAL E N G L I S H March 2017 ...

Страница 2: ...RVIEW 7 LEFT SIDE OVERVIEW 8 RIGHT SIDE OVERVIEW 9 BOTTOM OVERVIEW 10 GETTING STARTED 12 Power Sources 12 CONNECTING THE POWER ADAPTER 12 RECHARGING THE BATTERY 13 Starting Your Notebook 15 POWER ON 15 STATUS INDICATORS 16 USING FUNCTION KEYS 17 USING THE TOUCHPAD 18 USING THE CONTROL CENTER 19 TROUBLESHOOTING 22 Identifying the Problem 22 ...

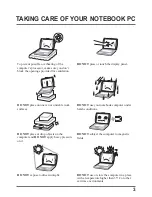
Страница 3: ...play panel DO NOT place on uneven or unstable work surfaces DO NOT use your notebook computer under harsh conditions DO NOT place or drop objects on the computer and DO NOT apply heavy pressure on it DO NOT subject the computer to magnetic fields DO NOT expose to direct sunlight DO NOT use or store the computer in a place with a temperature higher than 35 C or other extreme environments ...

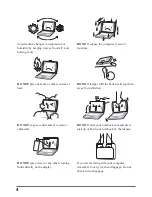
Страница 4: ... of heat DO NOT tamper with the batteries Keep them away from children DO NOT expose to dust and or corrosive chemicals DO NOT slam your notebook shut and never pick up or hold your notebook by the display DO NOT spray water or any other cleaning fluids directly on the display If you are traveling with your computer remember to carry it as hand luggage Do not check it in as baggage ...

Страница 5: ... list to make sure your notebook system is complete Once you have checked and confirmed that your notebook system is complete read through the following pages to learn about all of your notebook components NOTE Depending on the model you purchased the actual appearance of your notebook may vary from that shown in this manual ...

Страница 6: ...before you start 6 Familiarize yourself with the computer OPENING THE DISPLAY PANEL To open the display panel simply lift the lid up When closing it be sure not to slam it shut ...

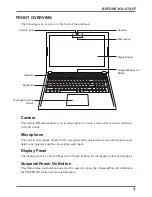
Страница 7: ...ideo chat or video conference with just a click Microphone The built in microphone allows for the reception and transmission of voice and or other audio data to any program capable of accepting such input Display Panel The display panel is a color LCD panel with back lighting for the display of text and graphics Suspend Power On Button This button turns your notebook on and off or puts it to sleep...

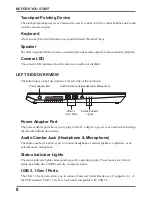
Страница 8: ...ts Status Indicator Lights Audio Combo Jack Headphone Microphone Power Adapter Port Power Adapter Port The power adapter port allows you to plug in the AC adapter to power your notebook and charge the internal Lithium Ion battery Audio Combo Jack Headphone Microphone The audio combo jack allows you to connect headphones external speakers amplifiers or an external mono microphone Status Indicator L...

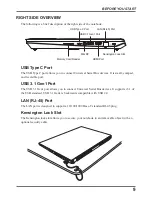
Страница 9: ... Universal Serial Bus devices It is small compact and reversible port USB 3 1 Gen1 Port The USB 3 1 Gen1 port allows you to connect Universal Serial Bus devices It supports v3 1 of the USB standard USB 3 1 Gen1 is backwards compatible with USB 2 0 LAN RJ 45 Port The LAN port is designed to support a 10 100 1000 Base T standard RJ 45 plug Kensington Lock Slot The Kensington lock slot allows you to ...

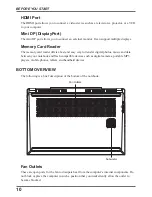
Страница 10: ...d easy way to transfer digital photos music and data between your notebook and flash compatible devices such as digital cameras portable MP3 players mobile phones tablets and handheld devices BOTTOM OVERVIEW The following is a brief description of the bottom of the notebook Fan Outlets Subwoofer Fan Outlets These are open ports for the fan to dissipate heat from the computer s internal components ...

Страница 11: ...11 before you start Subwoofer The 3W subwoofer provides enhanced low frequency tones bass to audio output from your notebook ...

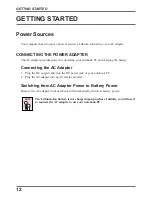
Страница 12: ...charging the battery Connecting the AC Adapter 1 Plug the DC output cable into the DC power jack of your notebook PC 2 Plug the AC adapter into an AC electrical outlet Switching from AC Adapter Power to Battery Power Remove the AC adapter Your notebook will automatically switch to battery power NOTE The Lithium Ion battery is not charged upon purchase Initially you will need to connect the AC adap...

Страница 13: ... power adapter that came with it because each power adapter has its own power output rating Once your computer goes into Suspend mode as a result of a dead battery you will be unable to resume operation until you provide a source of power either from an adapter or a charged battery Once you have provided power you can press the Suspend Power On button to resume operation In Suspend mode your data ...

Страница 14: ...Minimum 7180 mAH 0 2Cmin discharge with 3V cell cut off voltage at 25 3ºC To measure the battery capacity discharge the battery at the various current until it reaches the end of discharge cut off voltage of 3V standard charge as shown in the table below Item Discharge condition Current 0 2C 0 5C 1 0C 2 0C Relative Capacity 100 0 95 0 90 0 N A Percentage as an index of the capacity compared with 1...

Страница 15: ...you risk damaging the hard disk When you power on your notebook it will perform a Power On Self Test POST to check the internal parts and configuration for correct functionality If a fault is found your computer emits an audio warning and or displays and error message Depending on the nature of the problem you may be able to continue by starting the operating system or by pressing F2 key when the ...

Страница 16: ...light indicates Blinking Battery is below 10 capacity Fast Blinking Battery is at a critically low level and the system cannot be powered on plug the AC adapter into your notebook to charge the battery immediately If the battery is not working correctly the indicator will be off Batteries subjected to shocks vibrations or extreme temperatures can be permanently damaged Hard Disk Drive HDD Activity...

Страница 17: ...ay video Each time you press the combination of keys you will step to the next choice The choices in order are built in display panel only both built in display panel and external monitor or external monitor only FN F4 Decreases the screen brightness FN F5 Increases the screen brightness FN F6 Mutes the computer s volume FN F7 Decreases the computer s volume FN F8 Increases the computer s volume F...

Страница 18: ...ithout having to use the on screen cursor to manipulate the up and down scroll bars Clicking Clicking means pushing and releasing a button To left click move the cursor to the item you wish to select press the left button once and then immediately release it To right click move the mouse cursor to the item you wish to select press the right button once and then immediately release it You also have...

Страница 19: ... Next move the object to its new location by moving your finger across the touchpad and then release your finger Using the scroll bar allows you to navigate through a document quickly without using the window s scroll bars This is particularly useful when you are navigating through on line pages USING THE CONTROL CENTER The Control Center application allows you to preview the system parameters and...

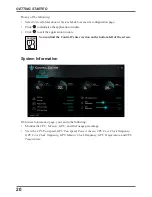
Страница 20: ...ication window CAUTION You can find the Control Center version on the bottom left of the screen System Information On System Information page you can do the following Monitor the CPU Memory GPU and Disk usage percentage View the CPU Fan speed GPU Fan speed Power scheme CPU Core Clock frequency GPU Core Clock frequency GPU Memory Clock frequency GPU Temperature and CPU Temperature ...

Страница 21: ...d Modes such as User define 1 User define 2 User define 3 CAUTION Using User Defined Modes you can create up to three customized modes 2 On the Mode Parameters define the mode values when running the computer on battery power DC and on AC power 3 Click any of the following Default to restore the default values of the currently selected mode Apply Activate to save and apply the settings for the cur...

Страница 22: ...o remove the card from the slot thus eliminating it as a possible cause of failure 4 Make sure that any devices connected to the external connectors are plugged in properly You can also disconnect such devices thus eliminating them as possible causes of failure 5 Turn on your notebook Make sure it has been off at least 10 seconds before you turn it on 6 Go through the boot sequence 7 If the proble...

Отзывы: