20
Installation
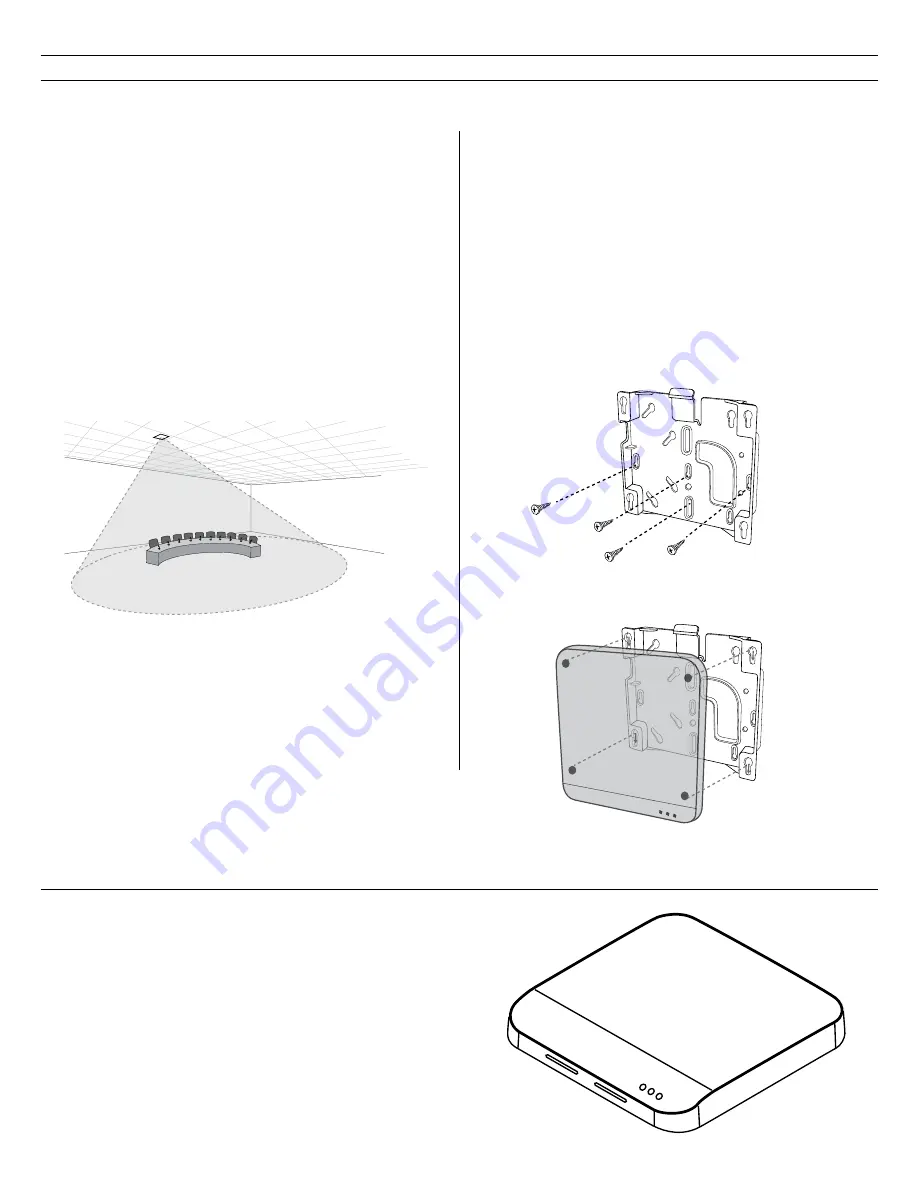
Select a Location
The access point is typically mounted to a ceiling or wall near the
microphone coverage area. For best results, perform a Spectrum
Scan at potential locations to find the optimal placement (see Wireless
Management section for more details).
Use the following best-practices when selecting a location for the device:
• Direct the face of the access point toward the intended coverage area.
• Position the access point so there is nothing obstructing a line of sight to
the microphones.
• Keep device away from large metal objects.
• Keep at least eight feet between access points.
• Mount with its reset button accessible, as it may be useful for
troubleshooting.
Important:
Always perform a "walk around" test to verify coverage
before using a wireless system during a speech or performance.
Experiment with antenna placement to find the optimum location. If
necessary, mark "trouble spots" and ask presenters or performers to
avoid those areas.
Securing to a Wall or Ceiling
Required Equipment
• Two #8 screws at appropriate length*
*Screw Length = Surface thi thread engagement (4.75 mm
max.) + thickness of flat the thickness of the split lock washer
Installation Steps
1. Use the mounting plate as a template and mark the location for the
holes.
2. Drill the holes into the mounting surface.
3. Secure mounting plate to the surface (CAUTION: Do not over-tighten
screws, as this could cause permanent damage to the charging station).
4. Connect of the Ethernet cable to the MXWAPT using the cable route
path.
5. Position the MXWAPT over the keyway slots of the mounting plate and
slide it down into the locked position.
Mount the Access Point Transceiver
The directional antennas of the APT send and receive the RF signal in a cardioid pattern with the greatest sensitivity toward the face of the device. Always
aim this side toward the microphone coverage area.
External Cover for Painting
The Access Point is supplied with an external cover that can be painted to
match the decor of the installation. After it has been painted and dried, it
snaps onto the front plate of the device.
②
①


