64
Messages
2.
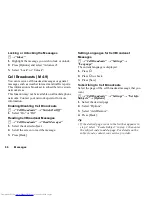
Highlight the “Send” indicator in the lower left of
the screen. Press
B
and select “Send”.
After the message is sent, the message is moved to
the Sent box.
Note
•
The current message size displayed while you are
creating the message is an approximation.
•
If a message cannot be sent for some reason, the
message stays in the Outbox and the “
” is
displayed in stand-by.
Tip
•
To save the message without sending, press [Send]
and select “Save to Drafts” in step 5 in “Creating a
New Message” on page 61.
•
You can send the following items attached to
multimedia messages. Details are given in the
following sections.
•
Gallery data
•
Phonebook entry
•
File (Schedule entry created by Calendar,
Phonebook entry), etc.
•
You can use the template option to help you compose
messages. For details on using this option, see
“Using Templates” on page 45.
•
You can select the message type to send. Highlight
“Send” in the lower left of the screen, press
B
, select
“Message Type”, then select from “Automatic”,
“SMS” and “MMS”.
Sending a Message in the Drafts Box
A
→
“Drafts”
1.
Select the desired tab, SMS/MMS or Email.
2.
Press [Options] and select “Edit & Send”.
3.
Modify the message, if necessary.
4.
Highlight the “Send” indicator in the lower left of
the screen. Press
B
and select “Send”.
Reading Message
Messages you receive are saved in the Inbox.
A
→
“Inbox”
1.
Select the message you wish to view.
Storing the Phone Number of a Sender in the
Phonebook
A
→
“Inbox”
1.
Highlight the message from which you wish to store
the phone number or Email address.
2.
Press [Options] and select “Save Address”.
The new Phonebook entry screen including the
phone number is displayed. For details on creating
a new Phonebook entry, see “Add New” on
page 47.
(M 4-4)
Содержание WX-T81
Страница 1: ......
Страница 11: ...10 Getting Started Getting Started 1 2 3 4 5 6 8 9 11 10 12 13 14 15 18 17 16 7 27 26 25 19 20 21 22 24 23 ...
Страница 147: ...146 Index ...


