Messages
63
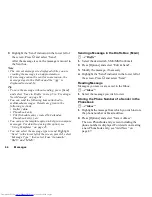
To Attach a Phonebook Entry
1.
In step 5 in “Creating a New Message” on page 61,
highlight the “Others” indicator in the lower right of
the screen. Press
B
and select “Attach Phonebook”.
2.
Select the desired entry.
If you wish to select your own Phonebook entry,
select “My Card”.
3.
Select the desired field.
The selected information is entered.
To Attach a Schedule Entry
1.
In step 5 in “Creating a New Message” on page 61,
highlight the “Others” indicator in the lower right of
the screen. Press
B
and select “Attach
Appointment”.
2.
Select the desired day including a schedule entry
you wish to add.
3.
Select the desired schedule entry.
Using the Sending Options
You can use the message sending options for each type
of message.
1.
Highlight the “Send” indicator in the lower left of the
screen. Press
B
and select “Messaging Settings”.
• “Read Report” (“On”, “Off ”) (MMS): Confirms
whether or not a report is sent notifying the sender
that the message has been read.
• “Delivery Report” (“On”, “Off ”) (SMS/MMS):
Enables or disables Delivery Report when the
message is successfully sent to the recipient.
• “Expiry Time” (“Maximum”, “30 minutes”, “1
hour”, “6 hours”, “1 day”, “1 week”) (SMS/
MMS): Sets Expiry Time for a message to be
saved in the server.
• “Priority” (“High”, “Normal”, “Low”):
Prioritises composed messages.
• “Delivery Time” (“No delay”, “30 minutes”, “1
hour”, “6 hours”, “1 day”, “1 week”) (MMS):
Sets the time the message is delivered after the
Send key is pressed.
Содержание WX-T81
Страница 1: ......
Страница 11: ...10 Getting Started Getting Started 1 2 3 4 5 6 8 9 11 10 12 13 14 15 18 17 16 7 27 26 25 19 20 21 22 24 23 ...
Страница 147: ...146 Index ...

