10
SX51LF7
SX51LF8
10-1
10-2
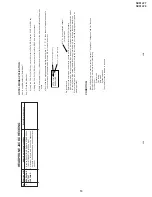
CUT
-OFF
, BACKGROUND
AND SUB-CONTRAST
ADJUSTMENT
No.
Adjusting point
Adjusting procedure/conditions
W
aveform and others
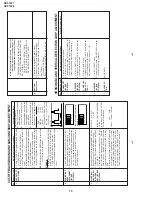
CRT CUT
OFF
ADJUSTMENT
1
.
Switch
TV to VIDEO mode,BLUE BACK OFF
, with-
out VIDEO signal.
2.
Press R/C to set Picture Normal condition.
3.
First of
f the screen by adjust screen variable re-
sistor
.
*4
.
Next, check
AKB circuit function by slowly increase
screen variable resistor until colour raster suddenly
On and Of
f (AKB start function).
5.
Then continue adjust unfil retrace line appear
.
6.
Finally
, slowly decrease the screen variablu resis-
tor unfil screen retrace line (Not Raster) Cut Of
f.
*NOTE
: Must comfirm the
AKB function in set before
continue the next adjustment.
REMARK:
1
.
Before CR
T
Cutof
f adjustment, SUB-BRIGHT
, DRI-
RS/RC/R
W
, DRI-GS/GC/GW
, DRI-BS/BC/BW
,
CUT
-R and CUT
-G must be in initial data.
2.
CR
T
Cutof
f adjustment must be done inside a dark
room.
1
20mS
3.0 0.1 Vdc
0
SUB-BRIGHT
-
NESS
ADJUSMENT
(I2C BUS
CONTROL)
1
.
Call " SUB-BRI" in service mode. (Receive Cross-
hatch pattern with 5 black level windows)
2.
Adjust the " SUB BRIGHT " bus data in order that
the line 1 and 2 have the same darkness whereas
line 3 is one step (data) brighter than line 2 .Fi-
nally data minus 1 to make line 1,2 and 3 are in
same level darkness.
2
1 2 3 4 5
1
1 2 3 4 5
2
line 3 is one step (data) brighter
than line 2.
WHITE BAL-
ANCE SER
V
-
ICE MODE
ADJ. (I2C BUS
CONTROL)
1
.
Receive the "WHITE" pattern with BURST SIGNAL.
2.
Press R/C to set Picture NORMAL condition.
3.
Connect the DC miliammeter between the
TP602
(-) TP603
(+).
4.
Check Beam current should be around 1,350 µA.
5.
Set it to service mode and adjust the " DRI-GS"
(White Point-G), "DRI-BS" (White Point-B) data
to have a colour temperature of 12,300°K (white).
* Note .
6.
Receive "White" pattern, with BURST signal, and
set Brightness
Y
by generator
, to **10cd/m
2
(Minolta CA-100) by reducing Luminate
Y
signal.
7
.
Adjust "CUT
-R" & "CUT
-G" to get 12,300°K .
Then
go back normal mode (High Bright**) to check
colour temperature. If out of range, back to 5.
3
*12300°K
X: 0.272
Y
: 0.275
(MINOL
T
A
COLOUR
ANAL
YZER
CA-100)
*Note:
Above Data can be UP/
DOWN by V
olume key
.
Low
High
**Note:
10cd/m
2
180cd/m
2
*Alternative Procedure:
(1).
Step (1),(2),(3) and (4) are same
as beside procedure.
(2).
Then continue adjust until re-
trace appear and make sure the
colour appear wheather red,
green or blue
(3).
Connect the oscilloscope to re-
lated test points as below which
is based on colour appear at (2)
Colour Appear
T
est
Point
RED
TP 851
GREEN
TP 852
BLUE
TP 853
(4).
Then adjust SCREEN VR until
the tip of signal reach
3Vdc±0.1Vdc
HORIZONT
AL
AND VERTICAL
DEFLECTION LOOP
ADJUSTMENT
No.
Adjusting point
Adjusting procedure/conditions
W
aveform and others
V
-LINEARITY
(I2C BUS
CONTROL)
V
-CENTER
(I2C BUS
CONTROL)
V -
AMP
(I2C
BUS CON-
TROL)
H-CENTER
(I2C BUS
CONTROL)
S-CORREC-
TION
1.
Receive Monoscope Pattern Signal.
2.
Call the "V
-LIN" mode.
3.
Increase or decrease "V
-LIN" by V
olume key till
the horizontal line in the center of monoscope is
just at the position where the blanking starts.
1.
Call the "V
-CENT" mode.
2. Increase or decrease "V
-CENT" by V
olume key
till the picture is centered.
1.
Call the "V
-AMP" mode.
2.
Increase or decrease "V -
AMP" by V
olume key
to set overscan of 8.5% typical.
Adjustment Spec 8.5% range +1% -1%.
1.
Call the "H-CENT" mode.
2.
Increase or decrease "H-CENT" by V
olume key
to center the picture horizontal.
24(FIX DA
T
A
)
1
2
3
4
5
Maximum
beam check
1.
Receive the "Monoscope Pattern" signal.
2.
Press R/C to set Picture NORMAL condition.
3.
Connect the DC miliammeter between
TP603 (+)
and TP602
(–).
(Full Scale: 3 mA Range)
4.
Beam current must be within 1,350 ± 100 µA.
4
Note:
T
h
is
a
d
justment must be done after
warming up the unit for 30 minutes or
longer with a beam current over 700µA).
*
ADJUST
DRI-GC/GW
, DRI-BC/BW
AS FOLLOW
-
ING DA
T
A,
AFTER FINISHING DRI-GS
AND DRI-
BS. *(12300ºK)
DRI-GC/GW DA
T
A
= “DRI-GS”-7 DA
T
A
DRI-RC = 25; DRI-BC = DRI-BS; DRI-R
W = 32
DRI-BW DA
T
A
= “DRI-BS”-7 DA
T
A
Содержание SX51LF7
Страница 31: ...31 SX51LF7 SX51LF8 1 2 3 4 5 6 7 8 9 10 A B C D E F G H I J CHASSIS LAYOUT ...
Страница 38: ...42 SX51LF7 SX51LF8 1 2 3 4 5 6 7 8 9 10 A B C D E F G H I J SCHEMATIC DIAGRAM MODEL SX51LF7 CRT Unit ...
Страница 39: ...43 SX51LF7 SX51LF8 1 2 3 4 5 6 7 8 9 10 A B C D E F G H I J SCHEMATIC DIAGRAM MODEL SX51LF8 CRT Unit ...
Страница 43: ...50 SX51LF7 SX51LF8 1 2 3 4 5 6 7 8 9 10 A B C D E F G H I J BLOCK DIAGRAM 2 3 CRT IGR BLOCK SX51LF7 ...
Страница 44: ...51 SX51LF7 SX51LF8 1 2 3 4 5 6 7 8 9 10 A B C D E F G H I J BLOCK DIAGRAM 3 3 NICAM IGR BLOCK SX51LF8 ...


