background image

45

 LC-43LB371U/LC-50LB371U 43"/50" 1080p, 60Hz, LED Sharp Roku TV

Using your TV

This section provides information on using the day-to-day features of your TV.

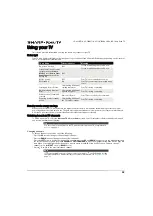
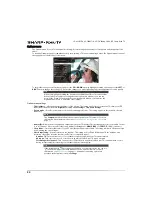
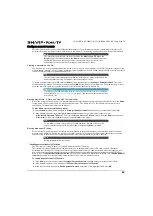
Status light

Your TV has a single status light on the front panel. It goes on and off and blinks in different ways depending on the status of 
the TV, as shown in the following table:

Standby mode energy savings

When you turn off your TV, it may remain in a higher power mode for a few minutes, after which it goes into a very low 
power standby mode. If you turn on the TV again before it has entered the very low power mode, it turns on immediately. 
After the TV goes into the lower power standby mode, it takes a bit longer to start up.

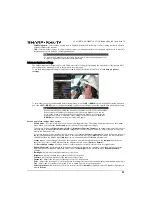
Watching broadcast TV channels

To watch broadcast TV, select the 

Antenna TV

 tile in the 

Home

 screen. Your TV remembers the last channel you watched 

and starts with that channel playing. 

Changing channels

To change channels, you can do any of the following:
• Press the 

UP

 arrow to change to the next higher channel.

• Press the 

DOWN

 arrow to change to the next lower channel.

• Press the 

LEFT

 arrow to display the channel list, and then press the 

UP

 and 

DOWN

 arrows to move the highlight through 

the list one channel at a time. Or press 

REWIND

 and 

FAST FORWARD

 to move the highlight through the list one page at a 

time. When you’ve highlighted the channel you want to watch, press 

OK

. (If you decide you don't want to change 

channels, press the 

RIGHT

 arrow or 

BACK 

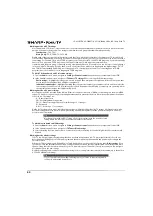
button).

• Press 

 to switch to the previously tuned channel.

TV condition

Status indicator

Meaning

On (screen is active)

Off

Screen is indicating that your TV is on.

Screensaver (screen is active, 
except when the 

Picture 

Mode

 is set to 

Power Saver

Power Saver

 turns off the 

backlight.)

Off

Screen is indicating that your TV is on.

Off (no power)

Off

Your TV is not connected to power.

Off (standby)

On

Your TV is connected to power and ready 
to use.

Starting up from off state

Slow pulsing blink until 
startup completes

Your TV is doing something.

On (receiving update from 
USB)

Slow pulsing blink until 
update completes

Your TV is doing something.

Remote control command 
received

Dims on/off once

Your TV has received your command.

Powering down to standby 
mode

Slow pulsing blink until 
the TV reaches standby

Your TV is doing something.

Tip

You also can use the buttons on the TV panel to select Antenna TV, as explained in 

Buttons

 on page

10

.

Note

If 

 is not available on your remote control, you can use 

 on the Roku App or the 

Jump Back button on a universal remote. For more information, se

Other devices

 on 

page

69

.

Содержание Roku LC-32LB481U

Страница 1: ...ER GUIDE Version 7 0 English Before using your new product please read these instructions to prevent any damage LC 43LB371U LC 50LB371U 1080p 60Hz LED Sharp Roku TV 43 50 CLASS 42 6 Diagonal 49 7 Diagonal ...

Страница 2: ...te control 12 What connection should I use 14 Connecting a cable or satellite box 15 HDMI best 15 AV composite video good 16 Coaxial good 17 Connecting an antenna or cable TV no box 18 Connecting a DVD or Blu ray player 19 HDMI best 19 AV composite video good 20 Connecting a game console 21 HDMI best 21 AV composite video good 22 Connecting a computer 23 Connecting a USB flash drive 24 Connecting ...

Страница 3: ...eaming 40 But what if I didn t connect my TV 41 Setting up Antenna TV 41 Why do I have to set up the TV tuner 41 How do I set up the TV tuner 42 Using your TV 45 Status light 45 Standby mode energy savings 45 Watching broadcast TV channels 45 Changing channels 45 Viewing program information 46 Adjusting settings 46 Switching TV inputs 46 Auto detecting devices 46 Adjusting audio video settings 46 ...

Страница 4: ...ange sound effects volume 58 Configure power settings 58 Power on settings 58 Auto power off settings 58 Configure parental controls 59 Creating a parental control PIN 59 Blocking Movie Store TV Store and News US TV models only 59 Blocking Broadcast TV shows 59 What happens when a TV show is blocked 62 Changing the parental control PIN 62 Resetting parental controls 63 More settings 63 Changing ne...

Страница 5: ...s on a connected TV 68 Getting updates on a non connected TV 68 Other devices 69 Screen Mirroring your phone or tablet 69 Getting and using the Roku mobile app 69 Using a universal remote 69 Maintaining 69 Cleaning your TV cabinet 69 Cleaning your TV screen 69 Troubleshooting 70 FAQ 70 Video and audio 70 Remote control 73 General 74 Roku 75 Network 75 CEC compatible devices 76 Specifications 78 Le...

Страница 6: ...r grabbed WALL OR CEILING MOUNT YOUR TELEVISION ALWAYS contact your retailer about professional installation if you have any doubts about your ability to safely mount your television ALWAYS use a mount that has been recommended by the television manufacturer and has a safety certification by an independent laboratory such as UL CSA ETL ALWAYS follow all instructions supplied by the television and ...

Страница 7: ...e back If you attach a wall mount bracket or TV stand to the back of your TV the bracket or stand must be securely attached using all four holes If you do not use all four mounting holes your TV may fall and cause property damage or personal injury See the documentation that came with your wall mount or TV stand for complete mounting instructions WARNING Electric shock hazard To reduce the risk of...

Страница 8: ...nal Electrical Code ANSI NFPA No 70 provides information with respect to correct grounding of the mast and supporting structure grounding of the lead in wire to an antenna discharge unit size of grounding conductors location of the antenna discharge unit connection to grounding electrodes and requirements for the grounding electrode Note to CATV system installer Article 820 of the National Electri...

Страница 9: ...e home screen No more flipping through inputs or wading through complicated menus You can even personalize the names of each input and move tiles around so your most often used devices and streaming channels are only a click away 4 Search for your favorite movie TV show actor or director Once you re connected to the internet you can easily search across top streaming channels by movie or TV show t...

Страница 10: ... to terms enter codes or provide identifying information Many features work with top mobile devices Please see http support roku com for device compatibility information Let s get started Note Voice search and My Feed are not available in the Roku app for Windows devices Note Using your Roku TV on a restricted public network requires wireless availability and use of your network connected smartpho...

Страница 11: ... center go to Installing the stand If you want to mount your TV on a wall go to Installing a wall mount bracket Installing the stand 1 Carefully place your TV face down on a cushioned clean surface to protect the screen Notes If you plan to wall mount your TV do not install the stand Store the stands and stand screws in case you decide to use the stand in the future ...

Страница 12: ...1080p 60Hz LED Sharp Roku TV 2 Align the TV stands with the screw holes on the bottom of the TV then secure the stands to your TV with the four provided screws Model Screw type Screw length of screws 43 in M4 28 mm 4 50 in M6 36 mm 4 ...

Страница 13: ...our TV has four VESA mounting holes on the back If you attach a wall mount bracket to the back of your TV the bracket must be securely attached using all four holes If you do not use all four mounting holes your TV may fall and cause property damage or personal injury See the documentation that came with your wall mount for complete mounting instructions Your TV is intended to be supported by a UL...

Страница 14: ...TV See the instructions that came with the wall mount bracket for information about how to correctly hang your TV Notes The length of the wall mount screws vary depending on the wall mount bracket you purchased See the instructions that came with the wall mount bracket for screw lengths The mounting holes on the back of the your TV take type M6 screws 43 model 7 87 in 200 mm 50 model 15 74 in 400 ...

Страница 15: ...lowing functions Item Description 1 Remote control sensor Receives signals from the remote control Do not block 2 Status indicator See Status light on page 45 Item Press to 1 INPUT Select among the configured TV inputs Each press moves down one item Also while the Input panel is visible the CH and CH buttons move the highlight up and down Pausing for a few moments selects the highlighted input 2 M...

Страница 16: ...ee Analog audio on page 28 5 SPDIF Connect a digital sound bar speaker system or home theater system to this jack to listen to TV audio through external speakers For more information see Digital audio using the SPDIF jack on page 26 Item Description 1 HDMI1 ARC Connect an HDMI device to this jack For more information see HDMI best on pages 15 19 or 21 or Connecting a computer on page 23 OR Connect...

Страница 17: ...r HDMI and AV inputs 5 sleep First press displays a banner showing the remaining sleep time ifany orSleep timeris off Subsequentpressescycle amongthepresetsleeptimeintervals 30 minutes 1hour 1 5hours 2hours and3hours Once set the Sleep timer remains in effect regardless ofwhat you arewatching 6 rewind When playing streaming videothat supports this feature First press rewindsat 1x speed Second pres...

Страница 18: ...e 12 volume up Turns volume up one settingwith each press Pressandhold toturn volume uprapidly A volume indicator shows the volume level while youare adjustingthe volume andfor a few seconds afterward Note If your TV is muted pressing unmutes the sound Button Description 13 volume down Turns volume down one settingwith each press Pressand holdtoturnvolume downrapidly Avolumeindicatorshows thevolum...

Страница 19: ... audio Good AV composite video requires an audio connection Good Coaxial video audio Connection type and jack Cable connector SPDIF optical digital audio output Analog audio input 3 5mm analog audio output Cautions Check the jacks for position and type before making any connections Loose connections can cause poor audio or video quality Make sure that all connections are tight and secure The exter...

Страница 20: ... all connected devices are turned off 2 Connect the incoming cable from the cable wall jack to the cable in jack on the cable or satellite box 3 Connect an HDMI cable not provided to an HDMI jack on the side or back of your TV and to the HDMI OUT jack on the cable or satellite box 4 Plug your TV s power cord into a power outlet turn on your TV then turn on the cable or satellite box 5 On the Home ...

Страница 21: ...jacks on the back of your TV and to the AV and audio out jacks on the cable or satellite box 4 Plug your TV s power cord into a power outlet turn on your TV then turn on the cable or satellite box 5 On the Home screen press or to highlight the AV tile then press OK Notes Cables are often color coded to match color coded jacks Note When you connect the audio using the L and R audio jacks the audio ...

Страница 22: ...coaxial out jack on the cable or satellite box 4 Plug your TV s power cord into a power outlet turn on your TV then turn on the cable or satellite box 5 Set up the TV tuner to watch broadcast TV See Setting up Antenna TV on page 41 6 On the Home screen press or to highlight the AntennaTV tile then press OK Notes Use a coaxial cable to eliminate interference and noise from radio waves Do not bundle...

Страница 23: ...from radio waves Do not bundle the coaxial cable with the power cord or other cables If the antenna is not installed correctly contact qualified service personnel to correct the problem If the signal level for a channel is weak the picture may be distorted Adjust the antenna or use a highly directional outdoor or set top antenna with a built in amplifier If the picture quality is good on some chan...

Страница 24: ... Make sure that your TV s power cord is unplugged and the DVD or Blu ray player is turned off 2 Connect an HDMI cable not provided to an HDMI jack on the side or back of your TV and to the HDMI OUT jack on the DVD or Blu ray player 3 Plug your TV s power cord into a power outlet then turn on your TV and DVD or Blu ray player 4 On the Home screen press or to highlight the HDMI 1 HDMI 2 or HDMI 3 ti...

Страница 25: ... to the AV OUT jacks on the DVD or Blu ray player 3 Plug your TV s power cord into a power outlet then turn on your TV and DVD or Blu ray player 4 On the Home screen press or to highlight the AV tile then press OK Note Cables are often color coded to match color coded jacks Note When you connect the audio using the L and R audio jacks the audio output is analog AV cable Back of TV AV cable connect...

Страница 26: ... 1 Make sure that your TV s power cord is unplugged and the game console is turned off 2 Connect an HDMI cable not provided to an HDMI jack on the side or back of your TV and to the HDMI OUT jack on the game console 3 Plug your TV s power cord into a power outlet then turn on your TV and the game console 4 On the Home screen press or to highlight the HDMI 1 HDMI 2 or HDMI 3 tile then press OK Note...

Страница 27: ...er cord into a power outlet then turn on your TV and the game console 4 On the Home screen press or to highlight the AV tile then press OK Note Cables are often color coded to match color coded jacks Note Most game consoles come with a special AV cable See the documentation that came with your game console or check the manufacturer s Web site When you connect the audio using the L and R audio jack...

Страница 28: ...f 2 Connect an HDMI cable not provided to an HDMI jack on the side or back of your TV and to the HDMI OUT jack on the computer 3 Plug your TV s power cord into a power outlet then turn on your TV and the computer 4 On the Home screen press or to highlight the HDMI 1 HDMI 2 or HDMI 3 tile then press OK 5 Adjust the display properties on the computer if necessary HDMI cable Back of TV HDMI cable con...

Страница 29: ...en to music stored on a USB flash drive 1 Plug a USB flash drive into the USB port on the side of your TV 2 Press S or T to highlight the Roku Media Player or USB Media Player tile then press OK Caution Do not remove the USB flash drive or turn off your TV while using the USB flash drive You may lose data or damage the USB flash drive USB flash drive Side of TV ...

Страница 30: ... only plays through the headphones Connect the headphones to the jack on the side of your TV Warning Loud noise can damage your hearing When using headphones use the lowest volume setting on your headphones that still lets you hear the sound Note You can also connect a home theater system sound bar or external speaker system to the jack Side of TV ...

Страница 31: ...ot provided to the SPDIF jack on the side of your TV and to the digital optical AUDIO IN jack on the digital speaker system or sound bar 3 Plug your TV s power cord into a power outlet then turn on your TV 4 Turn on the digital speaker system or sound bar then set it to the correct source For more information see the documentation that came with the digital speaker system or sound bar 5 To turn of...

Страница 32: ...s power cord into a power outlet then turn on your TV 4 Turn on the digital speaker system or sound bar then set it to the correct source For more information see the documentation that came with the digital speaker system or sound bar 5 To turn off your TV speakers on the Home menu press or to highlight Settings then press OK Highlight Audio then press OK Highlight TV speakers then press OK Press...

Страница 33: ...ect an audio cable not provided to the jack on the side of your TV and to the AUDIO IN jacks on the analog speaker system or sound bar 3 Plug your TV s power cord into a power outlet then turn on your TV 4 Turn on the analog speaker system or sound bar then set it to the correct source For more information see the documentation that came with the analog speaker system or sound bar Audio cable Anal...

Страница 34: ...evices Refer to the documentation that came with your devices for connection information Just remember to use the best connection types available for the best picture and sound For information about connection types see What connection should I use on page 14 For information about TV settings for home theaters see Using your TV in a home theater on page 65 DVD or Blu ray player Cable or satellite ...

Страница 35: ...t the power cable is unplugged from the power outlet 1 Connect the AC power cord to the power connector on the back of your TV 2 Connect the other end of the cord to a power outlet Caution Your TV should only be operated from the power source indicated on the label Always unplug the power cord from the power outlet when you will not be using your TV for an extended period of time ...

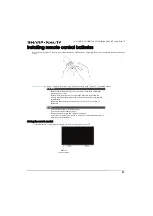
Страница 36: ... sensor on the front of your TV Cautions Batteries should not be exposed to excessive heat such as sunshine heat registers or fire Battery chemicals can cause a rash If the batteries leak clean the battery compartment with a cloth If chemicals touch your skin wash immediately Make sure that batteries are disposed of correctly Do not burn or incinerate Notes Do not mix batteries of different types ...

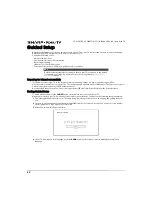
Страница 37: ...er We recommend that your wireless connection supports the IEEE 802 11b g n specification for the best experience Starting Guided Setup To start Guided Setup press the POWER button on the remote control to turn on your TV When you first turn on your TV it will take a few seconds to get itself ready You ll notice the following things happening 1 The status light blinks every time your TV is busy do...

Страница 38: ...s to highlight the name of your wireless network and then press OK to select it Note Store mode configures your TV for retail display and is not recommended for any other use In store mode some features of your TV are missing or limited To switch from one mode to the other you have to perform a factory reset as explained in Factory reset everything on page 67 and then repeat Guided Setup Note Some...

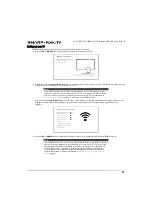
Страница 39: ...k name in the list this option displays the complete list If you still don t see your network name you might have your router configured to provide wireless service as a private network Private network If your wireless network name is hidden it won t appear in the list Select Private network to display an on screen keyboard and use it to enter your network name Unless you changed the factory set n...

Страница 40: ...screen Tips Your TV automatically checks for updates periodically These updates provide new features and improve your overall experience with your TV After an update you might notice that some options have moved and that there are new options or features This User Guide describes version 7 0 To determine your current Roku TV software version go to Settings System About after you complete Guided Se...

Страница 41: ... the OK or RIGHT arrow to proceed Tip Streaming channels from all Roku devices associated with your account are synchronized periodically so all of your Roku devices have the same streaming channels subject to compatibility with the device Why do I need a Roku Account You need a Roku Channel Store account for several reasons It links you your TV and your other Roku devices to the Roku Channel Stor...

Страница 42: ...up and whenever you press on the remote control the Home screen greets you From here you can explore everything your TV has to offer Press the arrow buttons to move around and press OK to select a highlighted item We ve designed your TV to encourage you to explore and you can probably figure out most of the capabilities and settings on your own If you have any questions or difficulties you can fin...

Страница 43: ...ile by highlighting it and pressing Then highlight Move input or Move channel and press OK Use the arrow buttons to move the tile and then press OK to lock it in its new location Rename a TV input tile by highlighting it and pressing Then highlight Rename input and press OK Highlight a new name in the list and then press OK to assign that name to the tile Change the screen theme by going to Settin...

Страница 44: ... highlighting it and pressing Then highlight Move input and press OK Use the arrow buttons to move the tile and then press OK to lock it in its new location Rename a tile by highlighting it and pressing Then highlight Rename input and press OK Highlight a new name in the list and then press OK to assign that name to the tile Add streaming channels by browsing the Roku Channel Store after connectin...

Страница 45: ...ted music live and on demand Tons of live and on demand sports Commercial free kids programming International programming in 22 languages 24x7 news and in depth news commentary Many streaming channels are free Some streaming channels like Cineplex and Amazon Instant Video let you purchase or rent the latest movie releases or popular TV series Some channels such as Netflix or Spotify charge a month...

Страница 46: ...first time you select the Antenna TV tile you have to set up the TV tuner Setting up the TV tuner scans for active channels and adds them to your broadcast TV channel list Why do I have to set up the TV tuner You might be asking Why is this step necessary Good question Not everyone needs to use the TV tuner For example you might have a set top box provided by a cable or satellite company that rece...

Страница 47: ...he Antenna TV tile 3 Read the simple on screen instructions and select Start finding channels 4 If prompted select your time zone You ll only need to do this if your TV can t figure out your time zone from your Internet connection 5 When prompted select whether to add analog channels 3 and 4 to enable you to connect older set top boxes VCRs or game consoles Why does the TV need my time zone The TV...

Страница 48: ...channels are channels from a cable TV provider that you can receive by connecting their cable directly to your TV unscrambled NTSC ATSC and QAM channels if you re the kind of person who is interested in the details In many cases your cable provider probably requires you to use their set top box and connect it to a different input and then use the set top box to tune your cable stations In that cas...

Страница 49: ...ure you are receiving all of the latest channels Broadcasters add and remove channels move channels to different parts of the spectrum and change the power levels of their channels periodically Note You ll have to repeat the channel scan if you remove the Antenna TV tile from the Home screen or perform a factory reset To repeat the channel scan at any time go to Settings TV inputs Antenna TV Scan ...

Страница 50: ...hrough the list one channel at a time Or press REWIND and FAST FORWARD to move the highlight through the list one page at a time When you ve highlighted the channel you want to watch press OK If you decide you don t want to change channels press the RIGHT arrow or BACK button Press to switch to the previously tuned channel TV condition Status indicator Meaning On screen is active Off Screen is ind...

Страница 51: ...UP and DOWN arrows to highlight an option and then press the LEFT and RIGHT arrows to change the setting Adjusting TV settings on page 49 explains each of the settings in detail Switching TV inputs Switch to a TV input to access the device connected to that input for example a Blu ray player Switching inputs is as simple as highlighting the input s tile in the Home screen and pressing OK The video...

Страница 52: ...r dorm room Hotels school dorms conference facilities and similar locations with public wireless Internet access often require you to interact with a web page to authenticate your access These restricted public networks are commonly known as captive portal networks When you select a network of this type the TV automatically detects that additional information is needed and prompts you through usin...

Страница 53: ...hat additional information is needed and displays the following prompt 3 If you selected the correct network highlight I am at a hotel or college dorm and then press OK The TV prompts you to use your smartphone tablet or laptop to complete the connection Tip Your TV can connect to a restricted network only if Device connect is enabled in Settings System Advanced system settings Device connect is e...

Страница 54: ...parate HDMI input and the AV input have their own settings that your TV remembers when you return to that input Your TV also remembers the settings you specify while viewing streaming content Settings menu Use the Settings menu to adjust overall TV settings Press to go to the Home screen and then navigate to Settings TV picture settings You can adjust the following overall TV picture settings from...

Страница 55: ...mer that turns off your TV after the specific amount of time This setting remains in effect even if you stop watching the current input Closed captioning Controls when you see captions This setting is only offered for Antenna TV the AV input and streaming videos Any set value remains in effect across only these inputs Antenna TV Turn captions on or off or set them to appear only when your TV sound...

Страница 56: ...In this way the HDMI 1 input s Movie picture mode can be customized and different than the HDMI 2 input s Movie picture mode and Antenna TV s Movie picture mode Low power is a power saving picture mode that reduces power consumption When you use Low power you ll notice that your TV s picture is a little dimmer than the brightest picture modes Vivid and Normal Use Reset picture settings described b...

Страница 57: ...ur new usage patterns affect the advertisements you see on your TV To reset the advertising identifier 1 From the Home screen menu navigate to Settings System Privacy 2 Highlight Reset advertising identifier Press to view more information about this option When you finishing reading the information press OK to close the More Information window 3 Press OK to reset the advertising identifier and the...

Страница 58: ...ed shows have updates you ll see My Feed 3 Searching for something to watch Searching for movies and shows across multiple streaming channels is one of the unique features of your TV Within a single search operation you can search by Movie name TV show name Actor or director name Streaming channel name Game name You can check which streaming channels are included in Roku Search by going to the Sea...

Страница 59: ...dy added the streaming channels When you narrow down your search to a game or streaming channel you ll see detailed information images and available actions such a list of streaming channels and the cost of getting the item on each channel Following on Roku Rather than watch the show you found in Search you can add it to My Feed and wait until it s available on a particular streaming channel or av...

Страница 60: ...TV enter your Roku PIN code to authorize the charges If you already have a subscription to the streaming channel for example you already subscribe to Netflix or you receive HBO through your cable TV provider you must complete a different simple authorization step to add the streaming channel You only have to complete the authorization or activation step one time when you initially add the streamin...

Страница 61: ...st tile in your Home screen But if you mostly watch one streaming channel you might want its tile to be the first one on your Home screen Rearranging tiles is easy 1 From the Home screen highlight one of the tiles you want to move 2 Press to display a list of options for the type of tile you selected 3 Select Move input The list of options disappears and the highlighted tile shows arrows indicatin...

Страница 62: ... to return to the Home screen The new name and icon are now in effect Remove unwanted tiles It s easy to remove unused TV inputs and unwanted channel or app tiles For example if you never use the HDMI 3 input or if you don t like the weather app you added from the Roku Channel Store you can remove them from your Home screen To remove any tile highlight the input tile in the Home screen and then pr...

Страница 63: ...then change the setting to High Medium Low or Off Configure power settings Power settings let you set up your TV so that it turns on to the location you choose Power settings also help your TV save energy by automatically turning it off under certain conditions Power on settings Power on settings tell your TV what to do when you turn on the power To configure the power on settings from the Home sc...

Страница 64: ...ram to be displayed Parents can configure parental controls to block broadcast TV programs that meet or exceed a specific rating so they cannot be viewed or heard unless the correct parental control PIN is entered Enabling parental control of TV shows The first step in blocking TV shows is to enable parental control of TV shows This setting is provided separately to make it easier for you to turn ...

Страница 65: ...g based on US movie ratings Most movies in the US are rated by the Motion Picture Association of America or MPAA so the ratings are known as MPAA ratings TV broadcast signals carry movie rating data that enables parental controls to block shows that parents don t want others to see The ratings are G General audiences PG Parental guidance suggested PG 13 Parents strongly cautioned for children age ...

Страница 66: ...d on content containing violence language sex or nudity The ratings are G Generally suitable for all age groups 8 Viewers 8 years and older 13 Viewers 13 years and older 16 Viewers 16 years and older 18 Adults only Blocking content with a particular rating also blocks content with a higher rating and unblocking content with a particular rating also unblocks movies with a lower rating To block prog...

Страница 67: ...d to know the PIN code defined when you enabled parental controls as explained in Creating a parental control PIN on page 59 1 Press OK to select Unblock and display a PIN pad 2 Use the arrow buttons to enter your parental control PIN code and then press OK to select Unblock everything After unblocking shows that have been blocked all blocking is disabled for two hours or until you turn off your T...

Страница 68: ... your own wireless signal your TV might pick up signals from your neighbors Now you can do one of the following Select your network name Select the name of your network and then enter your wireless password if requested Scan again If you don t see your wireless network name in the list select Scan again to list all networks in range The first scan listed only the first few strongest wireless signa...

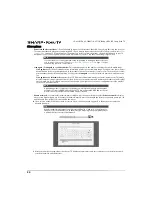
Страница 69: ...change unless you set the Background opacity to a value other than Off Background opacity Choose from a list of opacity settings for the background of the caption This setting determines how much the area behind the caption background shows through the background A value of 100 blocks all of the content behind the background As you move the highlight to each setting you can see a sample of the res...

Страница 70: ...automatically selects the appropriate surround sound capabilities of the device based on the characteristics of the current program Setting up a digital audio connection You can connect your TV to an external amplifier receiver or sound bar by using either of these two connections HDMI ARC The HDMI Audio Return Channel enables your TV to output digital audio on one of its HDMI connectors The conne...

Страница 71: ...ontrol System audio control enables your TV remote control to change the volume and mute state of an amplifier or sound bar connected through HDMI and to display the external device s volume and mute status in your TV s on screen display Your TV automatically turns off its internal speakers and sends volume and mute control signals to an external amplifier when all of the following are true System...

Страница 72: ...pad to enter the code displayed on the screen and then select OK to proceed When the factory reset operation completes your TV restarts and displays the first Guided Setup screen What if I can t access the Factory Reset option It is possible that your TV might get into a state where you cannot access the various menus including the menu option that lets you perform a factory reset operation If tha...

Страница 73: ...nd a computer with an Internet connection To get a system update navigate to Settings System System update The System update screen on a non connected TV gives you the opportunity to connect your TV to the Internet to automatically receive updates We recommend this option if it is possible in your situation To proceed select Connect to the Internet and follow the instructions in But what if I didn...

Страница 74: ...earch without typing More information can be found by going to http support roku com home and searching for mobile app Using a universal remote In many cases you can program your cable or satellite universal remote control to also control your TV You will need to have instructions for programming the remote control handy Check with your cable or satellite provider for instructions For details on h...

Страница 75: ...y Make sure that the video cables are connected correctly and securely to your TV Make sure that the antenna or cable TV is connected correctly and securely See Connecting a cable or satellite box on page 15 or Connecting an antenna or cable TV no box on page 18 Picture settings may be incorrect Adjust the contrast and brightness See the TV brightness option in Settings menu on page 49 or Options ...

Страница 76: ...cing problems If you are using an antenna and the signal strength is low adjust the antenna or use a highly directional outdoor antenna or set top antenna with a built in amplifier Cables are not be connected correctly Make sure that the antenna or cable TV is connected correctly and securely See Connecting a cable or satellite box on page 15 or Connecting an antenna or cable TV no box on page 18 ...

Страница 77: ...od picture but no sound Volume is down or muted Increase the volume Make sure that the sound is not muted Headphones may be connected Make sure that you do not have headphones connected When headphones are connected no sound comes from your TV speakers TV speakers may be turned off If you want sound to play through your TV speakers make sure that your TV speakers are turned on See Turning off the ...

Страница 78: ... power connector and power outlet See Connecting power on page 30 You should see an LED in the front of the TV panel when a button on the remote is pressed If you see no LED activity try another outlet or check your fuse box Line of sight obstructed Make sure that no objects or pets are obstructing the line of sight from the remote control to the remote sensor on the front of your TV See Aiming th...

Страница 79: ...is set up See Setting up Antenna TV on page 41 One or more channels do not display Channels may be blocked or hidden Make sure that the channels are not blocked See Blocking unrated programs on page 61 Make sure that the channels are not hidden The channel may have been deleted from the channel list You can add the channel back to the channel list See Edit broadcast TV channel lineup on page 57 Th...

Страница 80: ...t your TV is connected to a working power outlet and that your TV is turned on See Connecting power on page 30 I cannot screen mirror to my TV TV on older software Always keep your TV updated See Getting system updates on page 68 Go to Settings System Software update Mobile device not supported Screen mirroring is a beta feature currently so a select set of devices will work Symptom Possible cause...

Страница 81: ...correctly Make sure that the HDMI cable is connected securely to your TV and the device Volume may be too low or muted Make sure that the volume on your TV and the device is turned up and not muted TV speakers may be turned off If you want sound to play through your TV speakers make sure that your TV speakers are turned on See Turning off the speakers on page 65 Connected device may not be a CEC d...

Страница 82: ...e that the HDMI cable is connected securely to your TV and the device Make sure that the device is connected to your TV with an HDMI cable Connected device may not be a CEC device Make sure that the device is a CEC device See the documentation that came with the device CEC control may not be set up correctly Make sure that your TV has searched for CEC devices See Discovering connected CEC devices ...

Страница 83: ...ast ratio list value 120 000 1 120 000 1 TVBrightness minimum cd m2 240 nits 240 nits Comb filter 3d y c digital 3d y c digital Response time 8 ms 8 ms Horizontal viewing angle 178 178 Vertical viewing angle 178 178 HDMI suggested resolutions 1080p 1080i 720p 480p 480i Analog NTSC Digital ATSC 8 VSB Clear QAM HDMI 1 side 2 back EDID compliant HDCPcompliant Component video No Composite video 1 back...

Страница 84: ... in any manner or medium any content or services displayed through the Sharp Roku TV You expressly acknowledge and agree that your use of the Sharp Roku TV is at your sole risk and that the entire risk as to satisfactory quality performance and accuracy is with you The Sharp Roku TV and all third party content and services are provided as is without warranty of any kind either express or implied S...

Страница 85: ... to this EULA and where appropriate the applicable third party licenses you have a non exclusive non transferable license to run the Software and any updated versions provided to you by Roku only in and as incorporated in the Television This is a license and not a sale You may not a copy assign sublicense lease sell or rent the Software b distribute or otherwise transfer the Software except as inc...

Страница 86: ...class action waiver in this provision is deemed invalid or unenforceable or if an arbitration is allowed to proceed on a class basis then neither you nor Roku are entitled to arbitrate the Claims This arbitration provision is subject to the Federal Arbitration Act The arbitrator s award shall be binding on you and Roku and may be entered in any court of competent jurisdiction 3 Information on AAA ...

Страница 87: ... equipment into an outlet on a circuit different from that to which the receiver is connected Consult the dealer or an experienced radio TV technician for help Warning Changes or modifications not expressly approved by the party responsible for compliance could void the user s authority to operate the equipment Cables Connections to this device must be made with shielded cables with metallic RF EM...

Страница 88: ...metic damage Damage due to acts of God such as power surges Accident s Misuse unintentional or intentional Abuse unintentional or intentional Negligence Commercial purposes use including but not limited to use in a place of business or in communal areas of a multiple dwelling condominium or apartment complex or otherwise used in a place of other than a private home Modification of any part of the ...

Страница 89: ...upport 855 544 2030 This product is manufactured for Best Buy China Ltd as trustee for Best Buy China and distributed and warranted by Best Buy Purchasing LLC 7601 Penn Avenue South Richfield Minnesota U S A 55423 3645 under brand license by SHARP Corporation 2016 Best Buy China LTD All rights reserved SHARP is a registered trademark of Sharp Corporation used under license by SHARP Corporation All...

Отзывы: