42
E
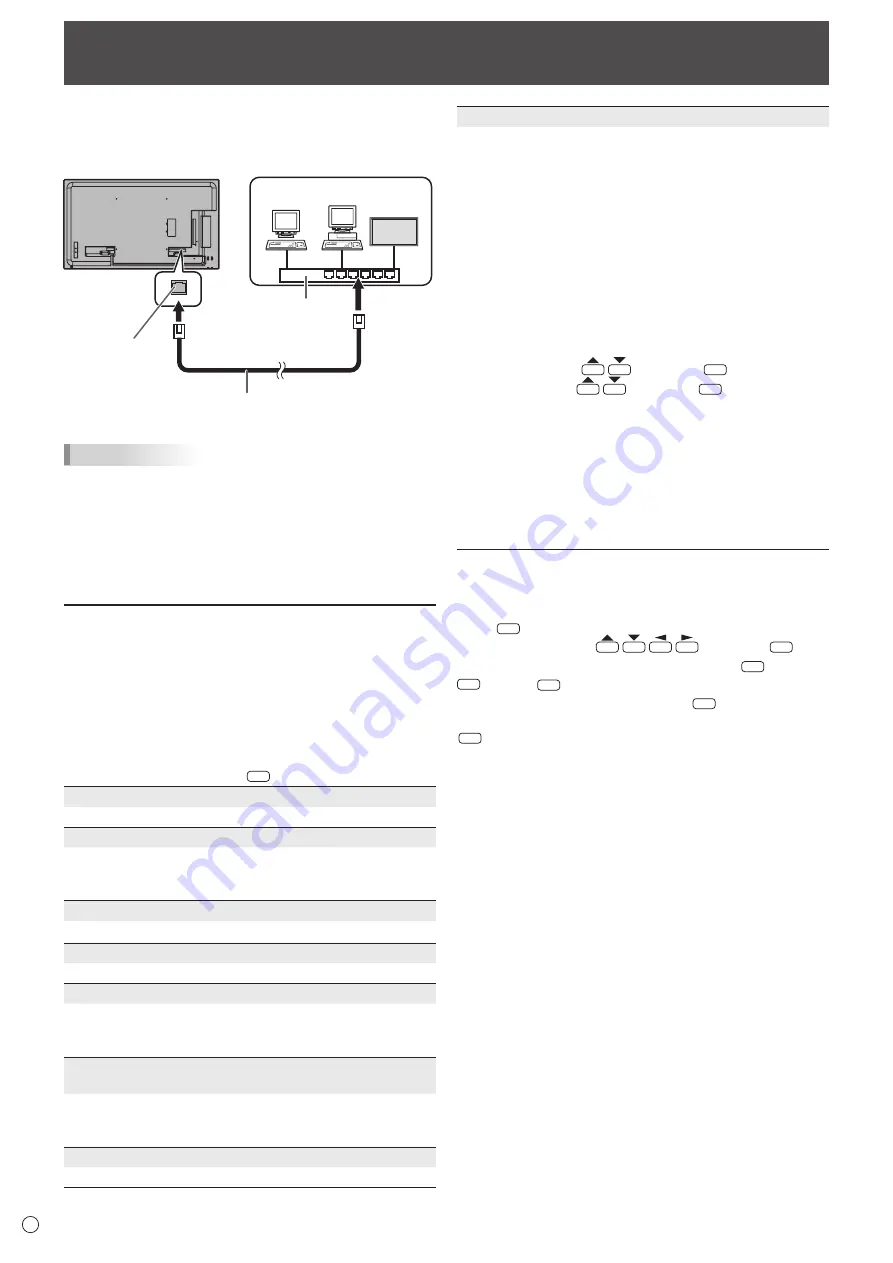
Your monitor can be connected to a LAN allowing you to
control it from a computer on the LAN.
The connection requires a commercially available LAN cable
(UTP cable, Category 5, straight through).
LAN terminal
LAN cable (commercially available, straight)
Network (LAN)
Hub
TIPS
• You must assign an IP address to the monitor by following
the procedures in “Settings to connect to a LAN”. (See the
description below.)
• To control the monitor via LAN, set POWER SAVE MODE
to OFF.
• If you will use RS-232C and LAN control simultaneously,
maintain an interval of at least 100 ms between commands.
Settings to connect to a LAN
Set the monitor’s IP address and subnet mask to match the
settings of your LAN.
The settings depend on the configuration of your LAN. Ask
your LAN administrator for details.
■ To set on the monitor
Set the LAN SETUP options. (See page 29.)
After setting each item, press
RETURN
.
SETTING DISPLAY
Shows the LAN SETUP settings.
DHCP CLIENT
If your LAN has a DHCP server and you wish to obtain an
address automatically, change this setting to ON.
To set the address manually, set this to OFF.
IP ADDRESS
If the DHCP CLIENT is set to OFF, specify an IP address.
SUBNET MASK
If the DHCP CLIENT is set to OFF, specify the subnet mask.
DEFAULT GATEWAY
If the DHCP CLIENT is set to OFF, specify the default
gateway.
If you are not using a gateway, specify “0.0.0.0”.
DNS 1
DNS 2
Specify the DNS server address if the DHCP CLIENT is set
to OFF.
If you are not using a DNS server, specify “0.0.0.0”.
NETWORK NAME
Enter the device name.
Controlling the Monitor with a computer (LAN)
FTP SETTING
Specify this setting to copy auto play files (see page 22) from
your computer over LAN to a USB flash drive or SD memory
card connected to the monitor using “Content Distributor”.
• For information on copying files, see the operation manual
for “Content Distributor”.
• During copying (“distribution” in Content Distributer), do
not perform any actions that access the USB flash drive or
SD memory card. The data may not be saved correctly.
• Do not use any client software other than “Content
Distributor”.
1. Enter the password.
• When you select the FTP setting, a password entry
screen will appear. The default password is “admin”.
2. Select FTP with
and press
ENTER
.
3. Select ON with
and press
ENTER
.
4. If needed, change the user name and password.
• The default user name is admin, and the default
password is admin. If you change these, also change
FTP USERNAME and FTP PASSWORD in “Content
Distributor”.
• The function cannot be used if the user name and/or
password is blank.
• The password entered here is also the password that is
used in step (1).
■ Character input
Input characters as follows when it is necessary.
Press
ENTER
to display the text entry table.
Select a character with
, and press
ENTER
to
enter. To change the characters entered, press
DISPLAY
(Red),
MODE
(Green),
SIZE
(Yellow).
To delete the previous character, press
MUTE
.
When you are done entering characters, select [OK] and press
ENTER
.


