20
E
Touch pen actions
Only use touch pens that are used with this monitor (supplied
touch pens or optional PN-ZL06).
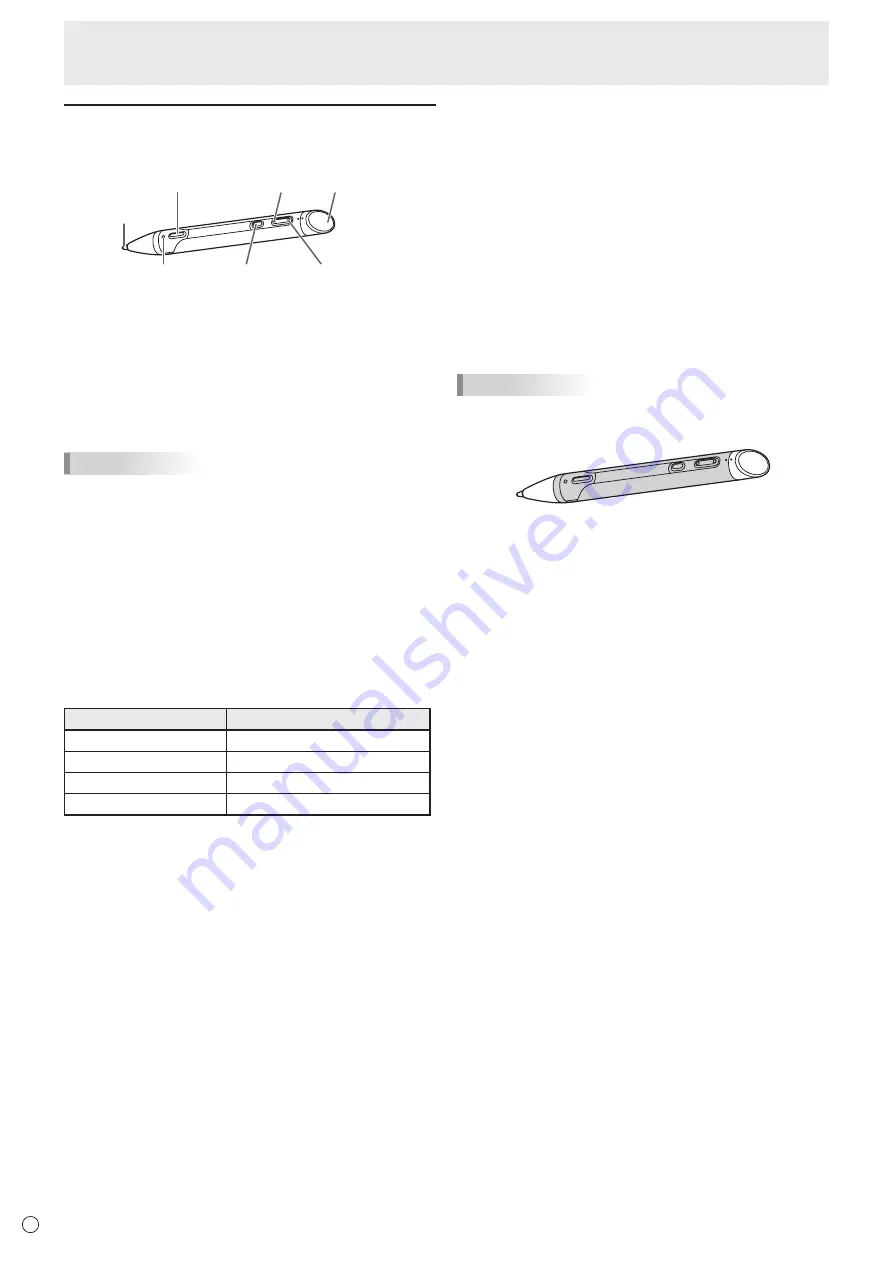
Function button 1 Function button 2 Pointer part
Function button 3
Function button 4
LED
Pen tip
• Function button 1 : Pen Software Link
• Function button 2 : PageDown
• Function button 3 : PageUp
• Function button 4 : Left click/Pointer (See the description
on the right.)
You can change the functions that are assigned to the function
buttons. For details, see the Touch pen Management Tool
Operation Manual.
TIPS
• In Mac and Chrome OS, function buttons below can be
used.
- Function button 2 : PageDown
- Function button 3 : PageUp
- Function button 4 : Left click
Using as a digitizer pen
A touch pen can be used as a Windows digitizer pen.
To use a touch pen as a digitizer pen, change the “Touch
Operation Mode Setting” to “Pen digitizer Mode” in the
Touch pen Management Tool. For details, see the Touch pen
Management Tool Operation Manual.
LED
Status
Status of the touch pen
Lights off
Standby mode
White flashing
Operation mode*
Orange flashing
Battery is low
Light blue flashing
Not connected to touch pen adapter
If the touch pen is not moved for an extended time, it
automatically enters the standby mode and the LED turns
off. (Factory setting. When the touch pen is moved, it
automatically enters operation mode.)
* You can change how the LED lights when the touch pen is in
operation mode. For details, see the Touch pen Management
Tool Operation Manual.
In the Pen Software, the LED lights in the set touch pen
color. For details, see the Pen Software Operation Manual.
Palm cancel mode function
When you write with the touch pen, you can set the touch
panel to not respond when your hand touches the screen. (See
page 36.)
Pointer
You can use the touch pen as a pointer.
1. Point the pointer part of the touch pen toward the screen.
2. While pressing function button 4, move the touch pen.
• The pointer icon appears on the screen, and moves as
the touch pen is moved.
• To stop the pointer, release the function button 4.
You can change the pointer icon settings while using the
pointer function (while pressing function button 4).
• Function button 2 while pressing function button 4 :
The shape of the pointer icon changes.
• Function button 3 while pressing function button 4 :
The color of the pointer icon changes.
For details, see the Touch pen Management Tool Operation
Manual.
TIPS
• Hold the touch pen at the part indicated below. Incorrect
operation may result if your finger is too close to the tip of
the pen.
• Hold the touch pen with your bare hand.
The screen will not respond if you wear a glove.
• If the LED blinks orange, the battery is low. Promptly
replace with a battery (commercially available).
If the LED does not illuminate, check if the battery is
depleted.
• Use function buttons near the front of the screen. If too far
away, operation will not be possible.
• Press function buttons slowly and firmly. If pressed too
quickly, the action may not be recognized.
• The line may break if the touch pen battery is low or there
is other wireless equipment in operation nearby.
• The touch pens cannot be used as touch pens and digitizer
pens at the same time. When the setting is changed in
the
Touch pen Management Tool, all touch pens become
digitizer pens. Multiple digitizer pens cannot be used at the
same time.
n
Touch pen settings
Touch pen settings are configured using the Touch pen
Management Tool. For details on the settings and how to use
this software, see the Touch pen Management Tool Operation
Manual.
Touch Panel / Touch Pen Preparations


