ENGLISH OPERATION MANUAL
98
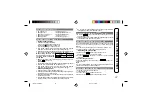
5. To perform group recording, hold down the GROUP button for 1
second or more. “GROUP” appears.
●
When the group recording is not performed, hold down the
GROUP button for 1 second or more to extinguish “GROUP”.
●
The group recording setting will be retained until the setting
is changed.
6. Start playback on the external equipment.
7 To adjust the recording level, move the M button toward
5
or
4
.
8. Pause the playback of the connected equipment.
9. Press the MODE button repeatedly to select a recording mode.
Analog recording or recording from a microphone:
●
Adjust the recording level so that the volume meter has a
maximum swing between –4 and 0 dB.
●
Once the recording level is adjusted, it is retained even after
recording is stopped.
Digital recording:
●
You can change the level within a range of –12 to +12 dB, at
1dB intervals.
●
When recording from CDs, adjust the level at around “DL 0”. When
recording from tuner, etc., adjust the level at around “DL +8”.
●
Once the recording level is adjusted, it is retained even after
recording is stopped.
10.Move the M button toward
06
.
11. Start playback on the connected equipment to start recording.
■
To interrupt recording
Move the M button toward
06
while recording.
●
The track numbers increase by one.
●
To resume recording, move the M button toward
06
again.
■
To stop recording
Move the M button toward
while recording.
■
Checking the remaining recording time
While recording or the recording is paused, hold down the
MODE/-DISP button for 1 second or more.
●
To return to the initial display, press the MODE/-DISP button
again.
■
To turn off the power
Move the M button toward
while in the stop mode.
●
The unit is turned off after TOC information is recorded.
■
Adding tracks to the previously recorded group
1. Hold down the REC button for 2 seconds or more.
2. Press the GROUP button for 1 second or more to display
“GROUP”.
3. Press the M button.
The unit enters the menu select mode.
4. Move the M button toward
5
or
4
to select “G (GrSELECT)”.
First letter of the menu
Contents of the menu
5. Move the M button toward
5
or
4
to select the group
which you want to add tracks to and press it.
6. Start recording.
●
Select the menu within 25 seconds.
●
If you press the CLEAR button during the operation, the previ-
ous display appears.
●
To cancel the operation, move the M button toward
.
■
About the TOC (Table of Contents)
After any recording or editing function, “TOC” is displayed.
If you move the M button toward
while in the stop mode,
TOC is automatically recorded and the unit is turned off.
●
While recording, “TOC” flashes on the display.
●
While the “TOC” is displayed, you cannot eject the MD. Eject it
after turning off the power.
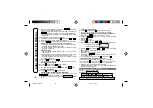
GROUP PLAYBACK (pages 32 – 33)
Playback of group-recorded MDs
Example:
1
Group1
A
2
B
3
C
D
4
1
E
2
F
3
G
4
H
1
Group2
Group3
Non-group
I
2
J
3
K
4
L
4
P
1
M
2
N
3
O
Group-recorded tracks
Tracks that are not group-recorded are “Non-group” (“Non-Gr” is displayed).
*P96˜107-ENGLISH
01.6.30, 1:34 PM
98

