background image

INSTALLING THE PRINTER DRIVER AND UTILITIES (SOFTWARE INSTALLATION)

6

8

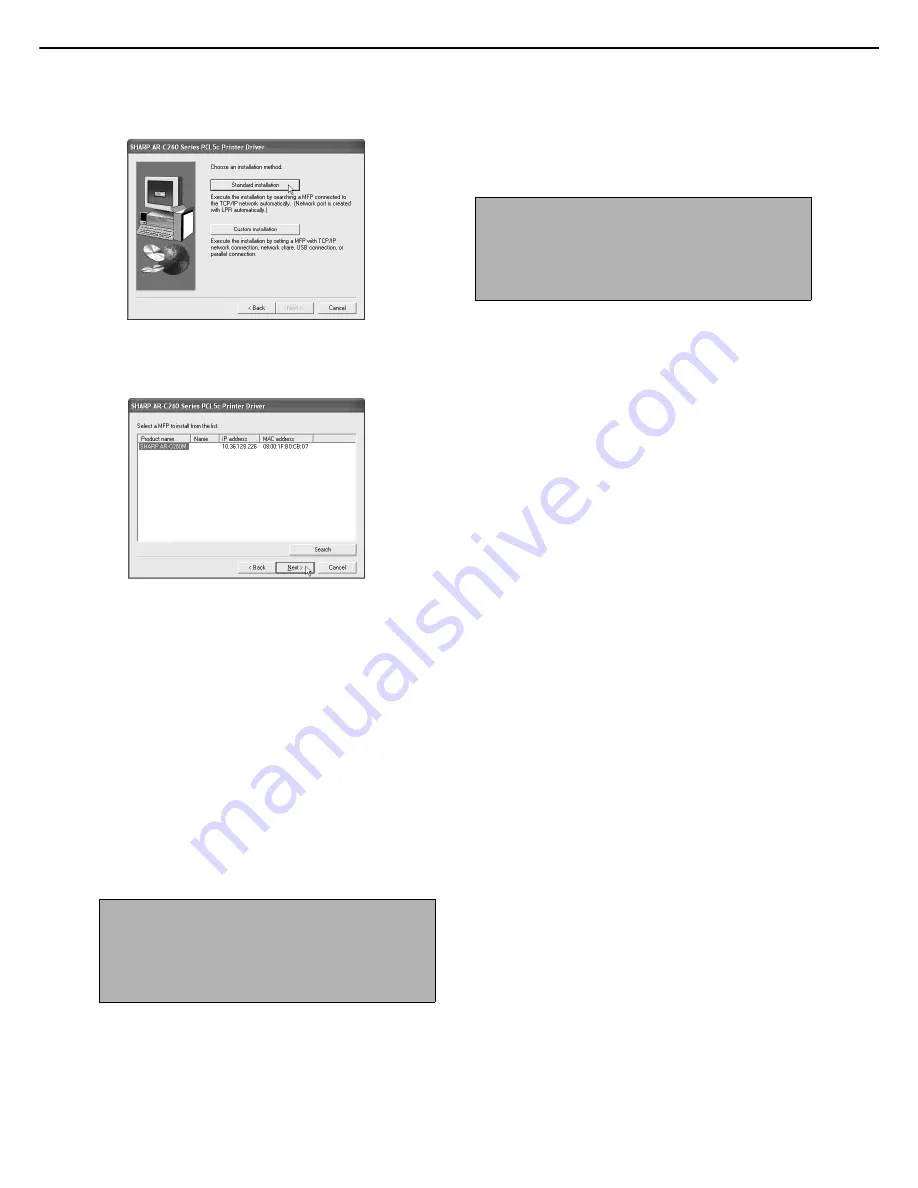
Click the [Standard installation] button.

9

The printers that are connected to the
network are found. Select the machine and
click the [Next] button.

If the machine is not found, make sure that the
machine is powered on and connected to your
computer and then search again. If the machine is
still not found, use the custom installation
procedure to directly specify the IP address (page
7).

10

A confirmation window will appear. Read
the contents and click the [Next] button. 

11

Select the printer driver being installed as
the default printer and click the [Next]
button.

12

Check the contents of the window and
click the [Next] button.

Installation of the printer driver begins.

13

When the finish setup window appears,
click the [OK] button.

14

Click the [Close] button.

This completes the installation. 

NOTE

When you are using Windows 2000/XP

If a warning message regarding the Windows logo
test or digital signature appears, be sure to click the
[Continue Anyway] or [Yes] button.

NOTE

A message prompting you to restart your computer
may appear after installation is finished. If this
message appears, click [Yes] to restart your
computer.

Содержание AR-C260

Страница 1: ...om the product Before installing this product be sure to read the installation requirements and cautions sections of the Operation manual for general information and copier operation Be sure to keep all operation manuals handy for reference including this manual the Operation manual for general information and copier operation and operation manuals for any optional equipment which has been install...

Страница 2: ...in the U S A and other countries Netscape Navigator is a trademark of Netscape Communications Corporation Macintosh Power Macintosh Mac OS LaserWriter and AppleTalk are registered trademarks of Apple Computer Inc IBM PC AT and PowerPC are trademarks of International Business Machines Corporation Pentium is a registered trademark of Intel Corporation PCL is a trademark of the Hewlett Packard Compan...

Страница 3: ...ration panel of the machine troubleshooting and key operator programs for the printer function Help files installed with the software in the PRINTER UTILITIES CD ROM Printer Status Monitor Help file Printer Administration Utility Help file Online Manual contained in the User Software CD ROM Print Server Card Online Manual SOFTWARE LICENCE The SOFTWARE LICENCE will appear when you install the softw...

Страница 4: ...rmat that are viewed using Adobe Acrobat Reader To view online manuals specify the path as follows where R represents the letter of your CD ROM drive R Printer_Manual English Prn_AR_C260 pdf R Scanner_Manual English Scn_AR_C260 pdf 1 To use the printer status monitor and the printer administration utility the machine must be connected to a network 2 The Twain driver SHARP MFP TWAIN C can only be u...

Страница 5: ...2 to page 13 Installation method 4 Follow the procedure on page 14 to page 15 1 To install the software from the CD ROM you must have administrator rights 2 Windows 95 and Windows NT 4 0 are not supported 2 Installation of the printer driver using the Add printer wizard Installation of the printer driver using the Add printer wizard is performed using basic Windows procedures To install the printe...

Страница 6: ...nd server client network connections in a Windows environment If the machine is used in a different network environment see the online manual Print Server Card User s Manual on the User Software CD ROM Network connection examples Computer running Windows Computer running Windows Computer running Windows Computer running Windows Computer running Windows Computer running Windows Example Windows NT 4...

Страница 7: ...ick the CD ROM icon In Windows 95 98 Me NT 4 0 2000 double click My Computer and then double click the CD ROM icon 3 Double click the SETUP icon 4 The Licence Agreement window will appear Make sure that you understand the contents of the licence agreement and then click the Yes button 5 After confirming the message in the Welcome window click the Next button 6 Click the Printer Driver button To vi...

Страница 8: ...r Read the contents and click the Next button 11Select the printer driver being installed as the default printer and click the Next button 12Check the contents of the window and click the Next button Installation of the printer driver begins 13When the finish setup window appears click the OK button 14Click the Close button This completes the installation NOTE When you are using Windows 2000 XP If...

Страница 9: ... software click the Display Readme button If you wish to install the printer status monitor or the Scanner driver click the Utility Software button in this window and then click the Printer Status Monitor or Scanner Driver button and follow the on screen instructions If you installed the scanner driver read the separate supplementary manual after completing installation If you wish to install the ...

Страница 10: ...click the Next button 15Check the contents of the window and click the Next button Installation of the printer driver begins 16When the finish setup window appears click the OK button 17Click the Close button This completes the installation NOTE When you are using Windows 2000 XP If a warning message regarding the Windows logo test or digital signature appears be sure to click the Continue Anyway ...

Страница 11: ...er port to be used click the Add Network Port button 4 Select the network printer that is shared and click the OK button Ask your network administrator for the server name and printer name of the machine on the network 5 In the printer port selection window verify the network printer that is shared and click the Next button 6 When you are asked to select the model name select the model that you ar...

Страница 12: ...rive 2 Click the start button select My Computer and then double click the CD ROM icon 3 Double click the SETUP icon 4 The Licence Agreement window will appear Make sure that you understand the contents of the licence agreement and then click the Yes button 5 After confirming the message in the Welcome window click the Next button 6 Click the Printer Driver button To view detailed information on t...

Страница 13: ...machine to your computer an interface cable page 18 If you are using a USB cable make sure the machine power is turned on and then connect the cable If you are using a parallel cable turn off both the machine power and the computer power and then connect the cable Turn the machine power on first and then turn on your computer The machine is found and a plug and play window appears 15Installation o...

Страница 14: ...ied the machine into your CD ROM drive 2 Double click My Computer and then double click the CD ROM icon 3 Double click the SETUP icon 4 The Licence Agreement window will appear Make sure that you understand the contents of the licence agreement and then click the Yes button 5 After confirming the message in the Welcome window click the Next button 6 Follow the on screnn instructions 7 Click the Pr...

Страница 15: ...p window appears click the OK button 15When the finish installation window appears click the Close button When the message Now connect the interface cable to the PC This will finalize the driver s installation and settings appears click the OK button 16Make sure that the machine power is turned on and connect the machine to your computer with a USB cable page 18 The machine is found and a plug and...

Страница 16: ...machine into your CD ROM drive 2 Double click My Computer and then double click the CD ROM icon 3 Double click the SETUP icon 4 The Licence Agreement window will appear Make sure that you understand the contents of the licence agreement and then click the Yes button 5 After confirming the message in the Welcome window click the Next button 6 Click the Printer Driver button To view detailed informa...

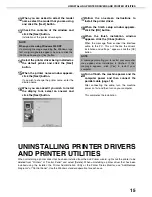
Страница 17: ...r s installation and settings appears click the OK button 20Turn off both the machine power and the computer power and then connect the parallel cable page 18 After connecting the cable turn the machine power on first and then turn on your computer This completes the installation UNINSTALLING PRINTER DRIVERS AND PRINTER UTILITIES When uninstalling a printer driver that has been installed from the ...

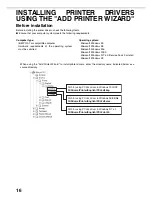
Страница 18: ...tem Microsoft Windows 95 Microsoft Windows 98 Microsoft Windows Me Microsoft Windows 2000 Microsoft Windows NT 4 0 Service Pack 3 or later Microsoft Windows XP When using the Add Printer Wizard to install printer drivers enter the directory name indicated below as a source directory Path for using PCL5c driver in Windows 2000 XP R Drivers Printer English PCL5c 2kxp Path for using PCL5c driver in W...

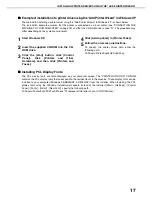
Страница 19: ...ters and Other Hardware and then click Printers and Faxes 4 Click Add a printer in Printer Tasks 5 Follow the on screen instructions To specify the printer driver path enter the following path R Drivers Printer English PCL5c 2kxp Installing PCL Display Fonts The PCL display fonts are fonts displayed on your computer screen The PRINTER UTILITIES CD ROM contains the PCL display fonts that correspond...

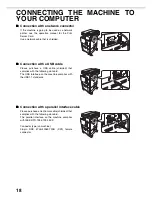
Страница 20: ...h a USB cable Please purchase a USB cable shielded that complies with the following standard The USB interface on the machine complies with the USB1 1 standards Connection with a parallel interface cable Please purchase a Centronics cable shielded that complies with the following standard The parallel interface on the machine complies with IEEE STD 1284 1994 ECP Connector type on machine 36 pin DD...

Страница 21: ......

Страница 22: ......

Страница 23: ...should be removed from the cut off plug and the plug destroyed immediately and disposed of in a safe manner Under no circumstances should the cut off plug be inserted elsewhere into a 13A socket outlet as a serious electric shock may occur To fit an appropriate plug to the mains lead follow the instructions below IMPORTANT The wires in this mains lead are coloured in accordance with the following ...

Страница 24: ...INSTALLATION GUIDE for printer PRINTED IN CHINA 2004A KS1 TINSE2381FCZ1 ...

Отзывы: