AR-5012 UNPACKING AND INSTALLATION 5 - 1
[5] UNPACKING AND INSTALLATION
1. Copier installation
Improper installation may damage the copier. Please note the following
during initial installation and whenever the copier is moved.
Caution: If the copier is moved from a cool place to a warm place, con-
densation may form inside the copier. Operation in this condi-
tion will cause poor copy quality and malfunctions.
Leave the copier at room temperature for at least 2 hours
before use.
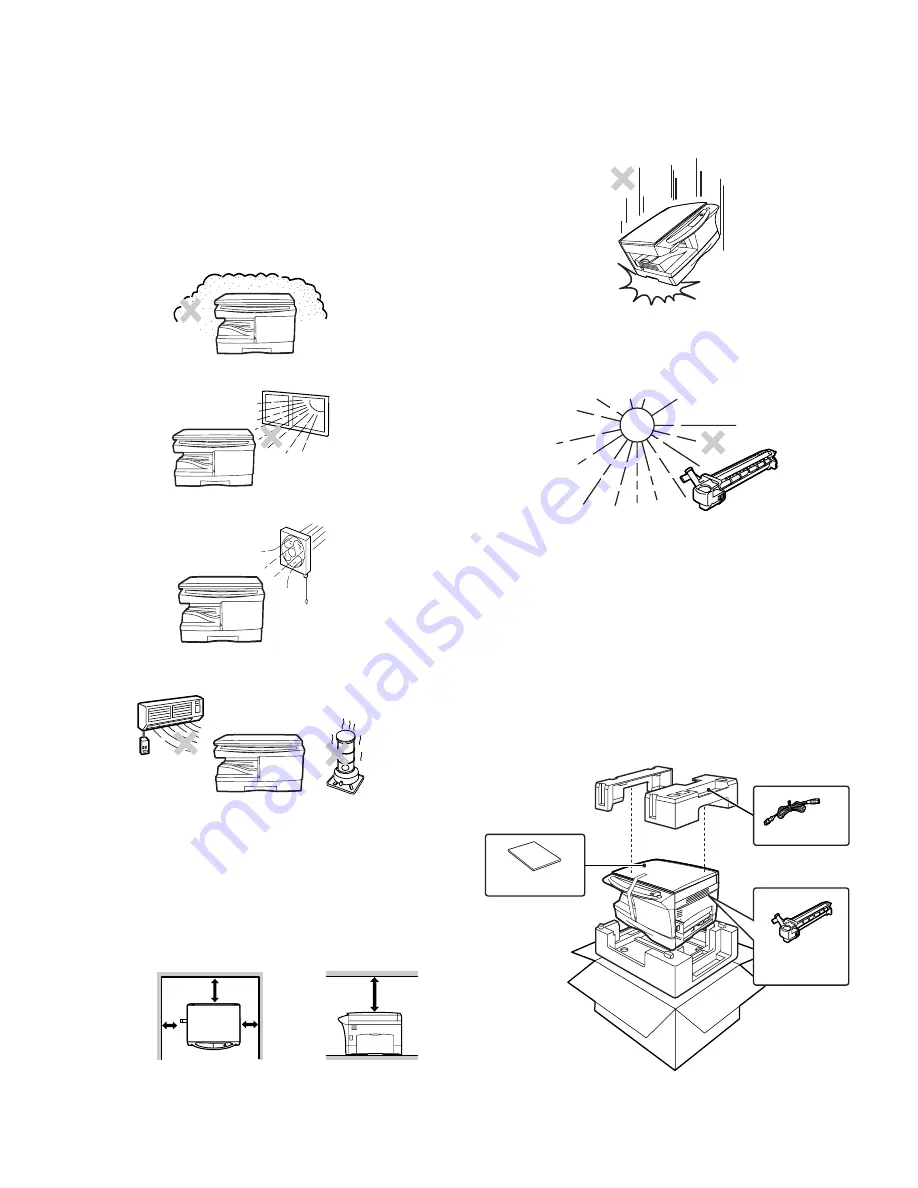
Do not install your copier in areas that are:
• damp, humid, or very dusty
• exposed to direct sunlight
• poorly ventilated
• subject to extreme temperature or humidity changes, e.g., near an
air conditioner or heater.
The copier should be installed near an accessible power outlet for easy
connection.
Be sure to connect the power cord only to a power outlet that meets
the specified voltage and current requirements.
Also make certain the outlet is properly grounded.
Be sure to allow the required space around the machine for servicing
and proper ventilation.
2. Cautions on handling
Be careful in handling the copier as follows to maintain the perfor-
mance of this copier.
Do not drop the copier, subject it to shock or strike it against any
object.
Do not expose the drum cartridge to direct sunlight.
Doing so will damage the surface (green portion) of the drum cartridge,
causing poor print quality.
Store spare supplies such as drum cartridges and TD cartridges in a
dark place without removing from the package before use.
If they are exposed to direct sunlight, poor print quality may result.
Do not touch the surface (green portion) of the drum cartridge.
Doing so will damage the surface of the cartridge, causing poor print
quality.
3. Checking packed components and
accessories
Open the carton and check if the following components and accesso-
ries are included.
20cm (
20cm (8")
10cm
(4")
10cm
(4")
Drum cartridge
(installed in unit)
Operation manual
Power cord
Содержание AR-5012
Страница 94: ...AR 5012 CIRCUIT DIAGRAM 14 11 1 A B C D E F G H 2 3 4 5 6 1 2 3 4 5 6 3 POWER SUPPLY POWER SUPPLY 120V 127V ...
Страница 95: ...AR 5012 CIRCUIT DIAGRAM 14 12 A B C D E F G H 6 7 8 9 10 11 6 7 8 9 10 11 ...
Страница 97: ...AR 5012 CIRCUIT DIAGRAM 14 14 A B C D E F G H 6 7 8 9 10 11 6 7 8 9 10 11 ...
Страница 106: ......


