


Get Started
7
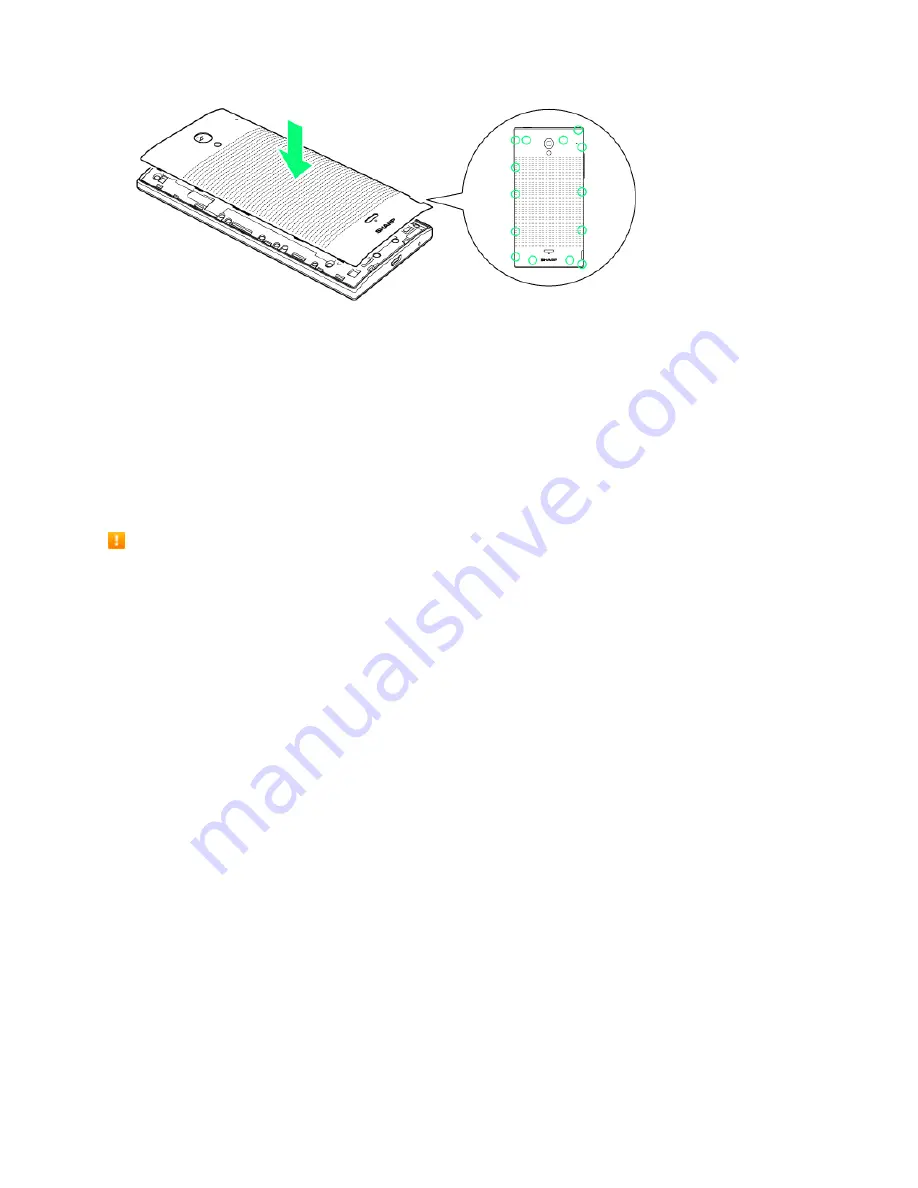
l
Press firmly where marked ○ so there are no gaps. Be careful not to press excessively and
damage the battery cover.
Phone Memory/SD Card
Your phone supports the use of an optional SD card (not included) to expand its storage capacity. It
supports cards up to 128 GB. Some cards may not operate properly with your phone.
The phone’s memory is also available for storing data such as system data, apps, and captured
pictures/videos.
SD Card Cautions
Content saved in phone memory/SD card:
Content stored in the phone’s memory/SD card
may be altered/lost due to accidents, malfunctions, repairs, phone replacement, or other
handling. Back up important information regularly. The company is not responsible for damages
from stored information that is altered/lost.
Reading/Writing Data:
Never power off while reading or writing data.
SD cards used on other mobile phones:
A message indicating there is app data on the SD
card may appear if the SD card was used on another mobile phone (a device prior to model
upgrade, etc.). First transfer the data on the SD card to your phone with the following steps to
use the data.
l
Drag the status bar down and open the notifications window > Follow the instructions in the
message.
l
If there are folders and files with the same names in phone memory as on the SD card, a
prompt appears for whether to overwrite folders/files. Use adequate caution, as overwritten
data in phone memory cannot be restored.
Battery Level:
A low battery charge may prevent reading/writing to the SD card.
Phone memory:
By default, pictures, videos, and other media files captured on your phone are
saved in phone memory. Applications (third-party) you download may indicate that files are
saved to an SD card, however, they are saved to your phone’s memory.
Handling SD Card:
Use/store SD cards away from the reach of infants. May cause choking if
swallowed.
Содержание AQUOS Crystal
Страница 1: ...Available applications and services are subject to change at any time ...
Страница 19: ...Get Started 10 2 Touch Storage 3 Touch Unmount SD card ...
Страница 22: ...Get Started 13 2 Touch Storage ...
Страница 23: ...Get Started 14 3 Touch Erase SD card 4 Touch Erase SD card ...
Страница 50: ...Basic Operations 41 2 Touch About phone ...
Страница 66: ...Basic Operations 57 2 Touch Google and then touch New 3 Enter your First name and Last name and then touch ...
Страница 77: ...Basic Operations 68 2 Touch ...
Страница 79: ...Basic Operations 70 2 Touch ...
Страница 81: ...Basic Operations 72 1 From home touch Play Store 2 Touch ...
Страница 83: ...Basic Operations 74 2 Touch ...
Страница 90: ...Basic Operations 81 3 Touch Software update to open the Sharp software update 4 Touch Yes ...
Страница 92: ...Basic Operations 83 2 Locate the software version read only field ...
Страница 105: ...Your Phone Interface 96 The new shortcut is added to the folder ...
Страница 150: ...Phone App 141 You will see the Import export contacts menu 3 Touch Export to storage ...
Страница 179: ...Smart Phone and Smart Contacts Apps 170 The contact s detailed listing appears 3 Touch Delete Contact ...
Страница 180: ...Smart Phone and Smart Contacts Apps 171 4 Touch OK The contact is deleted ...
Страница 198: ...Messaging and Internet 189 2 On the Messaging screen touch the conversation that you want to delete ...
Страница 217: ...Messaging and Internet 208 1 From home touch Settings Add account 2 Touch Google and then touch Existing ...
Страница 218: ...Messaging and Internet 209 3 Enter your Gmail username and password and then touch OK 4 Touch Not now ...
Страница 222: ...Messaging and Internet 213 The email inbox opens 2 Touch Settings ...
Страница 233: ...Messaging and Internet 224 2 Touch an account you want to delete 3 Touch Remove account ...
Страница 282: ...Useful Features 273 3 Type a name email number or circle or select a contact from the list ...
Страница 330: ...Connectivity 321 2 Touch Wi Fi The Wi Fi settings menu appears 3 Touch the Wi Fi slider to turn Wi Fi on ...
Страница 342: ...Connectivity 333 2 Touch Bluetooth The Bluetooth settings open 3 Touch the Bluetooth slider to turn Bluetooth on ...
Страница 348: ...Connectivity 339 3 Touch Share Bluetooth ...
Страница 351: ...Connectivity 342 The Nearby devices menu opens 2 Touch Enable wireless display Enabled when the check mark is entered ...
Страница 381: ...Settings 372 2 Touch VPN activated ...
Страница 403: ...Settings 394 2 Touch Security The Security settings menu opens 3 Touch Encrypt microSD ...
Страница 404: ...Settings 395 4 After an alert that all data will be erased appears touch OK ...
Страница 405: ...Settings 396 5 Touch Erase SD card 6 Enter a PIN or password you have set and then touch Next ...
Страница 408: ...Settings 399 2 Touch Security The Security settings menu opens 3 Touch Screen lock ...
Страница 422: ...Settings 413 2 Read the reset all information page and touch Reset phone ...


