Main code Sub code
Content
51
2
Resist amount adjustment (Outline)
Used to adjust the contact pressure of paper onto the copier resist roller and the RSPF resist roller.
(Operation/Procedure)
1. When this simulation is executed, the currently set value is displayed.
2. In a machine with the multi paper feed unit installed, press the copy mode select key, and each setting mode and
display are changed sequentially.
In a machine with the single paper feed unit installed, press the copy mode select key, and each setting mode
and display are changed sequentially.
∗
The selected adjustment mode is indicated by the lamps as follows:
3. Enter the adjustment value with the 10-key and press the SORT key. Then the set value is stored and a copy is
made.
4. Press the clear key to store the set value and exit the simulation.
∗
Machine with the multi manual paper feed
∗
Machine with the single manual paper feed
77
1
Memory reverse position adjustment in duplex copy (Operation/Procedure)
1. When this simulation is executed, the currently set correction value is displayed.
2. Enter the correction value with the 10-key, press the START key, and the entered value is stored. (Correction
value: 1 - 99, Correction zero: 0 or 50)
∗
For front printing in S-D mode and even-page printing in D-S mode, reverse memory copying made from the rear
edge of the document.
If, therefore, it is required to adjust the print position of the output image, perform the following procedure.
When the document is scanned in the direction shown in the figure below, images are printed from the scanning
rear edge in reverse memory copying.
If the print head is shifted, set the reference chart so that the reference position is at the rear edge section and
use this simulation so that the lead edge of the print image is fitted.
Printing is started at the print start position in the direction from the bottom to the top of image data stored in the
memory.
When the simulation set value is entered, the scanning end position and resultantly the bottom data position stored
in the memory are changed to adjust the image lead edge position.
2
Duplex copy rear edge void adjustment (Operation/Procedure)
1. When this simulation is executed, the currently st value is displayed in top digits. (Center value: 50 However, Set
value 50 = Set value 0)
2. Press the copy mode select key to select the set mode and the display.
3. Enter the adjustment value with the 10-key and press the START key, and the entered value is stored and a copy
is made.
4. Press the CLEAR key, and the entered value is stored and the simulation is terminated. (An increase in the set
value by 1 corresponds to an increase in void amount by 0.1 mm.)
Adjustment mode
Display lamp
Main cassette paper feed
AE, Main cassette lamp
2nd cassette paper feed
AE, 2nd cassette lamp
Manual paper feed
AE, Manual paper feed lamp
RSPF document feed (front)
AE, TEXT, PHOTO lamp
RSPF document feed (back)
AE, TEXT lamp
Duplex back
TEXT, PHOTO lamp
Adjustment mode
Display lamp
Main cassette paper feed
AE, Main cassette lamp
Manual paper feed
AE blinking (Main cassette lamp ON)
RSPF document feed (front)
AE, TEXT, PHOTO lamp
RSPF document feed (back)
AE, TEXT lamp
Duplex back
TEXT, PHOTO lamp
Adjustment mode
Lamp ON
Image cut rear edge void amount (RSPF)
AE lamp
Paper rear edge void amount
TEXT lamp
Rear edge void
Print rear edge
Document transport direction
Scanning lead edge
Scanning end position
(Default: Void (1) is cut off.)
Scanning rear edge
Scanning direction
Paper transport direction
Print lead edge
Lead edge void (1)
Print start position
AL-1550
8 – 2
Содержание AL-1550
Страница 12: ... 10 ELECTRICAL SECTION 1 Block diagram A Overall block diagram AL 1550 10 1 ...
Страница 13: ...B Main PWB block diagram AL 1550 10 2 ...
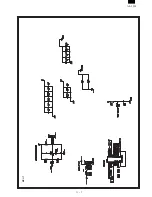
Страница 16: ... 11 CIRCUIT DIAGRAM MCU 1 AL 1550 11 1 ...
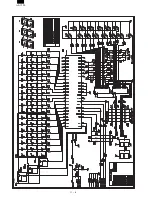
Страница 17: ...MCU 2 AL 1550 11 2 ...
Страница 18: ...MCU 3 AL 1550 11 3 ...
Страница 19: ...MCU 4 AL 1550 11 4 ...
Страница 20: ...MCU 5 AL 1550 11 5 ...
Страница 21: ...MCU 6 AL 1550 11 6 ...
Страница 22: ...MCU 7 AL 1550 11 7 ...
Страница 23: ...OPU AL 1550 11 8 ...
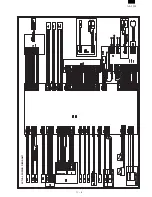
Страница 24: ...ACTUAL WIRING DIAGRAM 1 AL 1550 11 9 ...
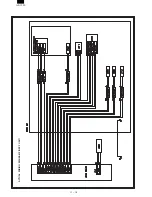
Страница 25: ...ACTUAL WIRING DIAGRAM 2 DSPF UNIT AL 1550 11 10 ...


