background image

DISCHARGE PIPE

Caution:

Please check local legislation regarding

discharge from on board toilets- i.e. holding tanks etc. 

SANIMARIN

®

macerates and pumps at the same time.

A seacock 

should be fitted where the SANIMARIN

®

discharges through a skin fitting. (see drawing  )

Caution:

For units installed below the water line, the

discharge pipe should rise at least 50 cm above water

level and be fitted with an anti-syphon valve 

prior to 

falling and discharging through the skin fitting.

SANIMARIN

®

does not require the use of chemicals in order

to operate.

2

7

7

FAULT FINDING

12

REMEDIES

• Dismount and clean the discharge pipe.

• Modify the installation.

• Check the route of the discharge pipe.

• Disconnect the motor supplies.
• Close water admission.
• Remove the motor unit.
• With a hook, withdraw all the matters being

able to obstruct the rotation of macerator.

• With a tool, turn the turbine in the 

2 directions until rotation is free.

• Re-connect the motor supplies and press on

the pneumatic contactor to control the 
correct operation of unit.

• Open water supply.

If the macerator remains blocked, we 
recommend to call the SFA service.

• Replace the control console
• Call an SFA service agent.

• Clean the filter of the solenoid valve.

• Check the water admission pipe.

• Open the stop valve.
• Change the solenoid valve.

PROBABLE CAUSES

• The evacuation is clogged

• The height of evacuation is

too great

• The discharge pipe is pinched

• Foreign body into the bowl.

• Faulty programmer
• Faulty control console

• The inlet filter of the solenoid

valve (18) is clogged.

• The water feed pipe is 

pinched.

• The stop valve is closed.
• The solenoid valve (18) is

defective.

SYMPTOM

• The cycle proceeds 

correctly, the motor
turns but water in the
bowl empties slowly or
not at all

• The cycle proceeds 

correctly, but some
water remains in the
bowl after a cycle

• The motor rattles or

crunches

• After the button on the

control console has
been pressed, the cycle
does not start

• The cycle engages but

little water runs in the
bowl

• The cycle engages but

water does not run in
the bowl

Disconnect the electrical power supply, before 

attempting any work on the unit.

COMMISSIONING

1 - Open the water admission valve fully to ensure a good 

bowl rinse.

2 - STANDARD Cycle

• Press pushbutton NORMAL and after approximately 

9 seconds of flush cycle, the pump will start and run for

approximately 6 seconds to clear the bowl and then it

takes 4 seconds to reprime the bowl.

3 - Throw several sheets of toilet tissue into the bowl and

repeat the cycle. The bowl should completely clear. 

Repeat the cycle again.

4 - ECO Cycle

• Press pushbutton ECO and after approximately 

3 seconds of flush cycle the pump will start and complete

the discharge within a further 3 seconds and then it takes

4 seconds to reprime the bowl.

8

USAGE

SANIMARIN

®

can be used like any normal toilet and does

not require any particular maintenance.

Only the disposal of toilet papers, fecal mat-

ter, and waste water will be under guarantee. Any

damage due to foreign bodies such as cotton,

condoms, sanitary towels, wet wipes food, hair, or

liquids such as oils, solvent products,… will not be

under guarantee.

If away for a long period (holiday,…) or in the

event of a long interruption of electricity, the water and

electricity supplies to the SANIMARIN

®

should be 

switched off.

Caution 2

Caution 1

9

SERVICE

• Normal non-foaming household bleaches/WC cleansers can

be used with this unit.

10

GUARANTEE

2 years guarantee from date of purchase, subject to correct

installation and correct use: disposal of toilet papers and fecal

matter only. Guarantee is limited to replacement or service of

the defective spare parts, and any indemnity or claim for

damages will not be included.

Freight and packing costs, travel expenses are not included in

the guarantee. It does not cover any normal deterioration of 

the material over time, any external deterioration or accident, 

incorrect disposal of sanitary products. Any modification

without prior notice will not be under guarantee. Fixing, 

modification, or replacement of parts without our agreement

will not be guaranted, and will invalidate it. Our liability is solely

for the product itself.

Guarantee starts from date of purchase we may request a

copy of the invoice to validate the purchase date.

13

In most cases, any inconsistencies in the operation of the unit will 

be minor and easy rectified. Please refer to the chart below. If the 

problem cannot be easily remedied thanks to this chart, please call

our SFA Service organisation or go to a SFA-approved technician.

WINTERING

• In the event of a long period without use, rinse the bowl and

carry out several flushing cycles with a supply of fresh water.

11

FITTING AND CONNECTING THE SEAWATER PUMP

(OPTION

Seawater filter 

Suction

Discharge

From the hull valve…

…to the SANIMARIN

®

toilet.

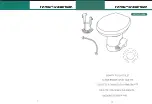
FITTING THE TOILET SEAT AND COVER

a

- Insert the threaded rod in the offset hole, using locking

compound,

b

- It can be advisable to fit the seat before installing the

SANIMARIN

®

.

6g

5

4

3

2

1

6f

Содержание SANIMARIN Bidet 35

Страница 1: ...e sorgfältig lesen und zum Nachschlagen aufbewahren Da leggere attentamente e conservare a titolo di informazione Leer atentamente y conservar a título de información SANIMARIN NOTICE D INSTALLATION INSTALLATION INSTRUCTIONS INSTALLATIONSANLEITUNG ISTRUZIONI PER L INSTALLAZIONE INSTRUCCIONES DE INSTALACIÓN F E 1 05 07 IND1 01 707 1 ...

Страница 2: ...ANIMARIN Elite 24 V x 3 SANIMARIN 31 x 3 SANIMARIN 35 x 2 SANIMARIN 48 x 2 SANIMARIN Elite x 3 SANIMARIN Bidet 35 B A J G E D Q R L W V F x 3 SANIMARIN 31 x 3 SANIMARIN 35 x 2 SANIMARIN 48 x 2 SANIMARIN Elite x 3 SANIMARIN 31 x 3 SANIMARIN 35 x 2 SANIMARIN 48 x 2 SANIMARIN Elite SANIMARIN 35 SANIMARIN 48 SANIMARIN Elite 370 mm 440 mm 310 mm 465 mm 375 mm 300 mm 300 mm 473 mm 368 mm 463 mm 220 mm 5...

Страница 3: ...6 6a 6c 6b a b c d G E B F A 25 m m 15 m m U Q D D x 2 1 L W 6d R L V OPTION WAHL OPZIONE OPCIÓN 1 ...

Страница 4: ...6 SUITE 6e 6f 6g R a b c J d e f 1 2 3 4 5 a b c ...

Страница 5: ...l rouge ALIM Fil noir ALIM Fil bleu COMMANDE DE POMPE OPTION Fil noir jaune FLOTTEUR DE NIVEAU CAISSE A EAUX NOIRES 1 Circuit breaker Red wire POWER SUPPLY Black wire POWER SUPPLY Blue wire PUMP CONTROL OPTION Black yellow FLOAT SHOWING wire THE LEVEL IN THE BLACK WATER TANK 1 Sicherung Roter Draht Pluspol Schwarzer Draht Minuspol Blauer Draht PUMPEN STEUERUNG OPTION Schwarz gelber SCHWIMMER Draht...

Страница 6: ...ssages arrière sont verticaux RACCORDEMENT DE L ÉVACUATION ET DE L ALIMENTATION EN EAU Connecter le coude de diamètre 38 38 mm au clapet de non retour et au tuyau d évacuation puis serrer avec des colliers Tuyau d alimentation en eau A connecter à une pompe eau de mer fournie en option ou au circuit d eau douce sous pression du bord Fournir une pression minimum de 1 7 bar Note il est possible de m...

Страница 7: ...ans le cadre de la garantie en cas de coupure de courant prolongée ou de longue absence couper les alimentations en eau et électricité du SANIMARIN Attention 2 Attention 1 9 NETTOYAGE DÉTARTRAGE Pour nettoyer utiliser les produits sanitaires classiques 1 0 CONDITIONS DE GARANTIE L appareil est garanti deux ans à compter de sa date d achat sous réserve d une installation conforme et une utilisation...

Страница 8: ... in the system must be at least 1 7 bar Note it is possible to fit a seawater pump other than the pump supplied as an option provided that the current requirement is not more than 16 A if the pump is to be controlled via the touchpad There is another possible assembly principle that of a water supply system in which the pump cuts in when the pressure drops FITTING THE CONTROL TOUCHPAD The touchpad...

Страница 9: ...nds to reprime the bowl 3 Throw several sheets of toilet tissue into the bowl and repeat the cycle The bowl should completely clear Repeat the cycle again 4 ECO Cycle Press pushbutton ECO and after approximately 3 seconds of flush cycle the pump will start and complete the discharge within a further 3 seconds and then it takes 4 seconds to reprime the bowl 8 USAGE SANIMARIN can be used like any no...

Страница 10: ... BODEN a Auf dem Boden den Umriss des Toilettenfußes aufzeichnen und die Befestigungslöcher für die Toilette markieren b Von der markierten Toilettenfußkontur einen Abstand von 15 mm abmessen die Bodenwinkel positionieren und in der Öffnung das Bohrloch anbringen c Die Winkel einschrauben ohne sie fest anzuziehen Sie werden erst beim Festschrauben der Toilette fest angezogen d Die Toilette festsch...

Страница 11: ...rforderlich SANIMARIN darf nur zum Zerkleinern und zur Ableitung von Fäkalien und Toilettenpapier verwendet werden Für Schäden an der Toilette die durch das Zerkleinern von funktionsfremden Stoffen wie z B Baumwolle Tampons Monatsbinden Kondomen und Haaren oder durch das Abpumpen von Flüssigkeiten wie z B Lösungsmittel oder Ölen verursacht werden besteht keinerlei Anspruch auf Garantieleistungen B...

Страница 12: ...to all avvitamento del vaso d Avvitare il vaso A 6a 6 Nota fissare il vaso definitivamente solo una volta completati tutti i raccordi Nota sul SANIMARIN 35 c è un solo supporto angolare sul davanti Le avvitature posteriori sono verticali RACCORDO DELL EVACUAZIONE E DELL ALIMENTAZIONE DELL ACQUA Collegare il gomito di diametro 38 38 mm alla valvola di non ritorno ed al tubo d evacuazione e stringer...

Страница 13: ...condi supplementari di riempimento d acqua Ciclo EMPTY mantenendo premuto il pulsante si avvierà il funzionamento in continuo fino al rilascio del pulsante Serve a cambiare completamente l acqua nel fondo del vaso 8 UTILIZZO Il SANIMARIN si usa come un WC classico senza richiedere una manutenzione particolare il SANIMARIN utilizzabile solo per triturare e scaricare le materie fecali e la carta igi...

Страница 14: ...ejándolas libres el apriete definitivo se realizará al fijar la taza d Fijar la taza Nota No fijar la taza definitivamente hasta que no estén terminadas todas las conexiones Nota En el SANIMARIN 35 solamente es necesaria una escuadra delantera Las dos fijaciones traseras son verticales CONEXIÓN DE LA EVACUACIÓN Y DE LA ALIMENTACIÓN DE AGUA Conectar el codo de 38 38 mm de diámetro a la válvula anti...

Страница 15: ...ojas de papel higiénico en la cubeta a continuación reinicie la operación Ciclo ECO Oprima el pulsador ECO tras 3 segundos de llenado el motor gira durante 3 segundos a continuación cuente 4 segundos suplementarios para la alimentación de agua 8 UTILIZACIÓN SANIMARIN se utiliza como un sanitario clásico no requiere un mantenimiento particular SANIMARIN sólo debe servir para la trituración y evacua...

Страница 16: ... 353 46 9733 102 Fax 353 46 97 33 093 IRELAND РОССИЯ ITALIA SVERIGE CANADA SFA POLAND ul Kolejowa 33 05 092 omianki Warszawa Tel 4822 732 00 32 Fax 4822 751 35 16 SFA Lda Av 5 de Outubro 10 1 1050 056 Lisboa Tel 351 21 350 70 00 Fax 351 21 957 70 00 SFA SANIFLO S R L Strada Leonard Nicolae nr 2A Timisoara 300454 Tel 40 256 245 092 Fax 40 256 245 029 SANIPUMP PTY LTD AUSTRALIA A B N 48 103 036 808 ...

Отзывы: