


U2
Configuring via the menu book
To configure the required options proceed as
follows:
• scan the SET label
• scan the required option(s)
• scan the END label
After scanning the END label, the new settings
are stored in non volatile memory.
Recommended steps to follow for quick
configuration
After checking your connection you are ready
to start the configuration of your reader.
• Check connection:
Ensure that the power is disconnected from
your equipment before you connect the reader.
After connecting the data cable, the power can
be applied to the equipment and the reader.
• 1:
Use chapter 1 to set the correct default for your
reader.
* The reader is now in factory default.
• 2:
Use chapter 2 to optimize the interface.
* The reader is now able to read bar codes and
transmit the data.
• 3:
Use chapter 3 to optimize the reader for the
type of bar codes you use. Set the readable
codes first and then the options for each of
these codes.
* The reader is now able to read the codes you
selected, validate the data using length and
check digit and transmit that part of the data
you specified.
• 4:
Use chapter 4 to select the string options for
your application. These include transmission of
code length, conversion of upper and lower
case and setting a prefix and suffix.
* The reader can now read and transmit the
data in the required format.
• 5:
Use chapter 5 to select the read options to your
preference. These options affect the read
mode, read time, trigger and redundancy.
• 6:
Use chapter 6 to select the indicator options
you prefer. These options affect the operation
of the buzzer and good read LED.
* The reader will now operate to your personal
preference.
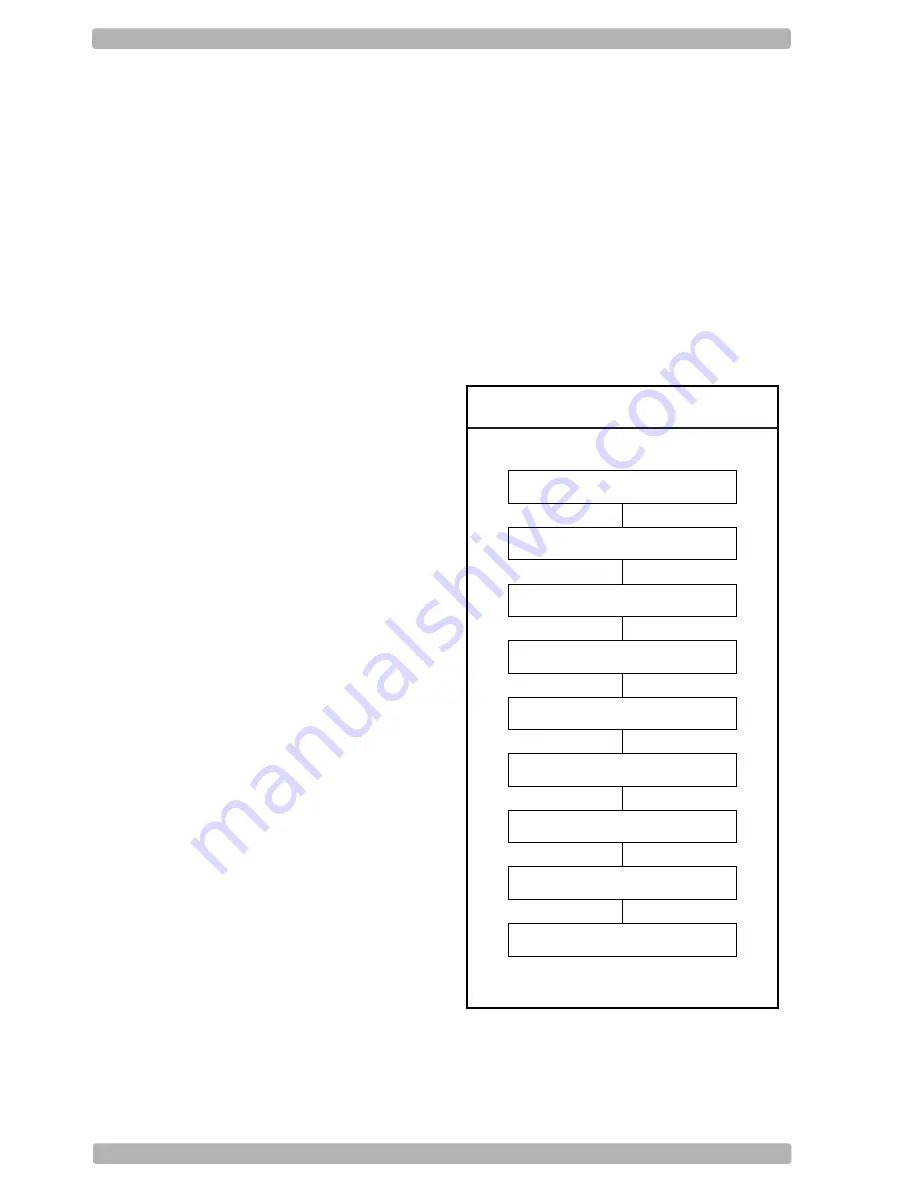
See figure 0.02.
Power OFF
Connect reader
Power ON
Set Default
(1)
Optimize interface
(2)
Optimize symbologies
(3)
Set string options
(4)
Set read options
(5)
Set indicator options
(6)
Fig. 0.02. Recommended Steps
Содержание KD-3500ZB
Страница 1: ...Configuration guide KD 3500ZB Wireless Area Imaging Scanner...
Страница 2: ...Ui bar code configuration...
Страница 7: ...U4 2 Defaults USB HID...
Страница 71: ...String options 4 U68 7D _7D_ _ 7E _7E_ 7F _7F_ 9T _9T_ 9U _9U_ 9V _9V_ 9W _9W_ SET _ZZ_ END _ZZ_...
Страница 84: ...Read options 5 U80 5 1 Read mode options SET _ZZ_ Single read S0 _S0_ Multiple read S1 _S1_ END _ZZ_...
Страница 97: ...U93 Example C 25 PDF417 Example C 26 MicroPDF417 PDF417 sample bar code MicroPDF417 sample bar code...
Страница 99: ......


