10
Chapter 3: Installing the RTM II
DUG-10009-01
RTM II FlexNet User Guide
3.2
Testing the Receiver Strength
After selecting an installation location and powering up the RTM II, it is a good idea to test the device’s
ability to transmit and receive. The device must be connected to power and an antenna attached in order
to carry out this test. You can check the radio strength locally using the Sensus Automation Device
Configurator software. Once the RTM II has been installed and commissioned, you can check the radio
strength remotely using AutomationControl.
3.2.1 Testing Locally with Automation Device Configurator
Make sure the PC has the Automation Device Configurator software installed.
Connect the device to the PC
1.
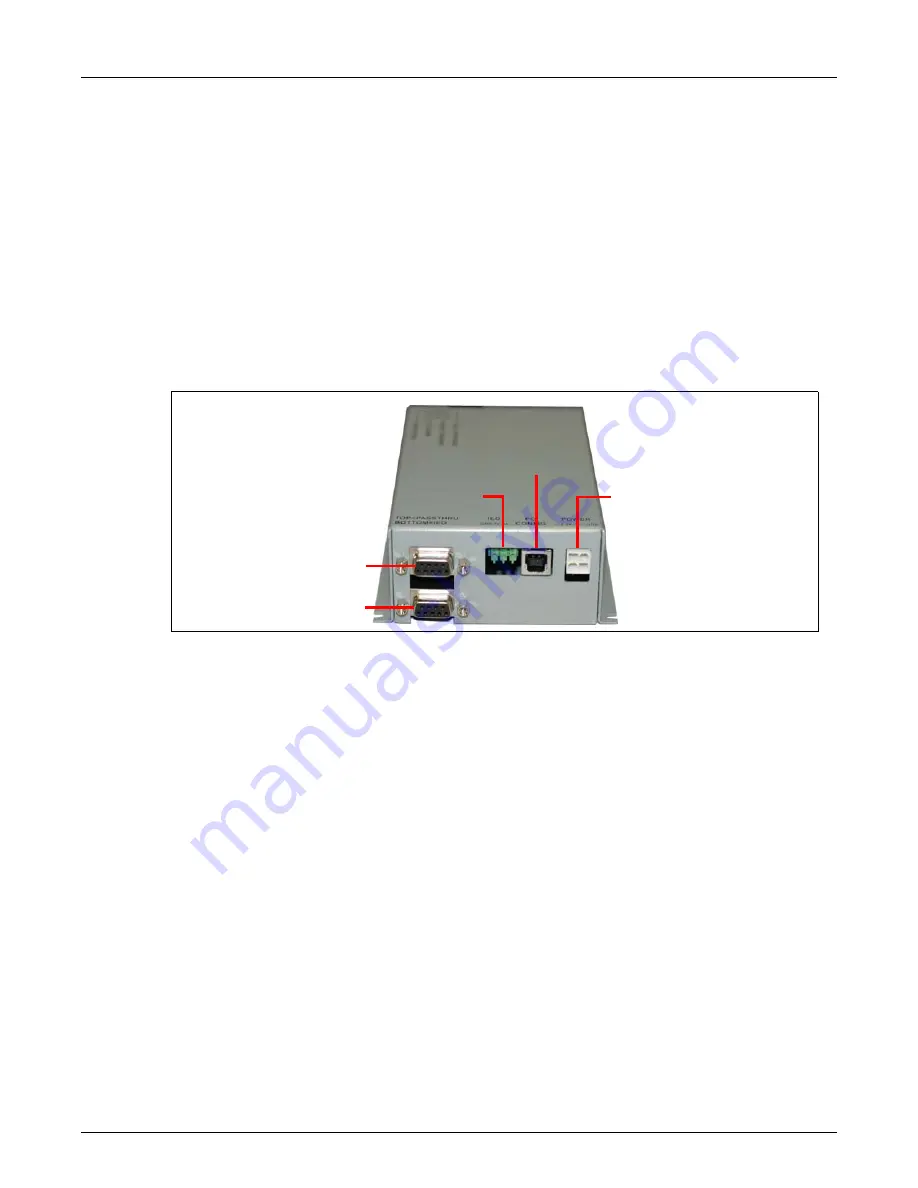
Using a standard USB 2.0 cable with Type A to Type B connectors shown in
Figure 3-1
, insert the
cable into the PC Port on the bottom of the device.
Pass Through Port
IED Port
PC Port
IED Terminal
DC Pow-
2.
Using the USB port, connect the cable to the PC that has the Automation Device Configurator
software installed.
3.
After physically connecting a PC to the Sensus device, follow the next steps to log in.
Содержание RTM II FlexNet
Страница 1: ...RTM II FlexNet Revision 1 DUG 10009 01 ...
Страница 6: ...vi Compliance Statements Document Number Document Name ...
Страница 14: ...6 Chapter 1 Introduction DUG 10009 01 RTM II FlexNet User Guide ...
Страница 16: ...8 Chapter 2 Commissioning Devices on AutomationControl DUG 10009 01 RTM II FlexNet User Guide ...
Страница 22: ...14 Chapter 3 Installing the RTM II DUG 10009 01 RTM II FlexNet User Guide ...
Страница 36: ...28 Appendix A Basic Integration Guidelines DUG 10009 01 RTM II FlexNet User Guide ...
Страница 41: ...Appendix C Hardware Specifications 33 RTM II FlexNet User Guide DUG 10009 01 ...
Страница 42: ...34 Appendix C Hardware Specifications DUG 10009 01 RTM II FlexNet User Guide ...


