


46 |
P a g e
R e v 5 - 1 9
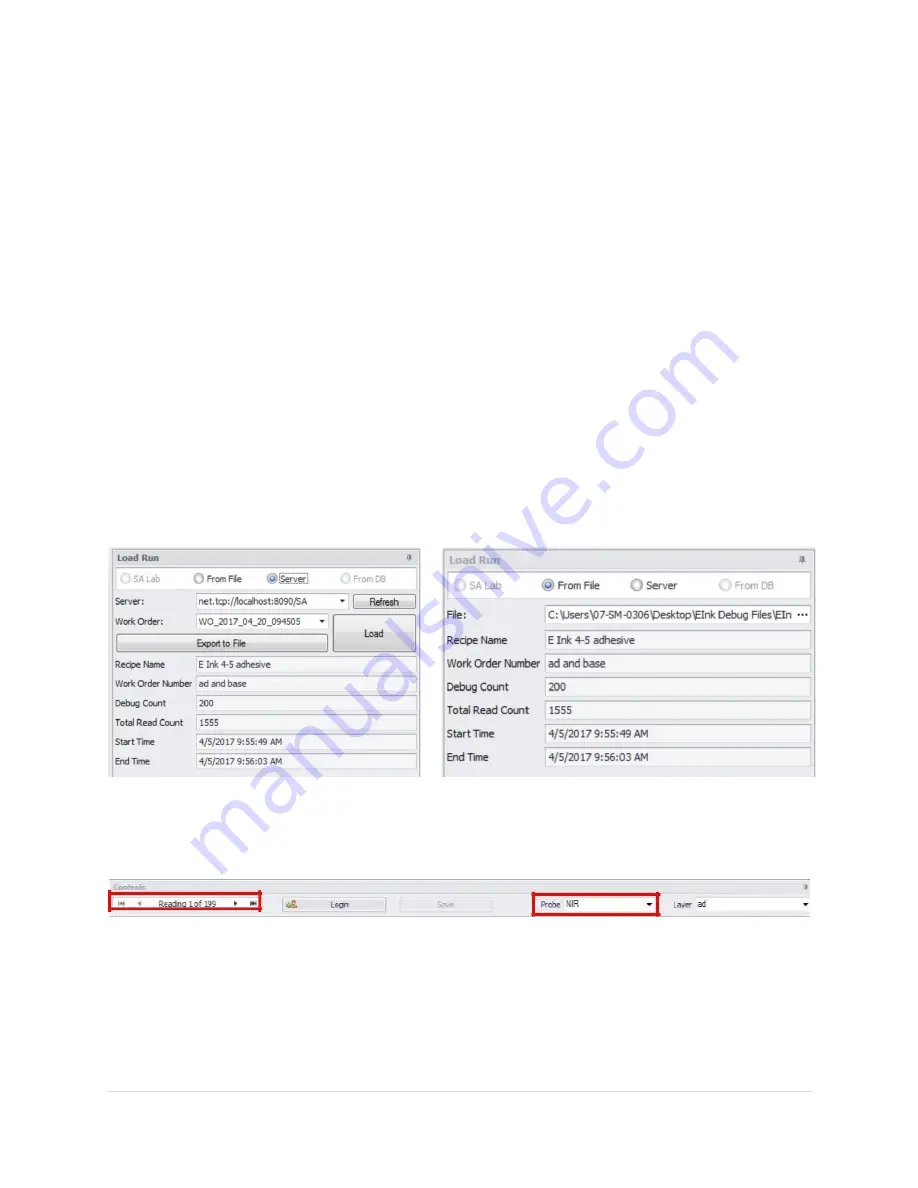
2.
Select the option of “From File” if you are working with an exported debug zip file
a.
Click on the ellipse “…” button to open the file selection window
b.
Navigate to the folder and select the file to analyze
3.
Select the option “From DB” if you wish to work with the SA Database
a.
DO NOT Use this option if you are working directly with the SA database. Only use if you
have copied (NOT ‘CUT’) the database to a remote location from the original.
b.
Click “Change DB” if you have an archived database you wish to work with. Navigate to
the folder and select the SA database (*.mdf) to work with.
c.
The drop-down window will display the list of Work Order numbers for each run
d.
When working with the DB, the details will be displayed below the “Load” button
e.
If Debug Readings = 0, then there are no debug records for the given run there will
be no readings in which to analyze. Select a different Work order number.
4.
SA Lab will be explained in the SA Lab Manual.
Regardless of which option, once you have selected a debug set, click the “Load” button. Within a few
seconds, the spectral data should be displayed in the graphs. If you do not see any graphs, then make
sure you have selected the correct “Probe” and “Layer” (top of the screen).
Controls
From left to right:
Reading Navigator: Using the navigation arrows on each side of the reading navigator to see the
different debug readings. You can go backward and forwards or enter the number of the reading
directly.
Language: Displays a selection window to change the language without having to exit