background image

17

During programming the radio control key of the control unit can be used instead of the SET 

key, if  stored previously.

4) T. PAUSA: 

 (Automatic closing time programming max. 4 minutes)

The control unit is supplied by the manufacturer without automatic closing. If you wish to 

enable automatic closing, proceed as follows: using the SEL key to move to the flashing 

T. PAUSA LED, press the SET key briefly, then wait for the amount of time you wish to set 

for automatic closing; briefly press the SET key again, and in that moment the automatic 

closing time will be memorised and the T. PAUSA LED will stay on steady. If you wish to 

restore the initial condition (without automatic closing), move to the flashing T. PAUSA 

LED, then press the SET key twice within 2 seconds. The LED will switches off and the 

operation is complete.

When programming, you can use the radio control key on the control unit instead of the 

SET key, if stored previously. 

EXTENDED MENU 1 

The control unit is supplied by the manufacturer with the option of selecting only the 

functions listed in the main menu.

If you wish to enable the functions described in extended menu 1, proceed as follows: 

press and hold the SET key for 5 seconds, after which the T. MOT. and T. PAUSA LEDs 

will start flashing alternately. The user then has 30 seconds to select the functions for 

extended menu 1 using the SEL and SET keys. After another 30 seconds the control unit 

will go back to the main menu.

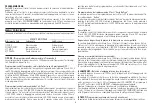
———————————— —      EXTENDED MENU 1   ————————————    

Reference LED    

LED Off 

LED On

A) CODE  

remote PGM = OFF  

remote PGM = ON

B) LAMP/CORT  

Step-by-Step    

Automatic 

C) T. MOT.  

Alternate ON/OFF flashing light    

D) T. PAUSA. 


 Alternate ON/OFF flashing light     


A) CODE 

(Remote programming of radio control):

The control unit allows the transmission code to be programmed remotely, without using 

the SEL key on the unit itself.

The remote transmission code can be programmed as follows: continuously send a pre-

viously-stored radio control code for more than 10 seconds. At this point the control unit 

switches to programming mode, as described above for the CODE LED in the main menu.

The control unit is supplied by the manufacturer with the remote transmission code pro-

gramming function disabled. If you wish to enable the function, proceed as follows: check 

that extended menu 1 is enabled (T. MOT. and T. PAUSA LEDs flash alternately), use the 

SEL key to move to the flashing CODE LED, then press the SET key: at this point the CODE 

LED will light up steady and programming is complete. Repeat the procedure to restore 

the previous configuration.

B) LAMP/CORT. 

(Step-by-Step / Automatic operation) :

The control unit is supplied by the manufacturer with Automatic mode disabled. If you 

wish to enable the function, proceed as follows: check that extended menu 1 is enabled 

(T. MOT. and T. PAUSA LEDs flash alternately), use the SEL key to move to the flashing 

LAMP/CORT LED, then press the SET key: at this point the LAMP/CORT LED will light up 

steady and programming is complete. 

Accordingly, using either the Radio Control, Transponder, Digital keyboard, Smartphone 

or the low voltage push button panel to operate the frame, you will obtain the following 

function: the first impulse commands opening until the motor time expires, the second 

impulse commands frame closing. If an impulse is sent before the motor time expires, the 

control unit 

changes

 the direction of motion in the opening and closing phases. Repeat 

the procedure to restore the previous configuration.

EXTENDED MENU 2 

The control unit is supplied by the manufacturer with the option of selecting only the 

functions listed in the main menu.

If you wish to enable the functions described in extended menu 2, proceed as follows: 

access extended menu 1 (as described in the relative paragraph), then press and hold 

the SET key down again for 5 seconds, after which the T. MOT. and T. PAUSA LEDs will 

start flashing simultaneously. The user then has 30 seconds to select the functions for 

extended menu 2 using the SEL and SET keys. After another 30 seconds the control unit 

will go back to the main menu.

————————————      EXTENDED MENU 2   ————————————    

Riferimento Led 

LED Off 

LED On

A) CODE   

Anti-Pass-Back = OFF   

Anti-Pass-Back = ON   

B) LAMP/CORT 

Anti-Collision (pedestrian) CH = OFF   

Anti-Collision (pedestrian) CH = ON

C) T. MOT.  

   Simultaneous ON/OFF flashing   

D) T. PAUSA. 

   Simultaneous ON/OFF flashing    

A) CODE  (Anti-Pass-Back) :

The control unit is supplied by the manufacturer with the Anti-pass-back function disabled. If 

you wish to enable the function, proceed as follows: check that extended menu 2 is enabled 

(T. MOT. and T. PAUSA LEDs start flashing simultaneously), use the SEL key to move to the 

flashing CODE LED then press the SET key: at that point the CODE LED will light up steady and 

programming is complete. This way the control unit will operate in Antipassback mode, i.e. 

using a pair of BeSafe Reader New, BeSafe KeyBoard and/or BeSafe NFC (set with different 

Содержание 96340000

Страница 1: ...LRX 2035 NEW READER ...

Страница 2: ......

Страница 3: ...fisiche o con poca conoscenza ed esperienza solamente se supervisionati o istruiti sul funzionamento e le modalità di utilizzo in maniera sicura per capire anche i pericoli coinvolti nel suo utilizzo queste istruzioni sono disponibili anche sul sito www seav com Non consentire ai bambini di giocare con il dispositivo e tenere lontano dalla loro portata i radiocomandi Esaminare frequentemente l imp...

Страница 4: ...tallazione di eseguire tutti i controlli necessari pro grammazione opportuna della centrale e corretta installazione dei dispositivi di sicurezza per assicurarsi di aver ese guito un installazione conforme 6 Fissare la centrale ad una parete ser vendosi per il montaggio dell apposito supporto di cui è dotato l involucro in modo tale da lasciare tale supporto verso il basso ed inserire delle viti d...

Страница 5: ...a 9 Il motoriduttore usato per muovere il ser ramento deve essere conforme a quanto prescritto al punto 5 2 7 della EN 12453 10 In accordo al 5 4 2 della EN 12453 è consigliabile usare motoriduttori dotati di un dispositivo di sblocco elettromeccanico per consentire in caso di necessità di muovere il ser ramento manualmente 11 Inaccordoal5 4 3 dellaEN12453utiliz zaresistemidisbloccoelettromeccanic...

Страница 6: ...Temperatura d esercizio 10 55 C Ricevitore radio vedi modello Trasmettitori op 12 18 Bit o Rolling Code N dispositivi memorizzabili 120 max Dimensioni scheda 100x105 mm Dimensioni scatola 110x121x47 mm Contenitore ABS V 0 IP54 COLLEGAMENTI DELLE MORSETTIERE CN1 1 Ingresso linea 230 Vac Fase 2 Ingresso linea 230 Vac Neutro 3 Uscita Lampeggiante 230 Vac Neutro 4 Uscita Lampeggiante 230 Vac Fase 5 Us...

Страница 7: ...sto si ottiene il seguente funzionamento il primo impulso comanda l Apertura fino allo scadere del tempo motore Il secondo impulso comanda la Chiusura del serramento se un impulso perviene prima dello scadere del tempo motore la centrale effettua l arresto del serramento un ulteriore impulso effettua la ripresa del moto nel senso opposto di marcia Funzionamento con radiocomando 2 Tasti Utilizzando...

Страница 8: ...Programmazione del radiocomando 3 Tasti Serie BeFree La centrale consente con la programmazione del solo Tasto UP la memorizzazione dell in tero radiocomando BeFree La programmazione dei codici del radiocomando BeFree è eseguita nel seguente modo premere il tasto SEL LED CODE inizierà a lampeggiare allo stesso tempo premere il tasto UP del radiocomando desiderato il LED CODE rimarrà acceso e la pr...

Страница 9: ...peggio ON OFF alternato A CODE Programmazione Radiocomando a distanza La centrale consente la programmazione del codice di trasmissione senza intervenire direttamente sul tasto SEL della centrale eseguendo l operazione a distanza La programmazione del codice di trasmissione a distanza si esegue nel seguente modo inviare in modo continuo per un tempo maggiore di 10 secondi il codice di un radioco m...

Страница 10: ... la configurazione pre cedente RESET Nel caso sia opportuno ripristinare la centrale alla configurazione di fabbrica premere il tasto SEL e SET in contemporanea allo stesso tempo si otterrà l accensione contempora nea di tutti i led ROSSI di segnalazione e dopo alcuni secondi lo spegnimento DIAGNOSTICA Test input comandi In corrispondenza ad ogni ingresso di comando in bassa tensione la centrale d...

Страница 11: ... age and persons with reduced physical or psychological abili ties or with little knowledge and expe rience only if supervised or educated in its operation and safe use in order to also understand the dangers involved in its use These instructions are also available at the website www seav com Do not allow children to play with the device and keep the radio controls away from their reach Frequentl...

Страница 12: ...ol unit 5 Once installation is finished it is rec ommended that all necessary checks be performed appropriate program ming of the control panel and cor rect installation of safety devices to ensure that compliant installation has been performed 6 Fix the control unit to a wall using the relevant support which is fitted to the casing in such a way as to leave said support facing downwards and inser...

Страница 13: ...s IP protection characteristics 9 The gear motor used to move the frame must comply with the require ments of point 5 2 7 of EN 12453 10 In compliance with 5 4 2 of EN 12453 it is recommended to use gear motors equipped with an electrical mechani cal release device so that the frame can be moved manually in case of necessity 11 In compliance with 5 4 3 of EN 12453 use electrical mechanical release...

Страница 14: ... temperature 10 55 C Radio receiver see model Op transmitters 12 18 Bit or Rolling Code No of devices that can be stored 120 max Board dimensions 100x105 mm Dimensions of container 110x121x47 mm Container ABS V 0 IP54 TERMINAL BOARD CONNECTIONS CN1 1 230 Vac line input Phase 2 230 Vac line input Neutral 3 230 Vac Flashing light Output Neutral 4 230 Vac Flashing light Output Phase 5 Opening 230V Mo...

Страница 15: ...lse commands Closing of the frame If an impulse occurs before the motor time expires the control unit stops the frame A further impulse implements the re starting of the motion in the opposite direction Radio control operation with 2 Keys Using the radio control with 2 keys the following function is obtained the first key Up associated to the Opening direction commands Opening until the motor time...

Страница 16: ...press the SEL key the CODE LED will start flashing then press the SET key for a few seconds the CODE LED will turn off and the codes are deleted Device already stored or not compatible warning The control unit can store up to 120 devices with different codes If the user attempts to perform the programming procedure for a device which is already stored in the memory or which is not compatible the C...

Страница 17: ...use the SEL key to move to the flashing CODE LED then press the SET key at this point the CODE LED will light up steady and programming is complete Repeat the procedure to restore the previous configuration B LAMP CORT Step by Step Automatic operation The control unit is supplied by the manufacturer with Automatic mode disabled If you wish to enable the function proceed as follows check that exten...

Страница 18: ...ontrol input the control unit uses a LED signal to make the status readily known Operating logic when a LED is on it means the input is closed when a LED is off it means the input is open MANAGING PROGRAMMING LEDS After 3 minutes of inactivity in the programming procedure the control unit will automati cally switch off the programming LEDs to save energy The LEDs will light up depending on the pre...

Страница 19: ...nts âgés de plus de 8 ans et par des personnes aux capacités psychiques et physiques réduites ou ayant peu de connaissances ou d expérience à condi tion qu ils soient surveillés ou qu ils aient reçu des instructions relatives au fonc tionnement et aux modalités d utilisation en toute sécurité afin de comprendre aussi les dangers liés à l utilisation du dispositif Ces instructions sont également di...

Страница 20: ...criptions défi nies dans les normes EN 12453 EN 12445 incombent à la personne qui assemble les différentes parties pour réaliser une fermeture complète 4 Utiliser des dispositifs de sécurité en mesure de contrôler l état de leur connexion à la centrale électrique 5 Une fois l installation terminée il est conseillé d effectuer l ensemble des contrôles nécessaires programmation appropriée de la cent...

Страница 21: ... de 0 75 mm2 Si aucun caniveau n est utilisé il est conseillé d utiliser des câbles de matériel H05RR F Veiller à fixer les câbles de manière à ce qu ils soient ancrés de manière stable Durant la phase de perçage du boîtier externe pour faire passer les câbles d alimentation et de branchement et celle d assemblage des presse étoupes veiller également à installer le tout de façon à conserver le plu...

Страница 22: ...boîtierdecom mande pour la commande manuelle doitêtreeffectuéenle plaçant de façon à ce que l utilisateur ne se trouve pas dans une position dangereuse 14 La fonction de sécurité garantie par la centrale est activée uniquement en fer meture ainsi laprotectionenouverture doit être garantie lors de l installation avec des mesures protections ou dis tances de sécurité indépendantes du circuit de cont...

Страница 23: ...dispositif de sécurité NC 6 Entrée masse antenne 7 Entrée pôle chaud de l antenne CN3 1 Sortie alimentation 12 VDC Device 2 Port de communication RS 485 signal A 3 Port de communication RS 485 signal B 4 Sortie alimentation 0 VDC Device CARACTÉRISTIQUES DE FONCTIONNEMENT fonctionnement pas à pas En utilisant aussi bien la commande radio le transpondeur le clavier numérique un Smartphone que les bo...

Страница 24: ...dant l ouverture ou la fermeture la centrale commande l arrêt de la menuiserie Si pendant l ouverture ou la fermeture nous envoyons une commande opposée au mouvement en cours la centrale commande l inver sion du sens de marche Fermeture automatique a centrale permet de refermer automatiquement le portail sans envoyer de commandes sup plémentaires Le choix de ce mode de fonctionnement est décrit da...

Страница 25: ... Si vous souhaitez habiliter le fonctionnement clignotant dans le temps de pause aussi procéder de la façon suivante avec la touche SEL se placer sur le voyant de la LED LUM COURT ensuite appuyer sur la touche SET dans le même temps la LED LUM COURT s allume de façon permanente Répéter l opération si vous souhaitez rétablir la configuration d usine Si vous souhaitez habiliter la lumière de courtoi...

Страница 26: ...tons en basse tension pour l actionnement de la menui serie vous obtiendrez le fonctionnement suivant la première impulsion commande l ouverture jusqu à l échéance du temps moteur la seconde impulsion commande la fer meture de la menuiserie si vous envoyez une impulsion avant la fin du temps moteur la centrale effectue l inversion du mouvement aussi bien au cours de la phase d ouverture que de fer...

Страница 27: ...es d inactivité dans la procédure de programmation la centrale éteint auto matiquement les LED de programmation pour l économie d énergie La seule pression des touches SEL SET ou la réception d une commande de mouvement active l allumage des LED en fonction des programmations configurées au préalable BUS CESSATION RS 485 La communication BUS s effectue par un standard RS485 Il est possible de réal...

Страница 28: ...as reducidas o sin experiencia o conocimientos suficien tes solo si lo hacen bajo supervisión o si han sido instruidas en el manejo seguro del dispositivo e informadas sobre los riesgos que conlleva su uso estas instrucciones están disponibles tam bién en el sitio web www seav com No permita que los niños jueguen con el dispositivo no deje los radiomandos a su alcance Controle con frecuencia la in...

Страница 29: ...tivos de seguridad capaces de monitorizar el estado de su conexión con la central eléctrica 5 Una vez concluida la instalación se recomienda constatar la conformidad de la misma llevando a cabo todos los controles necesarios programación oportuna de la unidad y correcta ins talación de los dispositivos de seguri dad 6 Fije la central a una pared ayudán dose para el montaje del correspon diente apo...

Страница 30: ...en sujetos de manera estable Durante las fases de perforación de la cubierta exterior para permitir el paso de los cables de alimentación y de conexión y de ensamblaje de los prensacables asegúrese además de instalar todos los componentes man teniendo inalteradas en la medida de lo posible las características del grado de protección IP de la caja 9 El motorreductor utilizado para mover el cerramie...

Страница 31: ... hágalo de manera tal que el usuario pueda acceder al mismo sin encontrarse en una posición peligrosa 14 La función de seguridad garantizada por la centralita está activa solo con el cierre por lo tanto la protección durante la apertura se debe asegurar en fase de instalación con medidas protecciones o distancias de segu ridad independientes del circuito de control 15 Para el funcionamiento correc...

Страница 32: ...ridad NC 6 Entrada de masa de la antena 7 Entrada del polo positivo de la antena CN3 1 Salida de alimentación 12 VCC dispositivo 2 Puerto de comunicación RS 485 señal A 3 Puerto de comunicación RS 485 señal B 4 Salida de alimentación 0 VCC dispositivo CARACTERÍSTICAS DE FUNCIONAMIENTO Funcionamiento Paso Paso Usando tanto el Radiomando como el Transpondedor el Teclado digital o el Smartphone como ...

Страница 33: ...scribe en el modo de programación del Tiempo de pausa Dispositivo de seguridad Células fotoeléctricas Lacentralpermitelaalimentaciónylaconexióndelasfotocélulasydelosbordesneumáticos NC Entrada DS NC La intervención del Dispositivo de Seguridad en la fase de apertura no se considera en la fase de cierre provoca la inversión del movimiento PROGRAMACIÓN Tasto SEL selecciona el tipo de función que se ...

Страница 34: ...cerse con el cerramiento cerrado de la siguiente manera colóquese con la tecla SEL en el parpadeo del LED T MOT A continuación pulse de forma continua la tecla SET y el cerramiento iniciará la fase de subida al alcanzar el punto deseado suelte la tecla SET y en ese momento se producirá la memori zación del tiempo programado del motor y el led T MOT quedará encendido de forma fija Si se desea un ti...

Страница 35: ...bre Presente CH OFF Hombre Presente CH ON C T MOT Parpadeo ON OFF simultáneo D T PAUSA Parpadeo ON OFF simultáneo A CODE Anti Pass Back La central se suministra de fábrica con la función Anti pass back deshabilitada Si se desea habilitar la función haga lo siguiente asegúrese de haber habilitado el Menú extendido 2 indicado por el parpadeo alternado de los Ledes T MOT y Led T PAUSA posiciónese con...

Страница 36: ...ción en los dispositivos colocados en los extremos de las conexiones J1 pos 1 2 resistencia de terminación activada J1 pos 2 3 resistencia de terminación no activada por defecto El texto completo de la declaración de conformidad de la UE está disponible en la siguiente dirección de Internet http www seav it Rev 3 1 03 08 2017 Το πλήρες κείμενο της δήλωσης συμμόρφωσης ΕΕ είναι διαθέσιμες στην ακόλο...

Отзывы: