Adjusting Damping
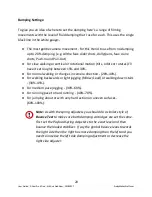
To adjust the amount of fluid damping you turn the
two Damping Adjuster knobs. It’s best to keep these
at the same level. As you can see, like the payload
adjusters you’ve got positive arrows to indicate an
increase in damping and negative arrows to indicate
a decrease. If you turn the knob in the direction of
the negative arrow the variable fluid damping will
gradually decrease until there’s no damping at all
and the spring will bounce back and forth easily.
Here’s a few other pointers on the fluid damping cartridges:-
1. The maximum (100%) fluid damping is when the white gauge is furthest
away from you towards the front.
2. Take Care
when near the ends of the damping gauge (0% and
100%) as overtightening past when you meet firm resistance may
permanently damage the damping cartridge!
3. The maximum damping setting will vary in position slightly from the coldest
to the hottest year round temperatures. When turning the knobs use the
increase in the resistance as an indicator being just past the maximum /
minimum damping.
4. There are very few actual scenarios to have your fluid damping set at 100%
(i.e. except for say jumping up and down very hard). The majority of soft
motion to running fast will likely be between 0% and 80% fluid damping.
We each move and shoot differently. This guide is a good starting
point but you each need to find the range of damping to suit your
own shooting styles.
19
User Guide - Glider Pro 3 Duo - 4th Axis Stabilizer - 20180917 ScottyMakesStuff.com


