


56
6.
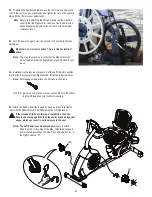
Using a #2 Phillips Screwdriver, remove the 6 screws (indicated) that
secure the Left Shroud. Remove the bottom screws fi rst, and then the top
screws. Slowly remove the Left Shroud. Set the hardware and Shroud
safely aside for reassembly.
Note:
Find the Power Inlet (A) in the Left Shroud.
Disconnect the Power Inlet cable (A1) from
the wiring harness (B).
NOTICE:
Do not pinch or cut the cables.
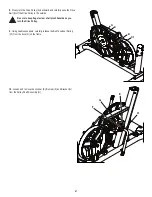
7.
Using a #2 Phillips Screwdriver, remove the 2 screws that secure the
Right Shroud. Slowly remove the Right Main Shroud. Set the hardware
safely aside for reassembly.
B
A
A1


