background image

9

TRUCKLOADER

SET UP INSTRUCTIONS

6

LITTLE WONDER 

TRUCKLOADER

SET-UP

DEBRIS RECEPTACLE

The Shredding Truckloader is intended to be used 

in conjunction with a truck or trailer mounted debris 

receptacle to load landscape debris for removal from a 

work site to storage, dump or processing site.  These 

receptacles or debris bodies or boxes are provided 

by the user and are the responsibility of the user.  

Following are some considerations to keep in mind 

when designing / building, or buying a debris receptacle 

on a vehicle.

1. It must be road worthy.

2. It must be constructed sturdily enough to contain the 

high velocity and force of entering debris to prevent 

injury to bystanders and damage to property.

3.  Sufficient screen area must be provided to allow 

the air produced by the truckloader to escape while 

containing the lighter debris.  A bigger screen area 

reduces the speed of the air through the screen and 

helps reduce the amount of debris that will be held 

to the screen.  The screen area should be in the 

last area to be fill so it stays clean.  If the air cannot 

escape, the truckloader will not be able to generate a 

vacuum to pick up debris.

4. It should prevent the debris from blowing out during 

transport to an unloading site.

5. Unloading:  Provision must be made for unloading.

ASSEMBLY AND SET-UP

1. Remove unit from crate.

2. Your Little Wonder  Truckloader can be mounted in 

(4) four ways.  The frame mounting will be covered 

below.  Refer to the instruction sheet supplied 

with each kit for Swing Away, Tailgate, or Hitch 

mounting.

3. Fill the engine with oil.  Fill the fuel tank with clean 

fresh gasoline.

4. Assemble the discharge chute.  Slide flange clamp 

plate over discharge chute.   Position the discharge 

flange over the fan housing flange.  Position the 

flange clamp plate over the fan housing studs and 

secure with (2) two 3/8-16 nylon insert flange nuts 

and 2 (two) locking knobs.  Back the nuts off from 

tight just enough that the 

chute may be turned for 

positioning.  Lock the chute in the desired position 

by tightening the knobs.

UNIT MOUNTING AND MOUNTING KITS.

Most Truckloader installations are customized and 

somewhat unique.  It is the responsibility of the 

installer to ensure the installation is sufficient to carry 

the truckloader or truckloader mounting kit.

Your Little Wonder 14HP Truckloader can be 

mounted in four different ways.  Brief instructions for 

each are listed below.  Refer to the specific mounting 

kit for detailed instructions.

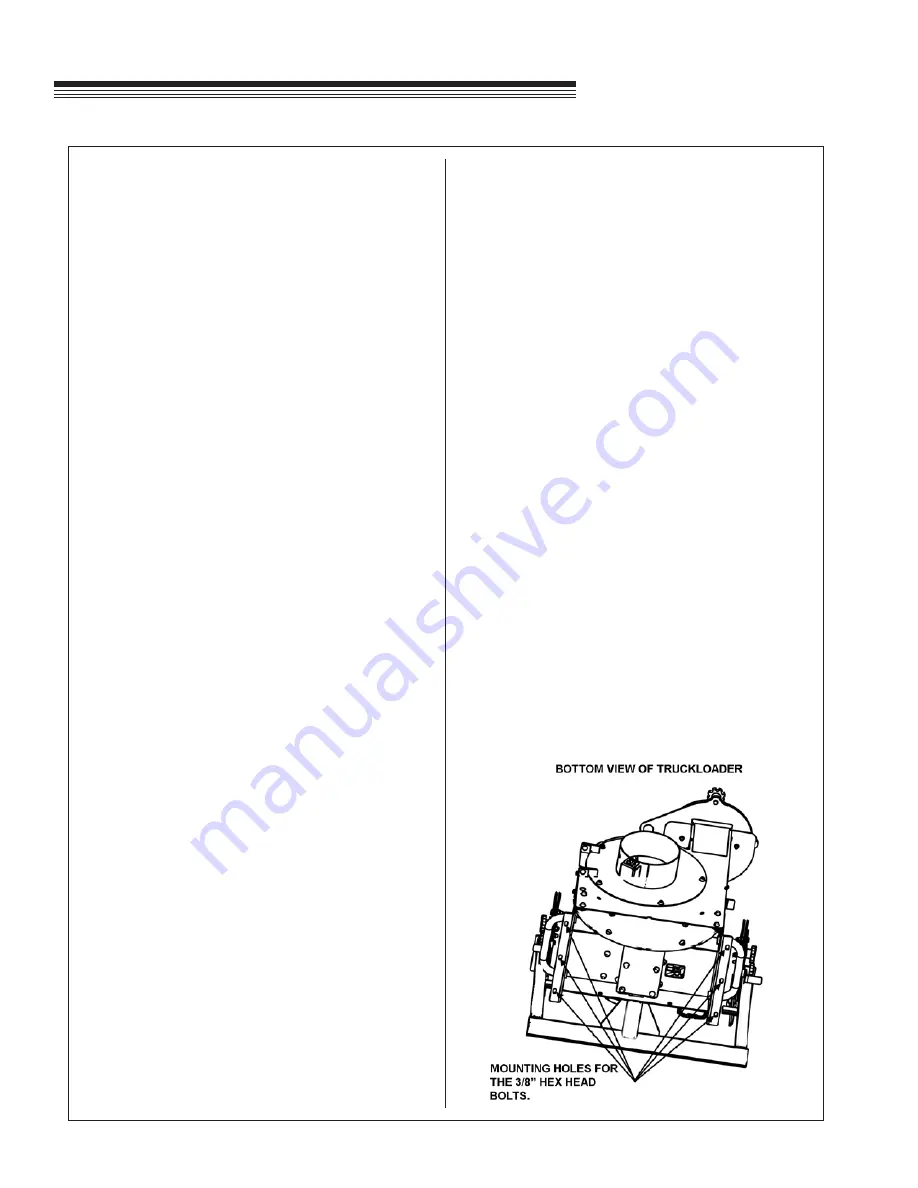
MOUNT SHREDDING TRUCKLOADER FRAME

1. Mount the Shredding truckloader frame to the 

frame or swing away, and secure frame with (6) 

six 3/8" hex head bolts (Grade 5 or better), 3/8" 

flat washers, and 3'8" lock nuts.

5. Assemble the boom assembly in the receiver tube 

on top of the fan housing.  Connect the hose to the 

inlet flange.  Insert the adaptor, turn to lock and 

secure in place with the locking knobs.

6. Read the Operator's manual before operating the 

machine.

DEBRIS RECEPTACLE

The Truckloader is intended to be used

in conjunction with a truck or trailer mounted debris 

receptacle to load landscape debris for removal from 

a work site to storage, dump or processing site. These 

receptacles or debris bodies or boxes are provided

by the user and are the responsibility of the user. 

Following are some considerations to keep in 

mind when designing / building, or buying a debris 

receptacle on a vehicle.

1. It must be road worthy.

2.  It must be constructed sturdily enough to contain the

high velocity and force of entering debris to prevent

injury to bystanders and damage to property.

3.  Sufficient screen area must be provided to allow

the air produced by the truckloader to escape while 

containing the lighter debris. A bigger screen area 

reduces the speed of the air through the screen and 

helps reduce the amount of debris that will be held 

to the screen. The screen area should be in the last 

area to be filled so it stays clean. If the air cannot 

escape, the truckloader will not be able to generate 

a vacuum to pick up debris.

4.  It should prevent the debris from blowing out during

transport to an unloading site.

5.  Unloading: Provision must be made for unloading.

ASSEMBLY AND SET-UP

1. Remove unit from crate.

2.  Your Little Wonder Truckloader can be mounted in (4)

four ways. The frame mounting will be covered below.

Refer to the instruction sheet supplied with each kit for 

Swing Away, Tailgate, or Hitch mounting.

3.  Fill the engine with oil. Fill the fuel tank with clean fresh

gasoline.

4.  Assemble the discharge chute. Slide flange clamp 

plate over discharge chute. Position the discharge

flange over the fan housing flange. Position the flange

clamp plate over the fan housing studs and secure 

with (2) two 3/8-16 nylon insert flange nuts and 2 (two) 

locking knobs. Back the nuts off from tight just enough 

that the chute may be turned for positioning. Lock the 

chute in the desired position by tightening the knobs.

5.  Assemble the boom assembly in the receiver tube on 

top of the fan housing. Connect the hose to the inlet 

flange. Insert the adaptor, turn to lock and secure in 

place with the locking knobs.

6.  Read the Operator’s manual before operating the 

machine.

UNIT MOUNTING AND MOUNTING KITS.

Most Truckloader installations are customized and 

somewhat unique. It is the responsibility of the installer to 

ensure the installation is sufficient to carry the truckloader 

or truckloader mounting kit.

Your Little Wonder 14HP Truckloader can be mounted in 

four different ways. Brief instructions for each are listed

below. Refer to the specific mounting kit for detailed

instructions.

MOUNT SHREDDING TRUCKLOADER 

FRAME

1.  Mount the Shredding truckloader frame to the frame 

or swing away, and secure frame with (6) six 3/8” hex 

head bolts (Grade 5 or better), 3/8” flat washers, and 

3/8” lock nuts.

Содержание LITTLE WONDER monster Truckloader 8143-06-01

Страница 1: ...PARTS OPERATOR S MANUAL MAN 4177059 Rev A 8 2018 Original Language Instructions MODEL 8143 06 59 14 HP Kohler Skid Mount ...

Страница 2: ...e exhaust from this product contains chemicals known to the State of California to cause cancer birth defects or other reproductive harm CALIFORNIA Proposition 65 Warning Battery posts terminals wiring insulation and related accessories contain lead and lead compounds chemicals known to the State of California to cause cancer and birth defects or other reproductive harm WASH HANDS AFTER HANDLING ...

Страница 3: ...ion of all controls Observe all safety precautions Follow all instructions and warnings Do not remove or defeat any safety features Make sure those who operate this machine are as well informed and careful in its use as you are See a Little Wonder dealer for any service or parts needed Little Wonder service ensures that you continue to receive the best results possible from Little Wonder products ...

Страница 4: ... by Little Wonder will be considered the responsibility of the individual s or company designing and or making such changes Little Wonder will vigorously pursue full indemnification and costs from any party responsible for such unauthorized post manufacture modifications and or accessories should personal injury and or property damage result This symbol means ATTENTION BECOME ALERT Your safety and...

Страница 5: ...quipment Local regulations can restrict the age of the operator Never allow to ride sit or stand on machine Keep warning labels and this operator s manual legible and intact Replacement labels and manuals are available from the factory Do not operate machine while under the influence of drugs or alcohol The owner user can prevent and is responsible for accidents or injuries occurring to themselves...

Страница 6: ...Y In general Use extra care when loading or unloading the truckloader onto a trailer or truck Slow down and use caution when making turns and crossing roads and sidewalks Do not run the engine in an enclosed area where dangerous carbon monoxide fumes can collect While operating the machine maintain a safe operating position secure footing and good balance at all times Before operating install inta...

Страница 7: ...t to remove materials from intake or discharge when unit is running or impeller is rotating Fan coasts after the engine is turned off Only replace impeller Never straighten or weld them Keep other persons away from impeller Caution should be used when clearing debris from inside the housing Gloves should be worn as sharp edges on the impeller or in the debris may be present Fuel Gasoline is flamma...

Страница 8: ...ors only Store fuel in an approved container in a cool dry place Keep the machine and fuel containers in a locked storage place to prevent tampering and to keep children from playing with them Do not store the machine or fuel container near heating appliances with an open flame such as a water heater or an appliance with a pilot light Keep gasoline storage area free of grass leaves and excessive g...

Страница 9: ... of blower housing Stop engine and remove spark plug wire before cleaning or servicing 4165513 15m HOT SURFACE BURN HAZARD Keep a safe distance Allow to cool before servicing 4165512 THROWN OBJECT HAZARD Keep bystanders at least 15m away Direct discharge into a suitable receptacle ...

Страница 10: ...d hearing Wear Respiratory Equip ment to protect yourself from breathing dust Rotating Fan CUT AMPUTATION HAZARD Keep hands and and other body parts out of blower housing Before Servicing Stop engine Remove key if applicable Remove spark plug wire s Read understand and obey Operator Manual Pay particular attention to safety sections Store in a safe place P N 600602 ...

Страница 11: ...lange Insert the adaptor turn to lock and secure in place with the locking knobs 6 Read the Operator s manual before operating the machine DEBRIS RECEPTACLE The Truckloader is intended to be used in conjunction with a truck or trailer mounted debris receptacle to load landscape debris for removal from a work site to storage dump or processing site These receptacles or debris bodies or boxes are pr...

Страница 12: ... Class III or Class IV hitch receiver Application Inexpensive mount on either a fixed or tilted bed truck Must be removed to tilt bed or unload Install the hitch bar in the channel underneath the truckloader unit Secure the hitch bar from pulling out with the hitch pin and hairpin cotter provided Sandwich the hitch bar between the unit and the clamp plate Secure the clamp plate with six 6 3 8 16X1...

Страница 13: ...ng the top of the Shredding truckloader housing and slide the flange clamp plate over the four housing flange studs 3 Direct discharge into The debris receptacle and affix it with 2 two knobs 2 two flanged nylon insert nuts as shown below CHANGE DISCHARGE CHUTE DIRECTION 1 Loosen knobs and nuts 2 Swivel discharge chute to desired direction 3 Affix chute by retightening knobs and nuts 4 Additional ...

Страница 14: ...4 Insert hose flange in one end of hose and tighten bridge clamp 5 Place hose bands over hose near flange end 6 Get boom arm assembly and attach chains to hose bands with bolts and nuts 7 Place boom arm pivot shaft into housing tube 8 Install knobs onto hose flange Leave knobs loose 9 Push hose flange studs into front plate notches and turn to lock Tighten knobs to secure into position 10 Install ...

Страница 15: ...ransporting the machine by trailer or truck during storage Move to the ON position before starting the engine HOSE ATTACHMENT Slide the hose adaptor into the slots on the inlet tube twist it to lock the studs into the slots and tighten the locking knobs to secure in place BOOM ASSEMBLY The hose boom assembly supports the hose while allowing it to move horizontally DISCHARGE CHUTE The discharge chu...

Страница 16: ...ded for vacuuming leaves clippings and other similar sized organic material from the ground into a truck or trailer Large sized or long stringy material will tend to clog Vacuuming sand rocks and hard litter will shorten the life of this machine and may damage the machine or parts of it PRE OPERATION CHECK LIST OPERATOR S RESPONSIBILITY Review and follow all safety rules and safety decal instructi...

Страница 17: ...ecrease in suction is experienced there may be a debris blockage in the hose Often a clogged hose can be cleared by stretching the hose out straight with the engine running If the hose does not clear you will need to remove the hose Before removing the hose or attempting to clear a clog manually STOP the engine Put the engine switch in the OFF position Wait for the impeller to come to a complete s...

Страница 18: ...ark plug wire so fan movement cannot inadvertently start engine Remove hose from blower inlet Remove nuts securing blower inlet assembly and open blower inlet assembly Remove liner retainer Remove the old liner Install the new liner with the thick rubber side towards the fan Use new bolts and washers Start at one end and work around the housing leaving the fasteners loose until all the fasteners h...

Страница 19: ... Start the engine and run until all the fuel is used from the carburetor float bowl and the engine stops 3 While the engine is still warm drain the crankcase oil and replace with the proper weight oil corresponding to the season the equipment will be used next 4 Remove the spark plug and squirt a small amount of engine oil into the cylinder Reinstall the plugs and ground spark plug leads DO NOT co...

Страница 20: ...Oil Capacity 1 4 qt 1 3 Liters Vacuum Hose 8 dia x 10 Discharge 7 Mounting Requirements 2 square Class III or Class IV Swing Away Receiver Hitch Heavy Duty Dump Body Tailgate Tailgate mount Skid mount Impeller 4 Blade 5 16 Steel with Taper Locking Hub Dimensions Shipped 57 L X 46 W X 37 H Dimensions Assembled 24 L X 27 W X 72 H Dry Weight 225 lbs ...

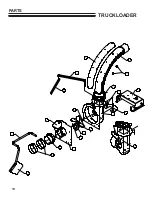
Страница 21: ...1 2 5 4 3 6 9 11 10 12 13 14 15 17 16 19 8 20 21 18 7 19 TRUCKLOADER PARTS ...

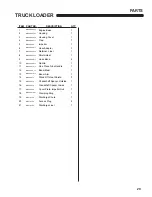
Страница 22: ...MP020407 31 Shield Heat 1 9 MP020408 17 Hose Band 2 10 MP020409 17 Nozzle 1 11 MP020410 17 One Piece Tube Handle 1 12 MP020411 17 Boom Mast 1 13 MP020412 17 Boom Arm 1 14 MP020413 Stand Off Heat Shield 3 15 MP020414 Chankshaft Spacer Outside 1 16 MP020415 Crankshaft Spacer Inside 1 17 MP020046 Cover Plate Impeller Hub 1 18 MP020416 31 Clamping Ring 1 19 MP010102 Discharge Chute 1 20 MP010106 Acces...

Страница 23: ......

Страница 24: ... of proper storage or accidents nor does it cover routine maintenance parts and service This limited warranty does not cover any defects due to repairs or alterations made to the product made by anyone other than LITTLE WONDER or its registered dealers You must maintain your LITTLE WONDER TRUCKLOADER by following the maintenance procedures described in the owner s manual Such routine maintenance w...

Отзывы: