background image

9

Classic

Pro

GENERAL INSTRUCTIONS

 OPERATING ON SLOPES

USE EXTRA CARE WHEN WORKING ON SLOPES

• 

With walk behind machines, mow across slopes, 

not

 up and down.  With ride-on machines, mow up 

and down slopes, 

not

 across, except for zero turn 

machines.  Zero turn machines should mow across 

slopes.

• 

Be alert to dips and rises which change the general 

slope. Watch for holes, rocks and roots in the terrain 

and other hidden hazards.  Keep away from drop 

offs.  Avoid ground conditions which will cause the 

machine to slide.

• 

If the operator is uncomfortable or unsure of the 

machines stability, operation on these slopes should 

cease immediately.

• 

The ultimate responsibility for safe operation on 

slopes, rests with the operator.

• 

Use lower speeds and exercise extreme caution 

on slopes and especially in sharp turns to prevent 

tipping and loss of control.  Use extra caution when 

changing direction on slopes.

 LEAVING THE DRIVING POSITION

Park the machine on level ground.  Before leaving the 

driving position, stop the engine, make sure all moving 

parts are stationary and that the traction control levers 

are in the neutral position.  Apply parking brake, if so 

equipped.

MAINTENANCE AND ADJUSTMENTS 
• 

Disconnect spark plug wire(s) before doing any 

maintenance.

• 

Particular care must be taken when adjusting the 

carburetor while the engine is running.  Keep hands 

and feet clear. Shut off PTO.

• 

When working underneath lifted parts or machines, 

make sure adequate support is provided.

• 

Do not dismantle the machine without releasing or 

restraining forces which can cause parts to move 

suddenly.

• 

Keep all nuts, bolts and screws tight to be sure the 

equipment is in safe working condition.

• 

Check the grass catcher frequently for wear and 

deterioration.

• 

Replace worn or damaged parts for safety.

STORAGE
• 

Never store the equipment with gasoline in the tank 

inside a building where fumes may reach an open 

flame or spark.

• 

Allow the engine to cool before storing in any 

enclosure.

• 

To reduce the fire hazard, keep the engine, muffler, 

battery compartment (if equipped) and gasoline 

storage area free of grass, leaves or excessive 

grease.

• 

If the fuel tank has to be drained, this should be 

done outdoors.

• 

Use only replacement parts supplied by the original 

manufacturer.

Содержание BOB-CAT 33007J

Страница 1: ...OPERATOR S PARTS MANUAL MOWERS MAN 4173014 Rev A 11 2015 MODELS 932007J FS481V KAWASAKI 32 CLASSIC PRO 933007J FS481V KAWASAKI 36 CLASSIC PRO 934007J FS481V KAWASAKI 48 CLASSIC PRO ...

Страница 2: ...s congénitaux et d autres dangers en matière de reproduction El estado de California hace saber que los gases de escape de este producto contienen productos quÍmi cos que producen cáncer defectos de nacimiento y otros daños en el proceso de reproducción humana CALIFORNIA Proposition 65 Warning Battery posts terminals wiring insulation and related accessories contain lead and lead compounds chemica...

Страница 3: ...re Inc service ensures that you continue to receive the best results possible from Schiller Grounds Care Inc products You can trust Schiller Grounds Care Inc replacement parts because they are manufactured with the same high precision and quality as the original parts Schiller Grounds Care Inc designs and builds its equipment to serve many years in a safe and productive manner For longest life use...

Страница 4: ...s add on accessories or products not approved by Schiller Grounds Care Inc will be considered the responsibility of the individual s or company designing and or making such changes Schiller Grounds Care Inc will vigorously pursue full indemnification and costs from any party responsibleforsuchunauthorizedpost manufacture modifications and or accessories should personal injury and or property damag...

Страница 5: ...5 Classic Pro LABELS ...

Страница 6: ...RAKE TURN ENGINE OFF REMOVE KEY O I 4172373 2000569 DO NOT ALLOW CHILDREN UNSKILLED OR IMPROPERLY TRAINED PERSONNEL TO OPERATE DISCONNECT SPARK PLUG WIRES BEFORE PERFORMING ADJUSTMENTS CLEANING OR MAINTENANCE WEAR STURDY SHOES MOW ACROSS SLOPES DO NOT DEFEAT INTERLOCKS CHECK OPERATION DAILY KEEP LABELS GUARDS AND SHIELDS IN PLACE REPLACE IF DAMAGED REPLACE OPERATORS MANUAL IF LOST OR DAMAGED OBEY ...

Страница 7: ...epotentiallydangerous Nopersonshould operate the machine unless they are familiar with the controls and the proper use of the machine b Neverallowchildrenorpeopleunfamiliarwiththese instructions to use the mower Local regulations may restrict the age of the operator c Keep the area of operation clear of all persons particularly small children and pets d Keepinmindthattheoperatororuserisresponsible...

Страница 8: ...or the blades to come to a complete stop and disconnect the spark plug wire before clearing blockages or unclogging chute before checking cleaning or working on the mower after striking a foreign object Inspect the mower for damage and make repairs before restarting and operating the mower if mower starts to vibrate abnormally check immediately for the cause Vibration is generally a warning of tro...

Страница 9: ...all moving parts are stationary and that the traction control levers are in the neutral position Apply parking brake if so equipped MAINTENANCE AND ADJUSTMENTS Disconnect spark plug wire s before doing any maintenance Particular care must be taken when adjusting the carburetor while the engine is running Keep hands and feet clear Shut off PTO When working underneath lifted parts or machines make s...

Страница 10: ... the throttle lever back the engine will idle down CHOKE I Pull to close choke Push to open choke TRACTION CONTROL LEVERS F The traction control levers have five functions 1 To provide a neutral position to maneuver the machine manually See Traction Lock illustration below 2 To engage drive to the wheels gradually release the traction control levers to take up the drive 3 To apply the brakes pull ...

Страница 11: ...r and result in excessive wear For maneuvering where the gearbox does not give the required speed partial throttle may be used Steering is controlled by the operation of the traction control levers To steer the machine to the left dis engage drive to the LH wheel by pulling up the LH traction control lever To steer to the right disengage drive to the RH wheel by pulling up the RH traction control ...

Страница 12: ...evers up until brakes engage 2 Engage the traction locks to parking brake position 3 Disengage the cutterdeck with PTO switch 4 Shift transmission to neutral 5 Close the throttle to slow the engine turn engine off with the keyswitch NOTE When the machine is transported by truck or trailer or left to stand unused the fuel valve under the fuel tank should be turned off This avoids the possibility of...

Страница 13: ...itable means 2 Remove brake rod R from bellcrank Q 3 Remove 4 bolts M 2 washers K and 4 nuts L 4 Place the axle J in the desired position according to the Height of Cut Chart on page 12 5 Install the bolts washers and nuts removed in step 3 NOTE Install the washers K on the bolts in the slots 6 Install the brake rod R onto bellcrank Q 7 Adjust brakes and belt guide V as shown in the ADJUSTMENT sec...

Страница 14: ... angle These height of cut charts were developed in a controlled workshop environment Slight variations can occur in the field depending on tire pressures etc Make sure front of blade is lower than back of blade to prevent double cutting Adjustment is provided by removing 1 8 washer beneath caster support HEIGHT OF CUT CHART HEIGHT OF CUT ...

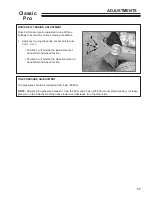
Страница 15: ... should be a 1 8 minimum gap between the traction control rod and the bottom of the drive slot when the drive is engaged and the traction control lever is pushed down If there is no gap the rod will hold the wheel belt idler up and the belt may slip Too much gap makes it difficult to get adequate braking and free wheeling neutral when traction locks are in the neutral position The gap may be incre...

Страница 16: ...T and brake band may be moved to a different hole in the brake arm 7 Adjust belt guide V to remove any sag in the drive belt between the drive pulley and the wheel pulley When the brakes are properly adjusted the machine can be freely manuevered with the traction control levers in the neutral position If not the brakes have been over adjusted and have to be backed off NOTE Clean inner groove of wh...

Страница 17: ...2 or 3 Position 1 will provide the least amount of hand effort and wheel traction Position 3 will provide the highest amount of hand effort and wheel traction TIRE PRESSURE ADJUSTMENT Tire pressures should be maintained at 14 psi 96 kPa NOTE Adjusting tire pressure between 10 psi 69 kPa and 28 psi 193 kPa can improve tracking Increase pressure on the side the machine tracks toward and decrease it ...

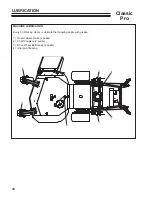
Страница 18: ...ro LUBRICATION MACHINE LUBRICATION Every 50 Working Hours Lubricate the following points with grease 1 Caster wheel pivots 2 points 2 Shaft Couplers 2 points 3 Drive Wheel Bellcranks 2 points 4 Idler pivot bearing ...

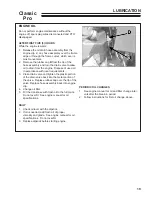
Страница 19: ...ith local requirements 3 Clean drain valve and tighten the plastic portion of the drain valve back into the metal portion of the valve Replace rubber cap over the tip of the valve Replace hose assembly back into engine clip 4 Change oil filter 5 Fill the crankcase with fresh oil to the full mark Do not overfill See engine manual for oil specifications DAILY 1 Check oil level with the dipstick 2 If...

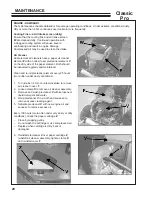
Страница 20: ...ise to remove air cleaner cover F 2 Loosen clamp X to remove air cleaner assembly 3 Remove and wash precleaner V with kerosene or liquid detergent and water 4 Wrap precleaner V in a cloth and squeeze to remove excess cleaning agent 5 Saturate precleaner V with new engine oil and squeeze to remove excess oil Every 100 hours more often under very dusty or dirty conditions check the paper cartridge Z...

Страница 21: ...TER When required the fuel filter X may be replaced See the Parts Section for service part numbers SPARK PLUG Remove plug and check condition Good operating conditions are indicated if the plug has a light grey or tan deposit A white blistered coat ing may indicate overheating A black coating usually means an over rich fuel mixture caused by a clogged air cleaner or improper carburetor adjustment ...

Страница 22: ...des do not use another manufacturer s blades as this could be dangerous Replace cracked or bent blades BLADE REMOVAL 1 Use a box wrench or socket with a long breaker bar to remove spindle bolt under cutterdeck 2 Slip tube over breaker bar or wrench if necessary to gain leverage 3 Keep hands clear as blades may rotate when bolt releases 4 When changing blades wear thickly padded gloves 5 Block blad...

Страница 23: ...i O k c e h C X r i A l i O r o f k c e h C s k a e L X e k a t n I r i A n a e l C X r e n a e l C r i A n a e l C X r e t l i F l i O e g n a h C X L A U N A M S R E R U T C A F U N A M E N I G N E E E S r e t l i F l e u F k c e h C t s u j d A e c a l p e R g u l P k r a p S L A U N A M S R E R U T C A F U N A M E N I G N E E E S X O B R A E G l e v e L l i O k c e h C X E N I H C A M e r i T ...

Страница 24: ...__________________________ ________________________________________________ ________________________________________________ ________________________________________________ L A R E N E G E T A D S R H E T A D S R H E T A D S R H E T A D S R H E T A D S R H E T A D S R H s e r u s s e r p e r i t k c e h C s t n i o p l l a e t a c i r b u L s t l o b s t u n k c e h C E N I G N E l e v e l l i o ...

Страница 25: ... BELT 1 Rotate idler arm A counterclockwise using a 3 8 ratchet or breaker bar and remove belt 2 Install belt as shown 48 CUTTERDECK PTO BELT 1 Rotate idler arm B counterclockwise using a 3 8 ratchet or breaker bar and remove belt 2 Install belt as shown ...

Страница 26: ...til gearbox drive belt is snug WHEEL DRIVE BELT Remove brake rod R and tracton control rod D from bellcrank Q Remove bottom bolt C and spacer from fender Y and loosen the bolt E that holds bellcrank Rotate bellcrank and idler up and out of the way The wheel drive belt will be slack enough to be removed from its pulleys and passed over the drive wheel Replace in the reverse order readjust traction ...

Страница 27: ...0 CONTROLS THROTTLE SPEED SELECTOR LEVER FINGER TIP WHEEL DRIVE LEVERS BLADE DRIVE ENGAGEMENT SWITCH PARKING BRAKES AT TRACTION LEVER LOCKS OPERATOR PRESENT CONTROLS AXLE 1 0 25 4mm DIAMETER STEEL SHAFT REPLACEABLE DRIVE BELTS HB SINGLE WITH ARAMID FIBER USED ON MODEL 932007J ONLY HB DOUBLE BANDED WITH ARAMID FIBER DRIVE TIRES 13 X 5 00 TURF TREAD SPINDLES 1 SPINDLE SHAFT ON MAINTENANCE FREE SEALE...

Страница 28: ...T P M U S N O C D E E P S D A O L X A M r h l a g 25 1 r h l 4 74 FS481V 2 9 X 2 8 73mm x 72mm 32 1 N A 36 8 ci 603cc See engine manufacturer s specifications and website S K C E D E G R A H C S I D E D I S L E D O M R E B M U N 7 0 0 2 3 9 7 0 0 3 3 9 7 0 0 4 3 9 H T D I W N W O D E T U H C 8 2 4 m m 6 8 0 1 7 4 m m 4 9 1 1 5 8 5 m m 6 8 4 1 H T D I W P U E T U H C 2 6 2 3 m m 8 2 8 5 6 3 m m 7 2...

Страница 29: ...PARTS SECTION ...

Страница 30: ...30 Classic Pro FIGURE 1 UPPER ENGINE DECK ASSEMBLY 33 31 32 1 12 11 10 9 8 7 6 5 3 4 14 15 16 17 18 20 19 2 13 21 22 23 24 25 26 36 35 27 28 29 30 34 17 17 20 13 15 13 25 25 ...

Страница 31: ... BLT FLG HD M8 1 25 X 20 6 14 64123 16 BLT HEX 3 8 16X1 1 4 4 15 64266 02 NUT FL CRWN LCK M8 1 25 4 16 64123 15 BLT HEX 3 8 16X3 4 3 17 64006 03 LOCKWSHR 3 8 HELICAL 8 18 64123 50 BLT HEX 3 8 16X1 1 19 48228 12 CLIP CABLE INSULATED 1 20 64163 31 WSHR 25 64X1X12 7 21 64205 018 BLT METRIC M8 1 25X15 1 22 64002 04 LOCKWASHER EXT 5 16 1 23 4162977 01 HOSE FUEL 1 4 INCH 18 5 1 24 4179746 VENT IN LINE F...

Страница 32: ...32 Classic Pro FIGURE 2 LOWER ENGINE DECK ASSEMBLY 1 22 7 8 6 19 18 26 14 10 10 15 9 5 12 2 25 28 13 16 11 23 17 24 20 21 27 3 3 3 4 4 ...

Страница 33: ... WOODRUFF 19X 75 9 1 10 64044 1 SCREW SET 1 4 20X1 4 2 11 64163 55 WASHER 2 12 64025 05 NUT 3 8 16 HEX 1 13 38010 2A IDLER PULLEY 1 14 64144 01 SNAP RING 5 8 1 15 128175 PULLEY SNGL GRV 7 ED 1 16 2721796 BELT MIDSIZE GEARBOX 1 17 38304 03 BRG FLANGED PLASTIC 1 18 64123 155 BLT HEX 7 16 20 X 3 1 19 64006 06 LOCKWSHR HELICAL 7 16 1 20 64123 54 BOLT 5 16 18X3 4 HEX 2 21 64229 02 LOCKNUT NYLON 5 16 18...

Страница 34: ...65 62 55 32 34 57 16 54 51 58 26 36 35 27 27 30 31 18 25 68 43 49 62 44 53 65 67 27 71 69 27 64 56 55 14 61 27 66 27 59 27 27 4 49 53 44 60 29 10 41 39 12 22 21 28 13 19 23 18 17 6 23 19 18 21 15 2 11 24 40 7 9 8 22 3 20 42 1 45 63 52 49 48 10 29 5 50 70 47 ...

Страница 35: ... SPACER 2 32 2308000 PULLEY IDLER 2 33 4136715 SPACER FENDER 8 34 64123 138 BLT HEX 3 8 16X3 3 4 2 35 64123 93 BLT HEX 3 8 16X5 4 36 2721369 7 COVER BELT BOBCAT 2 37 2721365 7 WLDMT LH BELLCRANK 1 38 2721364 7 WLDMT RH BELLCRANK 1 39 4127203 TRNSMSN 5 SPD W REV 1 SEE FIGURE 7 FOR PARTS BREAKDOWN 40 64163 29 21 64x1x11GA WASHER 2 41 2721477 BELT HB 56 75 2 42 4151917 PULLEY SINGLE GROOVE 2 43 41592...

Страница 36: ... 55 32 34 57 16 54 51 58 26 36 35 27 27 30 31 18 25 68 43 72 62 44 53 65 67 27 46 69 27 64 56 55 14 61 27 66 27 59 27 27 4 72 53 44 60 29 10 41 39 12 22 21 28 13 19 23 18 17 6 23 19 18 21 15 2 11 24 40 7 9 8 22 3 20 42 1 45 63 52 49 48 10 29 50 5 49 49 71 70 47 66 ...

Страница 37: ... SPACER FENDER 8 34 64123 139 BLT HEX 3 8 16X4 2 35 64123 130 BLT HEX 3 8 16X5 1 2 4 36 2721369 7 COVER BELT 2 37 2721365 7 WLDMT LH BELLCRANK 1 38 2721364 7 WLDMT RH BELLCRANK 1 39 4127203 TRNSMSN 5 SPD W REV 1 SEE FIGURE 7 FOR PARTS BREAKDOWN 40 64163 29 21 64x1x11GA WASHER 2 41 38212 BELT BANDED A EL 55 75 2 42 4121312 PULLEY DOUBLE GROOVE 2 43 4160483 7 WLDMT CLASSIC AXLE 1 44 4124853 DRUM BRA...

Страница 38: ...38 Classic Pro FIGURE 5 CONTROL PANEL ASSEMBLY 6 15 13 20 17 3 18 26 28 9 27 2 7 1 4 11 21 24 10 25 22 5 16 14 8 12 2 9 6 29 11 29 19 9 9 2 21 23 30 30 ...

Страница 39: ... 20 X 1 2 11 64268 01 NUT FL NYLON LOCK 1 4 20 4 12 2721495 7 WLDMT UPPER HANDLES 1 13 2721505 SWITCH PTO 1 14 4169945 PLUG PLASTIC 2 15 38148 SWITCH ENGINE STOP 1 16 108208 SWITCH DBL POLE NC NO 1 17 4172426 PANEL CONTROL GD 1 INCLUDES ITEM 18 18 4172373 LABEL CTRL PANEL GD W CHK1 19 64163 03 WSHR 256ID X 62OD X 18 GA 2 20 108009 03 CONTROL CHOKE 1 21 4171606 2 CLAMP HALF 1 0IN 2 22 4172714 7 BRA...

Страница 40: ...CONTROLS ASSEMBLY 21 31 2 11 12 32 29 30 34 35 3 5 9 36 24 8 18 4 14 19 25 37 1 16 2 4 4 28 38 10 6 13 17 4 23 23 2 24 7 19 25 18 37 1 20 15 2 17 16 27 5 12 11 10 9 23 13 4 23 4 6 4 29 30 33 35 2 32 31 3 36 26 22 4 2 26 39 40 ...

Страница 41: ...BLT TDFM 1 4 20X3 4 2 18 64163 02 WSHR 321X 593X11GA 2 19 64123 64 BLT HEX 5 16 18X2 1 4 2 20 4169223 HANDLE LH 1 21 4169224 HANDLE RH 1 22 2308065 SPRING EXTENSION 1 23 38371 03 BRG NYLINER 3 16 4 24 33103 SWIVEL 2 25 4168050 ROD TRACTION CONTROL GD 2 26 38371 01 BRG NYLINER 3 8 2 27 4169315 7 HANDLE OP PRESENT LH 1 28 4169316 7 HANDLE OP PRESENT RH 1 29 33288 STUD DOUBLE ENDED 2 30 33243 SPACER ...

Страница 42: ...42 Classic Pro FIGURE 7 PEERLESS TRANSMISSION ...

Страница 43: ...NG RETAINING 1 29 780072 WASHER 6 30 780108 WASHER 5 32 792001 O RING 2 34 780105A BUSHING FLANGED 2 45 2308007 NEUTRAL SWITCH NC 1 49 778146A GEAR SPUR 37 TEETH 1 50 778125 GEAR SPUR 35 TEETH 1 51 778239A GEAR SPUR 32 TH ST 1 52 778124A GEAR SPUR 30 TEETH 1 53 778123A GEAR SPUR 25 TEETH 1 56 778145 GEAR SPUR 12 TH ST 1 57 778151 GEAR SPUR 15 TEETH 1 58 778240 GEAR SPUR 18 TH ST 1 59 778126A GEAR ...

Страница 44: ...44 Classic Pro 32 DECK 40 46 45 10 22 20 47 31 40 44 31 40 48 FIGURE 8 ...

Страница 45: ... 4 20 X 3 4 2 22 4164932 7 BRKT CHUTE SUPPORT 1 23 4160260 S 32 FRAME WLDMT 1 24 64141 4 NUT WLF 3 8 16 8 25 64006 05 LOCKWSHR HELICAL 1 2 1 26 64262 012 BLT FLG HD 3 8 16 X 1 1 4 12 27 64025 16 NUT HEX 5 8 18 2 28 64123 05 BLT HEX 1 2 20X1 1 2 1 29 64221 04 E RING 875 1 30 64262 010 BLT FLG HD 3 8 16 X 3 4 8 31 64123 50 BOLT HEX 3 8 16X1 7 32 DECK FIGURE 8 32 64123 88 BOLT 3 8 16X2 3 4 HEX 1 33 6...

Страница 46: ...46 Classic Pro FIGURE 9 36 DECK 47 48 40 10 20 39 44 22 31 40 49 ...

Страница 47: ...4932 7 BRKT CHUTE SUPPORT 1 23 4137390 S 36 FRAME WLDMT 1 24 64141 4 NUT WLF 3 8 16 8 25 64006 05 LOCKWSHR HELICAL 1 2 1 26 64262 012 BLT FLG HD 3 8 16 X 1 1 4 12 27 64025 16 NUT HEX 5 8 18 2 28 64123 05 BLT HEX 1 2 20X1 1 2 1 29 64221 04 E RING 875 1 30 64262 010 BLT FLG HD 3 8 16 X 3 4 8 31 64123 50 BOLT HEX 3 8 16X1 9 32 64123 88 BOLT 3 8 16X2 3 4 HEX 1 33 64163 12 635 640X1 0X 25 WASH 4 34 641...

Страница 48: ...48 Classic Pro FIGURE 10 48 DECK 51 50 54 43 45 42 48 53 46 54 44 46 55 55 46 10 20 56 52 22 31 46 57 ...

Страница 49: ...16 X 1 1 4 18 27 64025 16 NUT HEX 5 8 18 3 28 64123 05 BLT HEX 1 2 20X1 1 2 1 29 64221 04 E RING 875 1 30 64139 21 BLT WLF 3 8 16X3 4 8 31 64123 50 BOLT HEX 3 8 16X1 4 32 64123 88 BOLT 3 8 16X2 3 4 HEX 1 33 64163 12 635 640X1 0X 25 WASH 6 34 64163 16 WSHR 41 64X1 3 8X12GA 3 35 64209 03 SPRING WASHER 67 ID 3 36 64163 65 WASHER 890X1 375X18GA 1 37 64164 12 KEY 1 4X1 4X1 SQ END 3 38 113086 SPACER 2 3...

Страница 50: ...50 Classic Pro FIGURE 11 CASTER ASSEMBLY 1 2 3 4 5 4 6 3 7 8 10 9 15 14 14 11 13 12 16 11 19 18 20 17 ...

Страница 51: ... GREASE FITTING 1 7 64163 84 WSHR 1 015 X 1 75 X 125 1 8 2721484 7 WLDMT CASTER YOKE 1 9 64229 05 LOCKNUT NYLON 1 2 13 1 10 64123 166 BLT HEX 1 2 13X5 1 2 1 11 2722591 SPACER 3 4 INCH BRG 2 12 2722230 04 SPANNER 1 13 64123 01 BLT HEX 5 16 24X3 4 4 14 2722682 BEARING 9 WHEEL 2 15 64141 1 NUT WLF 5 16 24 4 16 4165544 WHEEL ASSY 9X3 5 4 1 INCLUDES 13 15 HUBS W TIRE 17 64141 4 NUT WLF 3 8 16 4 18 6425...

Страница 52: ...O BL O B NC NO BLOCK FUSE 6 OPERATOR PRESENCE SWITCH 5 4 SWITCH KEY SWITCH PTO 7 1 2 CHARGING ENGINE CLUTCH BLUE W WHITE STRIPE R Y B BL BLW O BR WIRE RED BLACK YELLOW ORANGE BROWN BLUE COLOR GROUND ENGINE ENGINE KILL P PURPLE OPERATOR PRESENCE RELAY 87 NO 30 86 RELAY SCHEMATIC 85 87A NC 9 3 SWITCH NEUTRAL ...

Страница 53: ...GRAM 1 2721110 CLUTCH ELECTRIC 1 INCLUDES ITEM 2 2 2720949 ASSY CLUTCH WIRE 1 3 2722033 SWITCH NEUTRAL 1 4 38148 SWITCH ENGINE STOP 1 5 108208 SWITCH DBL POLE NC NO 1 6 148082 10 FUSE 10 AMP 1 7 2721505 SWITCH PTO 1 8 4166845 HARNESS MID GEAR DRV 1 INCLUDES ITEM 6 9 9 2722325 RELAY 40 AMP SEALED 1 ...

Страница 54: ...54 Classic Pro FIGURE 13 DECALS 8 4 UNDER COVER 1 12 11 7 2 10 14 6 9 15 16 13 5 3 ...

Страница 55: ...71 LABEL IMPORTANT 1 6 4116761 LABEL MADE IN USA 1 7 2000572 LABEL WARNING BLADES 1 8 4164269 LABEL DANGER WARNING 1 9 2000678 LABEL ROT PARTS WSHR 1 10 2000704 LABEL MIDSIZE PATENT 1 11 2000673 DECAL OP MAN TIRES 1 12 2000575 LABEL WARNING 1 13 4124261 LBL DBL GEAR SEL WARN 1 14 4172528 LABEL PARK NTRL DRIVE 2 15 4130725 LABEL CLASSIC 1 16 4172196 LABEL DECK SIZE 32 1 4162912 LABEL DECK SIZE 36 4...

Страница 56: ...56 Classic Pro FIGURE 14 CUTTERDECK WEIGHTS ...

Страница 57: ...TION QTY 1 4160260 S 32 FRAME WLDMT 1 4137390 S 36 FRAME WLDMT 1 4137391 S 48 FRAME WLDMT 1 36 48 ARE OPTIONAL 2 4162891 7 WEIGHT 4 3 64262 012 BLT FLG HD 3 8 16 X 1 1 4 4 4 64123 50 BOLT HEX 3 8 16X1 2 5 64229 03 LOCKNUT NYLON 3 8 16 6 CUTTERDECK WEIGHTS FIGURE 14 ...

Страница 58: ...SCHILLER GROUNDS CARE INC ONE BOB CAT LANE P O BOX 469 JOHNSON CREEK WI 53038 920 699 2000 www schillergc com Schiller Grounds Care Inc 2010 ...

Отзывы: