international 71
• Noise can be a health hazard. If the permitted noise
level is exceeded when working, be sure to wear ear
protection.
• The use of incorrect or damaged mains cables can lead
to injuries caused by electricity.
• Even when all safety measures are taken, some remai-
ning hazards which are not yet evident may still exist.
• Remaining hazards can be minimized by following the
instructions given in the chapters „Safety notes“ and
„Use as authorized“ as well as in the entire operating
manual.
Even when all safety measures are taken, it is not possible
to exclude all remaining hazards. Due to the construction
of the machine, the following risks can occur:
• Injury of the lung when no breathing mask is worn.
• Injury of the ear when no ear protection is worn.
• Injury of the eyes when no efficient goggles (or protec-
tive screen) are worn.
Warning:
If an air hose is broken off or damaged, the air input on
the compressor must be switched off. A broken air hose
that is not supported, is extremely dangerous and can
quickly start to rotate, hitting people or blowing foreign
bodies in the air.
Do not try to catch the hose. Instead, immediately remove
all spectators from the dangerous area, cut off the air in-
put, and switch the machine off by pressing the ON/OFF
switch. Then remove the hose from the compressor.
Unpacking
Due to modern series production it is improbable that
your compressor has any defects or that a part is missing.
Should you note a fault, however, do not switch the ma-
chine on before the parts are replaced or the fault has
been remedied. Not observing this instruction can lead to
serious injuries.
Assembly
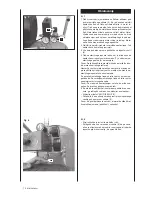
Wheels, fig. 2
1 To attach the wheels (12), pass a washer with the wheel
bolt through the wheel. Then add a washer and a hexa-
gon nut on the inside of the wheel. Fasten the nut by
hand so that the wheel still can be rotated.
2 Push the wheel unit through the ear below the tank.
3 Fasten it with a washer, a safety washer and a
nut and tighten them securely.
4 Repeat this process with the second wheel.
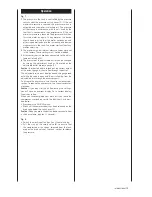
Rubber feet, fig. 3
Attach the rubber feet on the ear at the bottom of the
tank’s front side using the screws, washers and nuts pro-
vided.
Содержание HC54
Страница 109: ...international 107...

