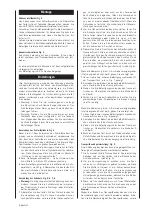
Scheppach 81080101 Скачать руководство пользователя страница 16

english 15

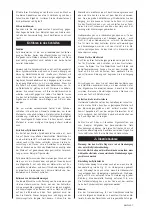
two above and two below, and if necessary tighten them.

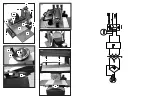
Adjustment of the Cylinder, Fig. 5, 6, 7, 8

• 

Warning: In order to avoid serious injury, always unplug 
the sanding machine before you begin maintenance or 
adjustment work.

Check that the positioning screws for the hoisting ten-
sion (Fig. 5) are correct. These screws must be adjusted 
to make the height adjustment possible and also to limit 
the play of the cylinder. (If the screws are too loose, 
then the cylinder has too much play during sanding and 
this can make the surface uneven. If the screws are too 
tight, then it is difficult to make height adjustments.)

In  order  to  position  the  height  adjustment  screws, 
loosen the safety nuts, which hold the screws in place. 
Loosen the screws as necessary a quarter of a turn or 
tighten them to achieve the desired level of tightness 
and smooth functioning. Tighten the safety nuts again 
in order to fix the screws‘ position.

Check the alignment of the sanding cylinder and the 
transport  table.  To  do  this,  first  remove  the  sanding 
belt from the cylinder. The goal of this adjustment is 
to maintain the same distance between points A and 
B, which, in turn, ensures that the cylinder is parallel 
to  the  entry  table  and  thus  allows  even  sanding  (see 
Fig. 6).

If the distance A is 0.5 mm or less/larger than the same 
point at B, proceed as follows:

Loosen  the  two  outside  fastening  screws  (C)  on  the 
transport table, as shown in Fig. 7.

As necessary, push one or both of the spacers under the 
edge of the transport table.

Tighten  the  fastening  screws  on  the  transport  table. 
Check once again the measurements at A and B.

Make a test run and check that the machine produces 
an even thickness. Repeat this procedure as often as 
necessary.

If the measurement B is 0.5 mm larger than at the same 
point in A, proceed as follows:

1  Loosen the two outside fastening screws 

(C) on the trans-

port table, as shown in Fig. 8.

As necessary, push one or both of the spacers under the 
edge of the transport table.

Tighten  the  fastening  screws  on  the  transport  table. 
Check, once again, the measurements at A and B.

Make a test run and check that the machine produces 
an even thickness. Repeat this procedure as often as 
necessary.

Positioning of the Transport Band and Tracks

, Fig. 9

Due to the stretching of the band, occasional adjustment 
of the transport band tracks may be necessary.

The screws for the transport band and track adjustment 
are to be found on the front and back of the machine 
(see Fig. 9).

In order to increase the track tension, the track screw 
must be turned clockwise, while the nut is held with an 
11 mm wrench (not included). In order to reduce the 
track tension, the track screw must be turned counter 
clockwise, while the nut is held with a wrench.

If the transport band track veers towards the inside (mo-
tor side) of the machine, then the tension on the fixing 
screw must be increased on this side of the machine.

Note:

Due to the width of the transport band, it is possible that a 

misalignment of the track is not at once evident. Increase 
the  speed  of  the  transport  band  in  order  to  be  able  to 
monitor the effect of any adjustments. Make small correc-
tions, of roughly a quarter of a turn, and check the results. 
Adjust as necessary, until the bands run correctly.
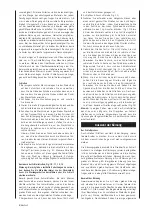
Helpful Note:

Tighten  the  desired  track  direction  on  the  opposite  side. 
That is, tighten the right side of the track adjustment so 
that the band runs to the left.

Introduction to Sanding

Function

Cylinder sanding is a repeated sanding procedure on both 
sides of a wooden work piece, until the desired size and/or 
smoothness is achieved. When this is carried out correctly, 
both sides of the work piece run parallel to each other.

Do not confuse cylinder sanding with planing. Depending 
on the coarseness, hardness of the work piece and width 
of  the  work  piece,  cylinder  sanding  removes  material  to 
0.8  mm  or  less.  In  the  case  of  a  portable  planing  ma-
chine, on the other hand, one run through of the material 
removes  up  to  3.2  mm.  If  you  can  work  with  a  planing 
machine, in order to smooth and plane your work piece to 
the size you want to attain, then you will be able quickly 
to learn how to work with your sanding machine and not 
against  it.  Be  patient  and  let  the  cylinder  sander  do  its 
work so that you can achieve the best results by removing 
0.8 mm or less.

The  most  usual  mistake  when  using  a  cylinder-sanding 
machine is trying to use force to remove too much mate-
rial  too  quickly.  Many  variables  (coarseness  of  the  sand 
paper, width of the wood, the kind of wood, entry speed 
and wood moisture content) can influence how much ma-
terial can be removed in a single pass.

Advantages of Cylinder Sanding

One advantage of a cylinder-sanding machine is that, due 
to its open construction, work pieces up to a width of 81 
cm can be handled. Although you must still always sand 
with the grain, you do not need to read the grain direction 
in order to avoid ripping. This is especially important for 
thin work pieces, or for pieces with twisted or mixed grain, 
for example with a striped pattern.

Cylinder sanding machines put much less pressure on the 
wood than planing and thus give the operator the possibil-
ity  of  working  with  material  as  thin  as  veneers  and  thus 
expands  his  or  her  range  of  operations.  Short  pieces  of 
wood, unusual forms and head wood can be sanded.

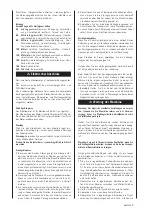
Removing Crosswise Bends in Wood

The  best  machine  to  remove  cross  warps  in  wood  is  a 
planing machine. The limited pressure applied by a sand-
ing  machine,  nonetheless,  can  remove  warps,  because 
the wood does not lie flat on the entry band and it is not 
pressed  against  the  table.  Be  patient.  Depending  on  the 
depth of the cross warps, in the wood, this procedure can 
take  some  time.  Lead  the  work  piece  into  the  machine, 
with the peak of the cross warp upwards (so that the edges 
rest on the band), and use a coarse grade of sandpaper. 
Repeat the procedure until the crown is flat on one side. 
Turn the work piece over and sand it flat. Do not be sur-
prised at how thin the wood is, after all of the warps have 

Содержание 81080101

Страница 1: ...derschuurmachine Vertaling van originele handleiding FIN Sylinterihiomakone K nn s alkuper isest k ytt ohjeesta I Levigatrice cilindrica Traduzione dalle istruzioni d uso originali DK Cylinderslibemas...

Страница 2: ...Fig 4 Fig 2 Fig 6 Fig 3 Fig 7 B A C D D A B C Fig 1 5 9 7 1 6 10 2 3 4 5 11 8 Fig 5...

Страница 3: ...4 68 73 2 69 68 26 86 87 28 85 47 84 83 89 94 93 40 39 88 92 26 91 90 26 68 27 68 26 46 45 47 44 63 27 43 42 88 40 39 38 41 37 20 19 18 48 3 1 2 47 95 96 28 97 2 1 36 102 101 12 36 116 117 115 39 114...

Страница 4: ...dung auf Vollst ndigkeit Machen Sie sich vor dem Einsatz anhand der Be die nungs anweisung mit dem Ger t vertraut Verwenden Sie bei Zubeh r sowie Verschlei und Er satzteilen nur Original Teile Ersatzt...

Страница 5: ...oder eine elektrische Einheit nicht einwandfrei funktionieren schalten Sie bitte die Maschine sofort aus und ziehen Sie den Ste cker aus der Steckdose Reparieren oder ersetzen Sie besch digte und oder...

Страница 6: ...lers genutzt werden Jeder dar ber hinausgehende Gebrauch gilt als nicht bestimmungsgem F r daraus resultierende Sch den haftet der Hersteller nicht das Risiko daf r tr gt allein der Benutzer Zum Absau...

Страница 7: ...s zu begrenzen Wenn die Schrauben zu lose sind weicht der Zylinder w hrend des Schleifens aus was zu einer unebenen Oberfl che f hrt Wenn die Schrauben zu fest sind ist es schwierig die H henein stell...

Страница 8: ...gedr ckt wird Ha ben Sie Geduld Dieser Vorgang kann abh ngig von der Kr mmungstiefe l ngere Zeit dauern F hren Sie das Werkst ck in die Maschine mit der Kr mmungskrone nach oben ein die Kanten ruhen...

Страница 9: ...einer gro en Rolle auch Ihre eigenen Streifen schneiden Ver wenden Sie dazu die mitgelieferten Streifen als Vorlage 1 Vergewissern Sie sich dass der Schalter auf AUS steht und der Netzstecker gezogen...

Страница 10: ...eschlossen werden 4 Konsultieren Sie einen Elektro oder Kundendienstfach mann wenn Sie die Erdungshinweise nicht komplett verstanden oder Zweifel haben ob die Maschine oder Steckdose vorschriftsm ig g...

Страница 11: ...Sie den Stock schalten die Maschine aus und schlie en den Riegel der Schutzhaube Austausch des Transportbandes H ufige Ursachen die den Austausch des Transportban des erfordern sind normaler Verschlei...

Страница 12: ...60555 2 EN 60555 3 Gemeldete Stelle T V Rheinland Product Safety GmbH 51101 K ln Ort Datum Ichenhausen 22 07 2009 Unterschrift i V Wolfgang Windrich Produktmanager St rungsabhilfe St rung M gliche Urs...

Страница 13: ...ions to make yourself famil iar with the device prior to using it Use only original parts for accessories as well as for wearing and spare parts Spare parts are available from your specialized scheppa...

Страница 14: ...pera tion A guard or other part that is damaged should be properly repaired or replaced Direction of work Push the workpiece towards the saw blade or cutter only in the moving direction of the tool Ne...

Страница 15: ...ylinder drive motor 3 Transport motor for grinding belt 4 On Off switch for variable speed 5 Extension tables 6 Height adjustment 7 Extraction nozzle 8 Adapter plate 9 Feeding transport belt 10 Guide...

Страница 16: ...ne Note Due to the width of the transport band it is possible that a misalignment of the track is not at once evident Increase the speed of the transport band in order to be able to monitor the effect...

Страница 17: ...ds of wood is recommended while an eighth of a turn or 0 2 mm is recommended for harder woods and or finer paper When determining the in take speed for the material to be sanded the rule is that the b...

Страница 18: ...material treats surface qualities and removes glue for sanding end grain 80 Middle aggressive removes material treats surface qualities and removes glue for sanding end grain removal of planing marks...

Страница 19: ...ed The following steps describe how to replace the conveyor belt if necessary 1 Disconnect the machine from the power supply 2 Lift the cylinder to its highest position approx 7 6 cm over the conveyor...

Страница 20: ...rvice centre Every attempt to carry out a repair can be dangerous if it is not done by skilled personnel Machine gets slower during work Too much pressure put on the workpiece Reduce the pressure on t...

Страница 21: ...Nous ne pouvons tenir compte des r clamations ult ri eures V rifier que la livraison soit bien compl te Familiarisez vous avec I appareil avant la mise en oeuvre par I tude du guide d utilisation Pour...

Страница 22: ...si la machine est renver s e ou si l utilisateur entre involontairement en contact avec l outil de pon age Contr ler les pi ces endommag es Si une pi ce de la machine manque ou si elle est endommag e...

Страница 23: ...e utilis e qu avec des acces soires et des outils d origine du fabricant Toute utilisation autre que celle sp cifi e est consid r e comme non conforme Le fabricant ne peut tre tenu responsable pour d...

Страница 24: ...s A et B pour que le cylindre soit parall le la table d alimentation et permettent par cons quent un pon age uniforme voir Fig 6 Quand la dimension A est de 0 5 mm ou de moins inf rieure celle du poin...

Страница 25: ...r glage et de pon age et par cons quent r duit la frustration Triez vos pi ces usiner en fonction de l paisseur et du grain de pon age Aller du mat riau le plus pais au plus mince ensuite passer au gr...

Страница 26: ...n droite vers l avant et approchez le mat riau du cylindre Utilisez cette technique pour enrouler la bande abrasive radialement de bord bord sur le cylindre S assurer que le mat riau de pon age ne se...

Страница 27: ...N utiliser que des bandes abrasives propres 5 V rifier r guli rement l alignement entre la bande d ali mentation du cylindre et la table En cas de besoin r tablir l alignement Avertissement Ne pas tr...

Страница 28: ...sur les machines 2006 42 EG 28 12 2009 Directive CE sur la sous tension 2006 95 EWG Directive CE EMV 2004 108 EWG Normes harmonis es appliqu es EN 292 1 EN 292 2 EN 294 EN 60204 1 EN 55014 EN 50082 4...

Страница 29: ...of aanmerkingen meteen de expediteur verwittigen Later gekomen reclamaties kunnen we niet meer aan nemen Controleer of de leverantie volledig is Voor de ingebruikname moet u zich met behulp van de ge...

Страница 30: ...t uit en trek direct de stekker uit de wandcontactdoos Repareer of vervang beschadigde of niet goed functionerende onderdelen voordat u met de werkzaamheden verder gaaat Werkrichting geleid het werkst...

Страница 31: ...en han den door de ronddraaiende schuurschijf Bij ondoelmatig vastklemmen of geleiden kan door weg schietende werkstukken letsel ontstaan Bij gebruik van elektrische bekabeling die niet aan de voorsc...

Страница 32: ...als volgt te werk 1 Los de beide binnenste bevestigingschroeven op de transporttafel zoals op afb 8 te zien is 2 Schuif naar behoefte een of beide afstandstukken onder de rand van de transporttafel 3...

Страница 33: ...g Steek nimmer uw vingers in de stofuitgang of onder de cilinderafdekking Voorzichtig Sluit om schade aan uw machine te voorkomen tijdens bedrijf een voldoend werkende stofafzuiging aan Instellen van...

Страница 34: ...assen worden gemaakt tot ze zo klein zijn dat het menselijke oog ze niet meer kan waarnemen De korrelgrootte beschrijft de mate van grofheid van het slijpmateriaal Hoe kleiner het korrelnummer des te...

Страница 35: ...vervangen 1 Neem alle waarschuwingen in acht en wees uiterst voorzichtig bij het uitvoeren van deze schoonmaak werkzaamheden 2 Zet de regelknop voor de snelheid van de transportband in de laagste sta...

Страница 36: ...2 EN 60555 3 Gemelde plaats T V Rheinland Product Safety GmbH 51101 K ln Plaats datum Ichenhausen 22 07 2009 Handtekening i o Wolfgang Windrich product manager Oplossing van storingen Storing Mogelijk...

Страница 37: ...mittajalle My hemmin saatuja valituksia ei oteta huomioon Tarkasta ett toimituksessa on kaikki tarvittavat osat Lue k ytt ohjeet tutustuaksesi laitteeseen ennen sen k ytt K yt vain alkuper isi osia li...

Страница 38: ...hteet ovat kunnossa Suoja tai muu vaurioitunut osa on korjattava oikein tai korvatta va uudella Ty j rjestys Ty nn ty stett v kappale sahanter tai leikkainta kohti vain ty kalun liikesuuntaan l j t ko...

Страница 39: ...sennus Korkeudens t veivi kuva 2 Kun olet purkanut hiomakoneesi pakkauksesta ja tarkasta nut mahdollisesti puuttuvat osat osaluettelosta voit asen taa korkeudens t yksik n kahvan B Ruuvaa korkeudens t...

Страница 40: ...aalia 0 8 mm tai v hemm n rakeisuudesta ty stett v n kappaleen ko vuudesta ja leveydest riippuen Kannettavilla paksuus h yl yskoneilla sit vastoin poistetaan kerralla materiaalia 3 2 mm iin asti Jos h...

Страница 41: ...pi Muuten voit saada painumia hiottuun puuhun 5 K nn puun kulkusuuntaa useampikertaisen ajon ai kana samalla kun s d t hiontasyvyytt s t kahvalla katso kuva 2 Monet muuttujat vaikuttavat valittuun hi...

Страница 42: ...e olla 2 5 mm2 Verkkoliit nt suojataan 16 A n hitaalla sulakkeella Koneen huolto Varoitus Irrota aina kone virransy t st ennen huoltot iden tekemist tai hiomanauhan vaihtamista Pid hiomakone siistin P...

Страница 43: ...aan seuraavien EY direktiivien asiaankuuluvien m r ysten mukainen Siin tapauksessa ett konetta muutetaan t m vakuutus ei ole en voimassa Koneen kuvaus Sylinterihiomakone Konetyyppi csm 405 Art Nr 8108...

Страница 44: ...tutti i singoli compo nen ti della macchina per rilevare eventuali danni cau sati durante il trasporto In caso di reclami occorre informare immediatamente l impresa di trasporto Re clami notifica ti...

Страница 45: ...n dovesse funzionare corret tamente spegnere subito la macchina e rimuovere la spina dalla presa di corrente Riparare o sostituire le parti danneggiate e o non funzionanti prima di rimettere in funzio...

Страница 46: ...a l impianto di aspi razione si spegne automaticamente dopo 3 4 secondi Le polveri residue sono aspirate secondo quanto pre visto nell ordinanza sulle sostanze pericolose Ci per mette un risparmio ene...

Страница 47: ...viti di sicurezza per bloccare la vite in posizione 3 Verificare il gioco tra il cilindro abrasivo e il tavolo di trasporto Prima rimuovere i nastri abrasivi dal cilindro L obiettivo di questa regola...

Страница 48: ...sare alla grana pi fine e iniziare nuovamente la procedura Si consiglia di provare con diverse grane e tipi di legno per trovare quali risultati si possono attendere prima di rovinare il vostro legno...

Страница 49: ...el caso in cui il nastro dovesse allungarsi Se il nastro non bloccato bene la clip di tensione non si solleva abbastanza in avanti per far aprire bene la guida prima di essere posizionato il nastro Fi...

Страница 50: ...duzione delle prestazioni e il danneggiamento e la bruciatura del pezzo in lavorazione Con la macchina spenta e la presa elettrica staccata verificare periodicamente lo stato del nastro abra sivo Quan...

Страница 51: ...1101 K ln Luogo data Ichenhausen 22 07 2009 Firma i V Wolfgang Windrich product manager m Rimedi in caso di guasto Problemi Cause Possibile Soluzioni Il motore non si avvia a Manca la corrente b Inter...

Страница 52: ...alle enkelte dele med hensyn til transport skader Ved eventuelle reklamationer skai spedit ren underrettes omg ende Senere reklamationer kan ikke anerkendes Kontroller om forsendelsen er fuldst ndig...

Страница 53: ...askinen st r helt stille f r du forla der maskinen Anvend nettilslutningsledningen korrekt Nettilslut ningsledningen m ikke stikke ud under drift Tr k aldrig stikket ud af stikd sen med nettilslutning...

Страница 54: ...der skal slibe Fysisk risiko p grund af v rkt j der bliver slynget v k ved ukorrekt fastsp nding eller f ring Fare p grund af str m ved anvendelse af uforsvarlige el tilslutningsledninger Desuden kan...

Страница 55: ...ts sporindstiling befinder sig p for og bagsiden af slibemaskinen se fig 9 1 For at forh je sporsp ndingen skal sporskruerne dre jes med uret mens m trikken holdes fast med en 11 mm skruen gle ikke me...

Страница 56: ...om generel regel an befales en kvart omdrejning eller 0 4 mm eller mindre ved grovere kornst rrelse og bl dere tr sorter mens en 1 8 omdrejning eller 0 2 mm kan v re mere nskv rdig ved arbejde med h r...

Страница 57: ...tynd tr afm ling 150 Fin Minimal aftagning afsluttende slibning af over flade tyndt tr 180 Fin Afsluttende slibning 220 Meget fin Afsluttende slibning m Elektrisk tilkobling Skadede elektriske ledning...

Страница 58: ...sd kslet fast p hastighedsreguleringsboksen med en stjerneskruetr kker Derefter fjernes frontbe skyttelsesd kslet idet det skubbes v k mod venstre hen over den yderste b sning til fremdriftsrullen 4 M...

Страница 59: ...b Sp ndestang er ikke sp ndt ordentligt c Trykket er for kraftigt a L g nyt slibeb nd i b Sp ndestang l gges eksaktWerkst ck beim c Bev g arbejdsemnet under arbejdet Slibeb ndet l ber ikke regelm ssi...

Страница 60: ...n Det underi tter montering och senare arbete Anv nd endast original scheppach tillbeh r och reserv delar Reservdelar erh ller Ni fr n Er scheppach ter f rs liare V r v nlig ange artikelnnummer typ oc...

Страница 61: ...ntak ten ur uttaget genom att dra i n tanslutningskabeln Var alltid varsam Var alltid uppm rksam p vad du g r ven om du anv nder maskinen regelbundet T nk alltid p att en br kdels sekund r cker f r at...

Страница 62: ...erligare icke uppenbara risker finnas Ytterligare risker kan minimeras om s kerhetsanvisning ar och ndam lsenlig anv ndning samt om bruksanvis ningen f ljs i sin helhet Utrustning Fig 1 1 Cylinder med...

Страница 63: ...n med st llskruven p denna sida av maskinen P pekande P grund av transportbandets bredd m rker man inte sp r justeringarna direkt H j transportbandets hastighet f r att effekterna av inst llningarna s...

Страница 64: ...sk r avl gsna v sentligt mer material i en genomg ng Hos slipmaskinen d remot begr nsas avfallsmaterialet genom slipmaterialet Slipning 1 Med avst ngd maskin l gger du arbetsstycket p mat ningsbordet...

Страница 65: ...ngarna k rts ver Isolationsskador p grund av att ledningen slitits ut ur v gguttaget Sprickor p grund av att isoleringen r gammal S dana defekta elanslutningar f r ej anv ndas och r p grund av isolati...

Страница 66: ...nre som den yttre bandst llskruven med urs 6 Ta av det gamla bandet genom att ta tag i det i b da sidorna med b da h nderna Lyft d rvid l tt p trans portbordet Om det inte g r att ta av bandet reducer...

Страница 67: ...tt jt efter l ngre anv ndning b Sp nnarm inte riktigt sp nd c Anliggningstryck f r kraftigt a L gg p nytt slipband b Vrid om sp nnarm exakt c R r p arbetsstycket vid bearbetning Ingen konstant slipban...

Страница 68: ...t eller slitt kables straks byttes ut Alment Ved utpakkingen kontroler at ingen deler er transport skadet Ved skade kontakt omg ende transport ren Senere reklamasjoner vil ikke bli anerkjent Kontrolle...

Страница 69: ...ingen under drift Trekk aldri st pselet till nettilkoblingsledningen ut av stikkontakten V r oppmerksom Pass alltid p hva De gj r ogs n r maskinen brukes regelmessig Tenk alltid p at en br k del et se...

Страница 70: ...risiko kan bli forminsket n r sikkerhetsanvisnin gene og anvendelsen skjer i f lge bestemmelsene s vel som at hele bruksanvisningen blir respektert og tatt hensyn til Utstyr Fig 1 1 Sylinder med st vd...

Страница 71: ...ikke med 3 N r transportb ndsporet trekkes innover motorsiden i maskinen ker du spenningen p stillskruen p denne siden av maskinen Merk P grunn av bredden p transportb ndet blir ikke spor justeringene...

Страница 72: ...seg for bli fortrolig med hvordan maskinen fungerer Selv om overfla tesliping med slipemaskinen ligner overflatebearbeidelse med en h velmaskin kan h velmaskinen p grunn av sin spesielle kniv fjerne...

Страница 73: ...lge av at ledningen er festet eller trukket p en uheldig m te Kuttskader som f lge av at ledningen kj res over Isolasjonsskader som f lge av at ledningen rykkes ut av stikkkontakten Sprekker som f lg...

Страница 74: ...rtb ndet ved dreiing b de av indre og utvendige b ndinnstillingskruer mot urviseren 6 Ta av det gamle b ndet ved gripe p begge sider med begge hender L ft samtidig lett i transportbordet Dersom b ndet...

Страница 75: ...d er strukket etter lang tids bruk b Spennarm er ikke strammet riktig c Presstrykk for kraftig a Legg p nytt slipeb nd b Juster spennarmen korrekt c Beveg emnet under arbeidet Ikke regelmessig slipeb...

Страница 76: ...ai difetti di materiale o di fabbrica Le parti difettose saranno ricambiate gratuitamente la sostituzione va effettuata da parte del cliente Ci assumiamo la garanzia solo per parti originali scheppac...

Отзывы: