FR
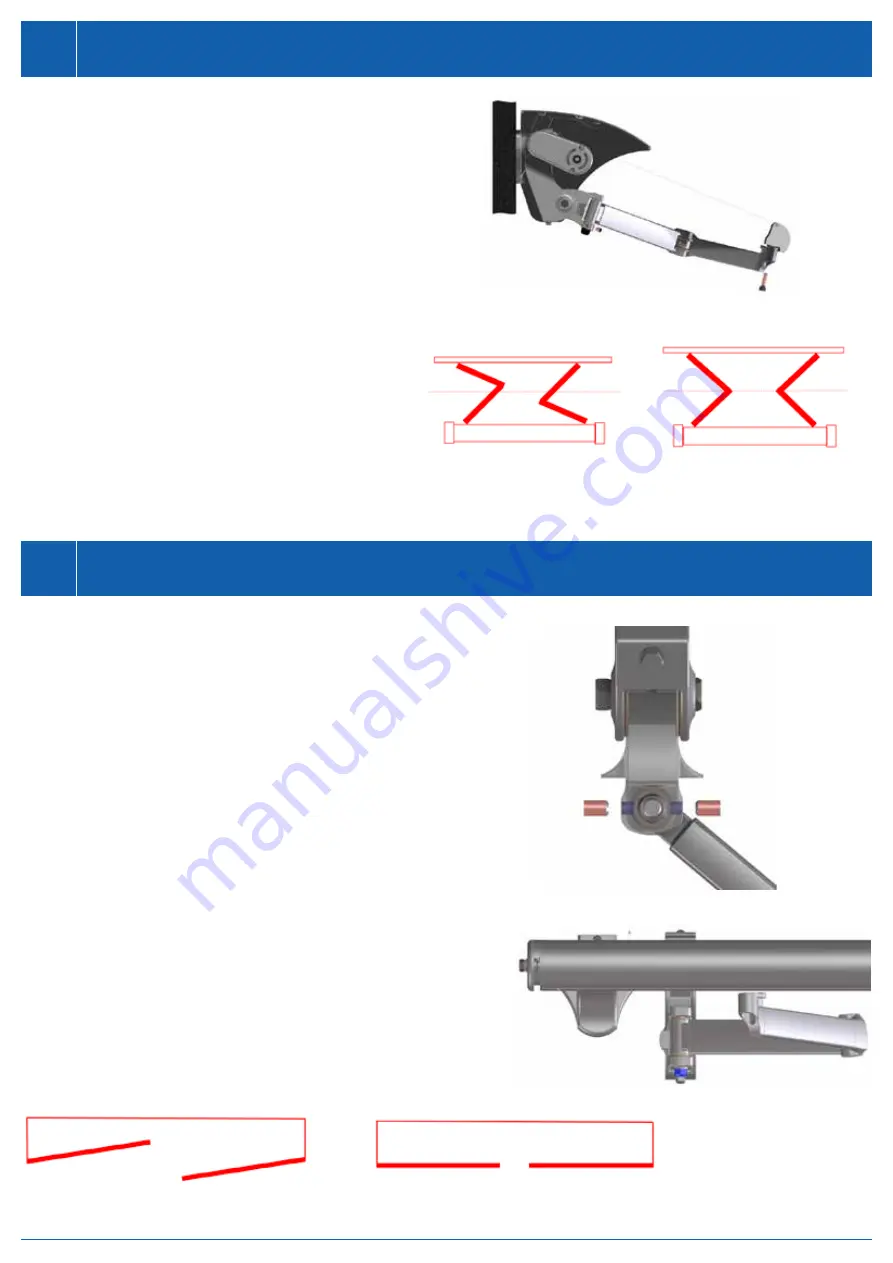
a. Rentrer la marquise jusqu’à 50 – 100 mm. Desserrer légère-
ment la vis Allen M10 sur la fixation du bras au niveau de la
barre à toile et positionner les bras pour qu’ils soient parallèles.
Les bras articulés doivent reposer sur le profil de la barre à
toile dans cette position. Serrer à nouveau la vis Allen.
DE
a. Markise bis auf 50 – 100 mm einfahren. Inbusschraube M10
zur Armbefestigung am Stoffstab leicht lösen und Arme parallel
stellen. Knickarme sollen in dieser Position am Stoffstabprofil
anliegen. Inbusschraube wieder fest anziehen.
IT
a. Far rientrare la tenda fino a 50 – 100 mm. Allentare legger-
mente la vite a brugola M10 per il fissaggio dei bracci sulla
barra finale e posizionare i bracci in parallelo. In questa posi-
zione i bracci ripieghevoli devono trovarsi sul profilo della barra
finale. Stringere nuovamente la vite a brugola.
EN
a. Retract the awning up to 50 – 100 mm. Slightly loosen the Al-
len screw M10 for attaching the arm on the the fabric rod and
adjust the arms so they are parallel. The hinged arms should
rest against the fabric rod profile in this position. Tighten the
Allen screw again.
FR
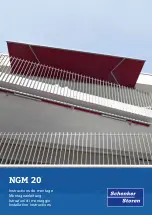
a. Desserrer légèrement la vis de la fourche pivotante (marquée en
bleu). Régler la position horizontale des bras en tournant les tiges
filetées (marquées en rouge) à l’aide d’un clé hexagonale de 5 mm.
Les deux tiges filetées doivent à nouveau reposer sur la tige de la vis
après le réglage.
Serrer à nouveau la vis de la fourche pivotante.
DE
a.
Schraube der Schwenkgabel (blau markiert) leicht lösen. Mit Drehen
der Gewindestifte (rot markiert), mithilfe eines 5 mm Sechskant, die
Horizontallage der Arme einstellen. Beide Gewindestifte müssen nach
der Einstellung wieder am Schaft der Schraube anliegen.
Schraube
der Schwenkgabel wieder anziehen.
IT
a. Allentare leggermente la vite della forcella girevole (segnata in blu).
Ruotando i perni filettati (segnati in rosso), con l’aiuto di una brugola
da 5 mm, regolare la posizione orizzontale dei bracci. Dopo la regola-
zione i due perni filettati devono trovarsi nuovamente sul gambo della
vite.
Stringere nuovamente la vite della forcella girevole.
EN
a. Slightly loosen the screw on the pivoting fork (marked in blue).
Adjust the horizontal position of the arm by turning the threaded pin
(marked in red) with a 5 mm hex-head screw. Both threaded pins
must abut on the shaft of the screws again after being adjusted.
Tighten the screw of the pivoting fork again.
✖
✔
3
Parallélisme des bras / Parallelität der Arme /
Parallelismo dei bracci / Parallelism of the arms
4
Position horizontale des bras / Horizontallage der Arme /
Posizione orizzontale dei bracci / Horizontal position of the arms
✖
✔


