


DOOR
7
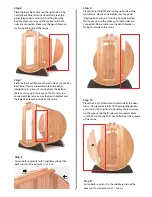
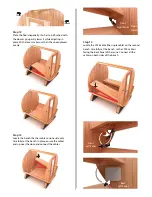
Step 19
Use the rubber mallet to adjust the staves. Using the
rubber mallet, adjust the Staves on the outer and inner
sides of the barrel until you achieve a perfect circle.
Step 20
Identify the RGB cable located in the ceiling panel. Make
sure the cables face the door, and the LED panels face
upwards. With the help of another person, place the panel
at a 45 degree angle and lean it against the side where
the door is located. Then carefully lift the other side (make
sure the cable is hanging). Use the Staves as a guide to
level the panel, ensuring that this is as straight as possible.
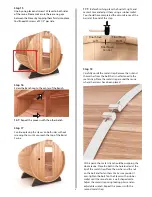
Drive the first screw for the LED panel on the area closest
to the door, then drive the screws that go on the back end
of the panel. Drive the rest of the screws and ensure the
panel does not move. You'll need six 1 1/4" screws.
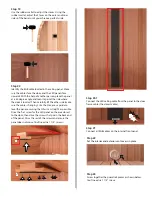
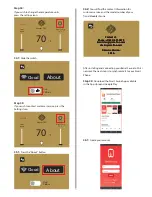
Step 20.1
Connect the LED ceiling cable from the panel to the door
frame cable (the closest cable).
Step 21
Connect all RGB cables on the internal front panel.
Step 23
Screw together the guard rail pieces as shown below.
You'll need six 1 1/4" screws.
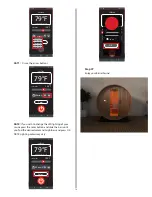
Step 22
Set the interior and exterior vent covers in place.