


35
13 SETUP AND DIAGNOSTIC UTILITIES
In order to set up the EtherMeter, the technician should actuate the #8
dip switch to the “up”
position. At this point, industrial protocols are disabled on the active serial port (RS-232 or RS-
485, depending upon dip switches #1 and #2). In setup mode, the
EtherMeter’s serial port operates
with the following parameters:
•
9600 bps Baud Rate
•
8 Data Bits
•
1 Start Bit
•
1 Stop Bit
•
No Parity
•
No Flow Control
•
ANSI Terminal Emulation
The technician should
start the HyperTerminal program and select your PC’s appropriate serial
COM port (eg COM1… COM12, etc.). Note that HyperTerminal should be configured to operate
with settings that match the EtherMeter (as shown in the bulleted list above). The HyperTerminal
session parameters may be saved through its “File>Save” or “File>Save As” menu, thereby
allowing the user to skip the HyperTerminal configuration menus during future sessions.
After HyperTerminal is configured
, the user should click on HyperTerminal’s “Connect” button (or
use the menu: “Connect>Connect”). Once connected, the user should press the <ENTER> key on
the keyboard, which will wake up the EtherMeter’s Setup Program. Note that, from any setup
screen, <ENTER> causes a refresh, and <TAB> causes the display to proceed to the next screen.
There are eight (8) setup screens in total.
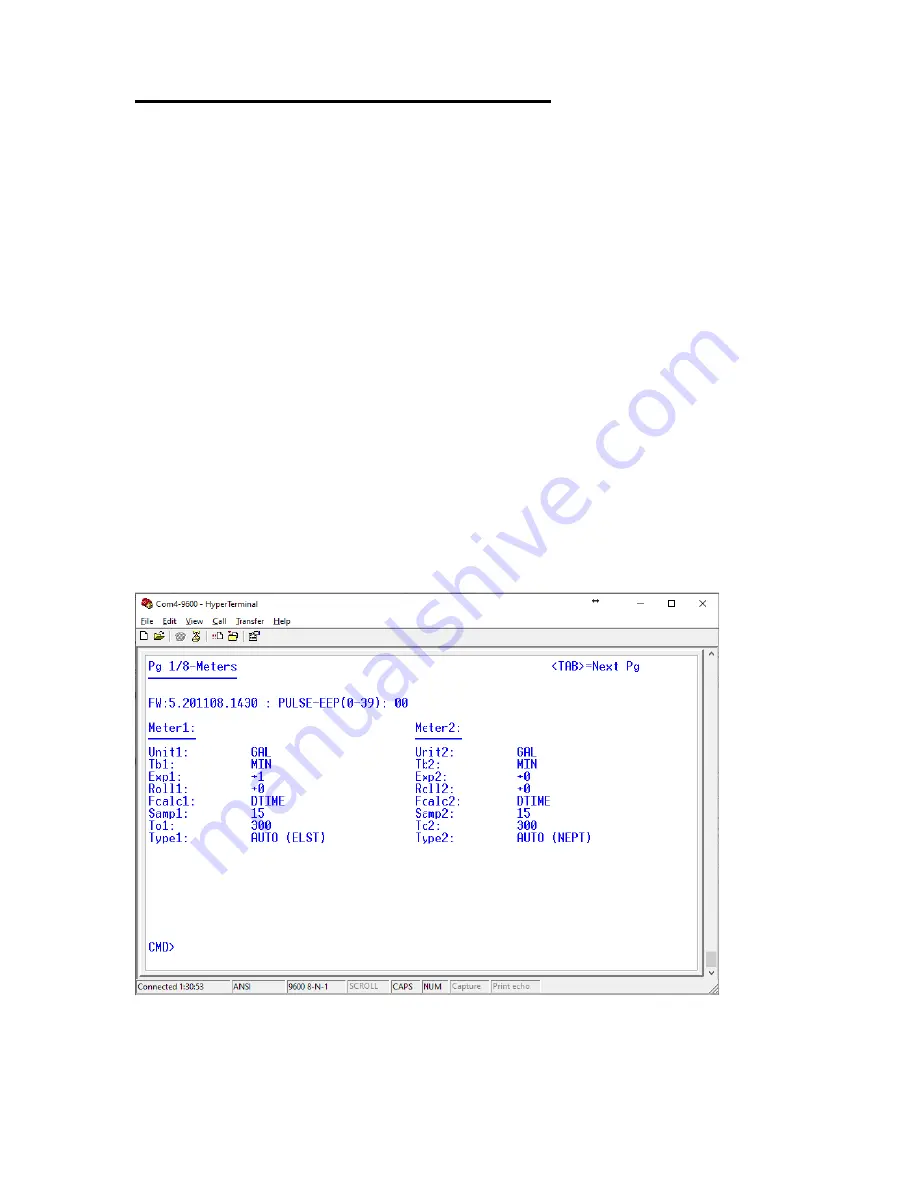
For reference, the eight (8) Setup Menu screens are shown below:
Setup Screen #1 of 8
“Meter Setup”
Содержание EtherMeter EM-100
Страница 2: ......
Страница 38: ...36 Setup Screen 2 of 8 Serial Port Setup Setup Screen 3 of 8 Networking Setup...
Страница 39: ...37 Setup Screen 4 of 8 Auxiliary I O Setup Setup Screen 5 of 8 Interface Setup...
Страница 41: ...39 Setup Screen 8 of 8 Meter Read Diagnostics...
Страница 79: ...This Page Intentionally Blank...


