


SawStop
®
10” Industrial Cabinet Saw 49
Adjusting
Your
Saw
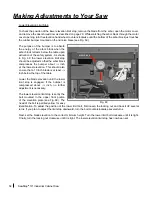
Making Adjustments to Your Saw
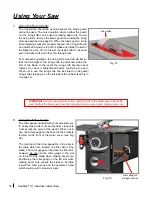
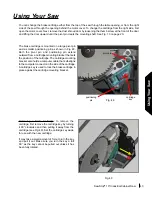
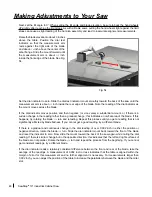
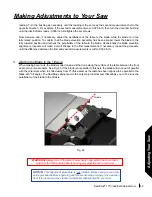
To adjust the alignment, begin by loosening the 4
mounting bolts (see Fig. 55) that attach the table to the
front and rear trunnion brackets using a 17 mm wrench or
an adjustable wrench. Slide the dial indicator to the front
of the blade and set the readout to zero. Slide the dial
indicator mount to the rear of the blade. The dial indicator
should now be reading close to the average measurement
you made previously.
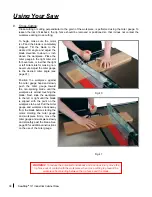
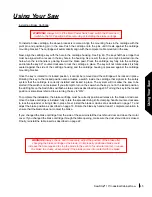
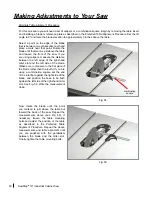
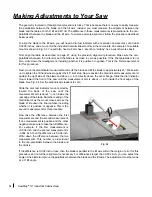
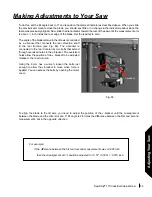
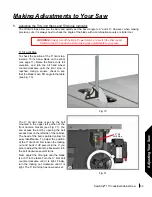
The table alignment is set by a pivot pin at the front of the
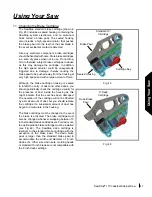
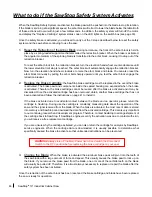
table, and positioning screws near the rear of the table on
both the left and right sides (see Figs. 56 and 57). If the
measurement is positive, loosen the left positioning screw
and tighten the right positioning screw. If the measurement
is negative, loosen the right positioning screw and tighten
the left positioning screw.
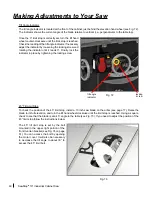
You should see the readout on the dial indicator change
as you adjust the positioning screws. Adjust the screws
until the readout is the same, but in the reverse direction.
For example, if the initial reading was +0.006 inch, adjust
the positioning screw until the reading is -0.006 inch.
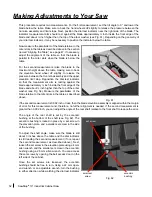
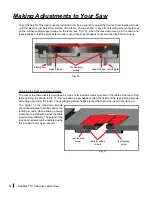
Now slide the dial indicator mount back to the front of the blade and re-zero the readout. Slide the indicator
mount smoothly forward until the indicator measurement arm is about
1
/
2
inch inside the rear edge of the blade.
The new measurement should be much closer to 0.000 inch.
If the new measurement is still too high, repeat the above process until the parallelism between the blade and
the miter slot is satisfactory. Finally, tighten the four table mounting bolts to secure the table to the front and
rear trunnion brackets. For best results, sequentially tighten each bolt a little at a time until all are tight. Watch
the dial indicator while tightening, and if one bolt causes a significant change, tighten the other bolts first.
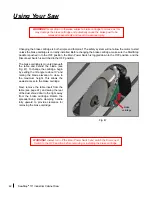
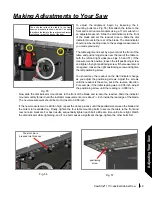
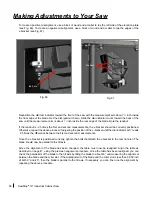
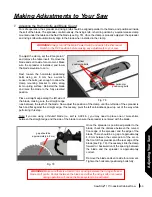
Fig. 55
The bolts that attach the table to the front
trunnion bracket are shown below. The bolts
that attach the table to the rear trunnion bracket
(not shown) are at the back of the saw.
Fig. 57
positioning
screw
The pivot pin is
pressed into this boss
Fig. 56


