background image

8

Stand 01/2017 MK

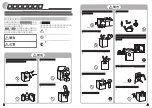
INBETRIEBNAHME

• 

Nachdem Sie den Flaschenkühlschrank gereinigt haben 

stecken Sie den Stecker in die Steckdose und achten darauf, 

dass der Netzstecker zugänglich ist, damit der Kühlschrank 

im Notfall vom Stromnetz getrennt werden kann, und weil 

vor jeder Reinigung / Reparatur der Stecker gezogen werden 

muss. Ziehen Sie den Stecker immer nur am Steckergehäuse 

aus der Steckdose.

• 

Oben auf der Frontleiste ist das Bedienfeld. Darauf befi ndet 

sich in der Mitte die analoge Temperaturanzeige und links 

davon der Lichtschalter sowie rechts die Kontrolllampe.

• 

Im Innenraum des Kühlschrankes ist oben ein Thermostat mit 

der Stufenangabe von 0 bis 7. Wenn Sie den Drehknebel auf 

0 drehen, ist der Kühlschrank ausgeschaltet.

Bemerkung

: Der Lüfter geht dann aber nicht aus.

• 

Von Stufe 1 bis 7 können Sie die gewünschte Temperatur 

einstellen, wobei die Stufe 7 die niedrigste Temperatur hat.

• 

Beachten Sie bei der Temperatureinstellung auch folgende 

Punkte:

• 

1.) Die Umgebungstemperatur

• 

2.) Ob die Türe oft oder nur ab und zu geöff net wird

• 

3.) Wie viel Getränke im Kühlschrank gelagert und wie diese 

dort positioniert sind.

• 

Die Kontrolllampe leuchtet immer auf, sobald der Kühl-

schrank mit dem Stromnetz verbunden ist.

• 

Um den Kühlschrank komplett auszuschalten, müssen Sie ihn 

vom Netz trennen.

COMMISSIONING

• 

After you have cleaned the bottle refrigerator, plug the 

plug into the socket and make sure that the mains plug 

is accessible so that the refrigerator can be disconnec-

ted from the mains in an emergency and because the 

plug must be removed before each cleaning / repair. 

Always unplug the plug from the socket using the plug 

housing only.

• 

At the top of the front panel is the control panel. The 

analog temperature display is located in the middle, 

the light switch to the left and the control lamp to the 

right.

• 

Inside the refrigerator there is a thermostat at the top 

with a level from 0 to 7. If you turn the rotary knob to 0, 

the refrigerator is switched off .

Note

: The fan will not turn off .

• 

From level 1 to 7 you can set the desired temperature, 

where level 7 has the lowest temperature.

• 

Please also note the following points when setting the 

temperature:

• 

1.) The ambient temperature

• 

2.) Whether the door is opened often or only occasio-

nally

• 

3.) How many drinks are stored in the refrigerator and 

how they are positioned there.

• 

The indicator light always lights up as soon as the refri-

gerator is connected to the power supply.

• 

To completely switch off  the refrigerator, you must 

disconnect it from the mains.

Reinigen Sie den Kühlschrank einmal vor gebrauch 

gründlich!

Clean the refrigerator thoroughly once before use!

WARNUNG: VERLETZUNGSGEFAHR! WARNING: RISK OF INJURY!

• 

Versuchen Sie niemals, Ihre Finger, Stäbchen, 

Schraubendreher oder andere dünne Gegenstände 

zwischen die Gitterstäbe des Kaltluft Gebläses zu 

stecken. Hinter dem Schutzgitter dreht sich ein 

Ventilator mit hoher Geschwindigkeit. Es besteht die 

Gefahr von Verletzungen, Stromschlägen und der 

Beschädigung oder einer Fehlfunktion des Gerätes.

• 

Never try to place your fi ngers, chopsticks, screwdrivers 

or other thin objects between the bars of the cold air 

blower. Behind the protective grille, a fan rotates at high 

speed. There is a risk of injury, electric shock and damage 

to or malfunction of the unit.

Содержание SC 390

Страница 1: ...ntilator Instruction manual for bottle cooler with convection fan Deutsch Original English SC 550 SC 390 Translation of the original Modell SC 390 Art Nr 209 1010 Modell SC 550 Art Nr 209 1025 model S...

Страница 2: ...vor der Inbetriebnahme des K hlschrankes aufmerksam durch Wir w nschen Ihnen viel Freude an Ihrem neuen SARO K hlschrank mit Umluftventilator Dear customer Congratulations on your new SARO refrigerato...

Страница 3: ...ise Safety instructions 7 Inbetriebnahme commissioning 8 Wechsel des Leuchtmittels im Innenraum changing the light source in the interior Unpacking 9 L ngeres Ausserbetriebsetzen removing the device f...

Страница 4: ...uction manual is an integral part of the unit and should be kept in the vicinity of the unit at all times acces sible to all persons involved in the installation operation cleaning or maintenance of t...

Страница 5: ...Dieses Symbol weist auf die hei e Ober fl che des Ger tes w hrend des Betriebes und danach hin Verbrennungsgefahr bei Nichtbeachten WARNING HOT SURFACE DANGER OF BURNS This symbol indicates the hot su...

Страница 6: ...D 610 x H 1885 B 710 x T 610 x H 2035 W 710 x D 610 x H 2035 Ma e Rost mm Grid dimensions mm B 510 x T 390 W 510 x D 390 B 605 x T 420 W 605 x D 420 Anschlu V Ph Hz kW Connection V Ph Hz kW 230 1 50 0...

Страница 7: ...cher in Innen oder Au enseite des Ger tes Der K hlkreislauf k nnte besch digt werden Aus hygienischen Gr nden wird eine t gliche Reinigung empfohlen Das Ger t ist weder geeignet noch vorgesehen f r d...

Страница 8: ...The device is intended for indoor use Use outdoors in rain can lead to short circuits leakage current or electric shocks If the unit has become wet unplug it from the mains immediately and have it ch...

Страница 9: ...lifizierten Fachmann ausgewechselt werden Verwenden Sie keine Verl ngerungskabel und Adapter Lassen Sie das Netzkabel nicht ber scharfe Kanten h ngen und halten Sie es fern von hei en Gegenst nden und...

Страница 10: ...be removed before each cleaning repair Always unplug the plug from the socket using the plug housing only At the top of the front panel is the control panel The analog temperature display is located...

Страница 11: ...ienic and functional reasons the refrigerator should be cleaned regularly Then also clean the capa citor Spills should always be wiped up immediately To clean the condenser on the back of the refriger...

Страница 12: ...ly rectified We therefore recommend that you check the following a If the bottle refrigerator does not work Is the connection of the mains plug to the socket correct Is the power cable damaged If so h...

Страница 13: ...01 2017 MK STROMPLAN CIRCUIT DIAGRAM M F L N 220 240V AC 50Hz F M F L N 220 240V AC 50Hz F 1 Ventilator 2 Thermostat 3 Traffo 4 Leuchte 6 Ventilator 7 Kompressor 8 Lichtschalter 9 Antriebslampe Traff...

Страница 14: ...ank mit Umluftvent Mod SC390 10 37 35 30 29 27 33 31 34 24 23 22 21 20 11 18 28 36 12 17 32 9 5 6 7 8 26 25 13 14 15 16 19 1 3 4 2 38 SARO Gastro Products GmbH Sandbahn 6 46446 Emmerich am Rhein Germa...

Страница 15: ...18 Bedienfeldplatte Control panel plate 19 Startplatz Starter slot 20 Anlasser Starter 21 Beleuchtung von Lampenvorschaltger ten Lighting of lamp ballast 22 Thermostatschieber Thermostat slider 23 L...

Страница 16: ...moisture in the interior If the refrigerator needs to be transported disconnect it from the power supply by unplugging the power cord When transporting make sure that the feet of the refrigerator do...

Отзывы: