7
Adjusting the Camera
b
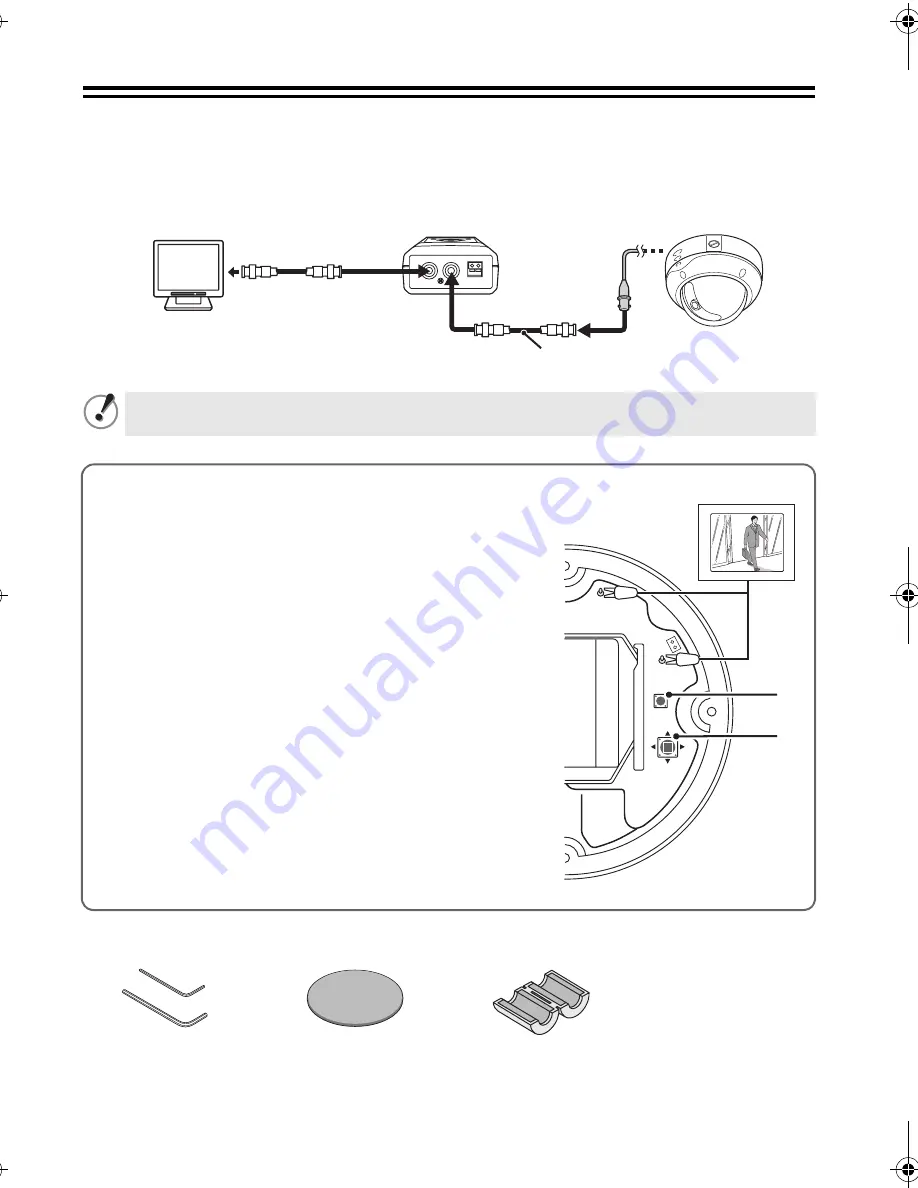
Setting up the camera remotely
Use of the separately ordered Camera Control Unit (VAC-70) is recommended for setting and adjustment of
this camera. Advanced settings are possible from the main menu. For details, see the instruction manual for
the Camera Control Unit.
b
Installation accessories
Do not forget to disconnect the Camera Control Unit once you have finished setting/adjustment.
Checking the settings screen or camera angle on a portable monitor
(These checks are unnecessary when using the separately
ordered Camera Control Unit (VAC-70).)
Connect the MONITOR OUT pin and the GND pin on the circuit
board to a monitor using an alligator clip cable. Do not forget to
remove the cable after you have finished checking.
A dedicated MONITOR OUT connector is provided for portable
monitors.
b
To check the settings screen and make changes
1) Hold down the SET button (
1
) for over a second.
The main menu appears.
2) Select a menu by pressing the Select button (
2
) up and
down.
3) Select the setting item and value by pressing the Select
button left and right.
b
To check the zoom position and make changes
Press the Select button left and right during live mode
(with no menu displayed).
You can set the zoom (wide:
d
, tele:
c
).
VIDEO OUT CAMERA
DC IN 3V
Ð +
VAC-70
Video in
BNC type
RG-6U coaxial cable
300 m max.
UP
DOWN
LEFT
RIGHT
SET
GND
MONITOR
OUT
1
2
1
Hexagonal wrench
(large, small)
2
Cushioning sheet
3
Clamping core
L5BH2_XE(INSTALLATION).book 7 ページ 2006年6月30日 金曜日 午後6時34分


