4
Use the following accessories if needed.
A
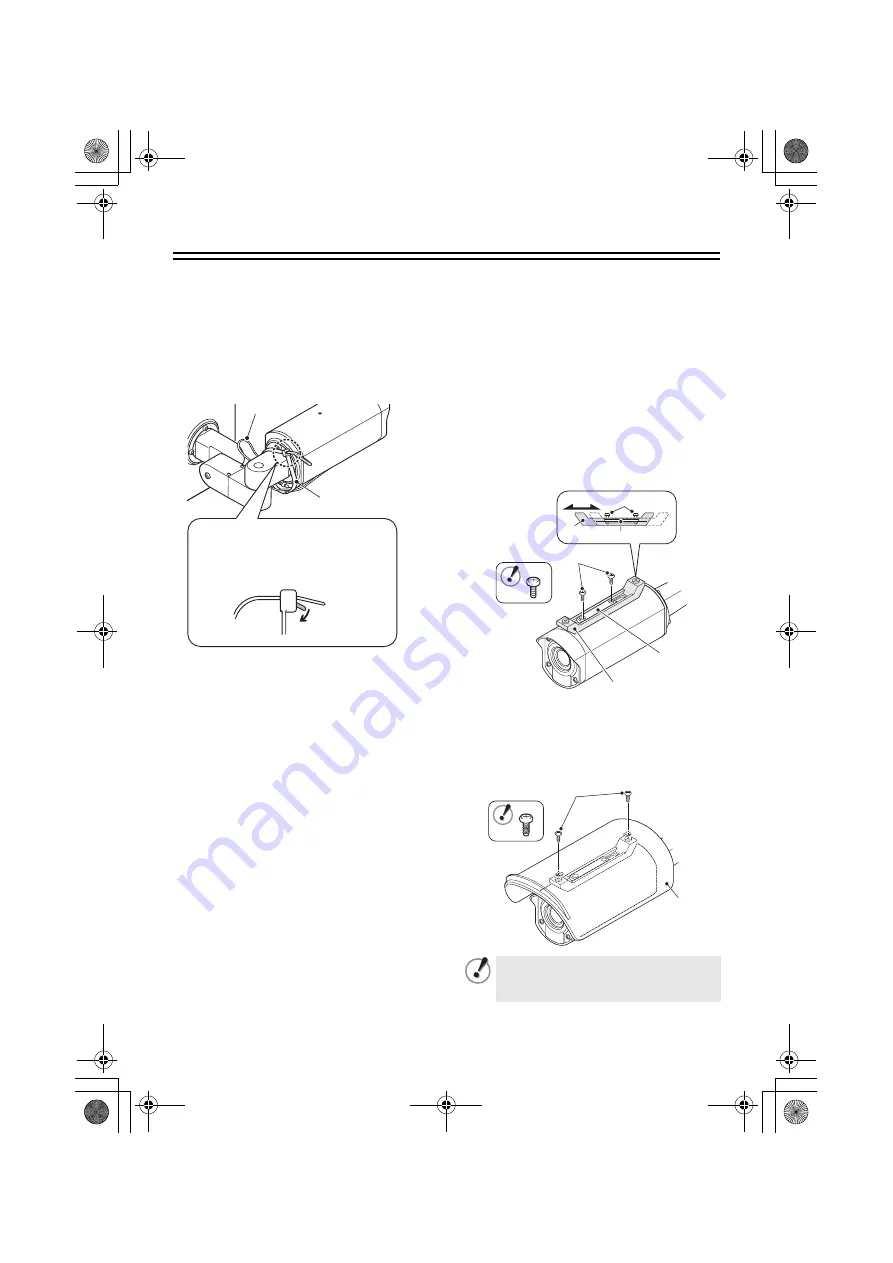
Installing the fixing band
If you would like to secure the
drop-prevention chain (A) after installing and
adjusting the camera, secure it with the
accessory fixing band (B).
B
Installing the sunshade
1
Align the sunshade adjustment
mounting bracket (A) with the mounting
surface, and then align it with the fixing
bracket (B) and provisionally secure it
with the accessory fixing screws (C).
2
Move the sunshade adjustment
mounting bracket (A) forward or back so
that the accessory sunshade (D) can be
installed, and then tighten the accessory
fixing screws (C).
3
Align the sunshade (D) with the screw
holes in the sunshade adjustment
mounting bracket (A), and then install it
by tightening the accessory sunshade
fixing tapping screws (E).
(B)
(A)
(C)
When temporarily removing the
fixing band after it has been
installed, push down the tab
(C)
and then pull out the fixing band.
Tighten the screws
(C)
and the tapping
screws
(E)
at a torque of 0.5 N·m or
more.
(B)
(A)
(C)
(C)
(B)
(A)
(E)
(D)
L5CE2_US(INSTALLATION).book 4 ページ 2008年1月23日 水曜日 午後4時8分
Содержание VCC-XZ600N - Network Camera - Weatherproof
Страница 20: ...MEMO L5CE2_US INSTALLATION book 19 ページ 2008年1月23日 水曜日 午後4時8分 ...
Страница 40: ...N B L5CE2_US INSTALLATION book 19 ページ 2008年1月23日 水曜日 午後4時8分 ...
Страница 60: ...NOTA L5CE2_US INSTALLATION book 19 ページ 2008年1月23日 水曜日 午後4時8分 ...
Страница 61: ...L5CE2_US INSTALLATION book 0 ページ 2008年1月23日 水曜日 午後4時8分 ...


