


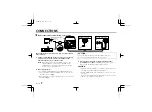


CONNECTIONS
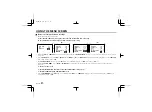
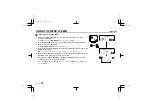
Basic connection for monitoring or recording
The peripheral devices (VCR, monitor, lens, etc.) and cables are
sold separately.
1
Using a coaxial cable (twin type, 75 ohms), connect the Y/C
OUT connector from the camera to the S-VIDEO input
terminal on the monitor or time lapse VCR.
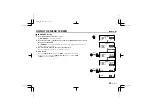
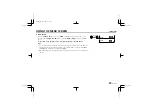
NOTE:
When using devices with an S-VIDEO connector, the
supplied clamping core (C) must be installed on the
S-VIDEO cable, to prevent electromagnetic interference
from the other connected devices.
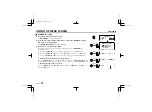
2
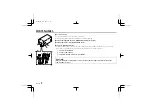
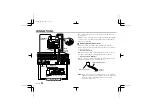
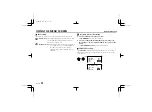
Power supply choices
•
Use a commercially available 24 V AC adaptor. Make sure to
use a cable with an earth line (22AWG or more) to connect to
the earth connector. (
Fig.1.
)
•
When using a DC 12 V power supply, make the connections as
indicated in
Fig. 2
.
CAUTION:
To prevent camera and/or power supply failure, pay close
attention to polarity when making the connections.
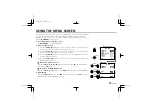
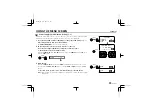
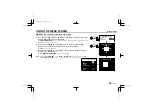
3
Insert the plug of this power supply into a wall outlet.
The
POWER
indicator
(A)
will light. Adjust the picture on the
monitor using the Brightness and Contrast controls.
CAUTION:
•
Please use a monitor with a Y/C or S-VIDEO input terminal, or a
time lapse VCR with a S-VIDEO input terminal.
•
Use a Mini-DIN (round type, 4-pin) plug to connect to the Y/C
connector.
Never use a coaxial cable longer that 10 metres to connect the
camera to the S-VIDEO input terminal.
(Video signal connections)
: VIDEO IN
: VIDEO OUT
(A)
AC 24 V connection
DC 12 V connection
GND
AC24V
GND
DC12V
Fig. 1
Fig. 2
+
–
+
DC12V
–
2
2
1
L53R2/XE GB 2000, 3, 31
English
9


