


ALARM RECORDING
MENU 3
By connecting the ALARM IN terminal to a door switch,
an interphone, etc., a recording can be done only when
necessary.
Alarm Recording Setting
Alarm recording is performed when there is an input
(trigger) at the ALARM IN terminal, “
û
” is displayed on
the digital display.
1
Make all necessary connections.
2
Press the MENU button to display the MENU 3 (SET
UP).
3
Press the
]
button, until the “ALARM DURATION”
setting is flashing.
4
Press the
l
(or
j
) button to select the desired alarm
recording duration (20 seconds – 5 minutes, CC or
TRIG.)
20S~5M . Recording only for the displayed duration.
CC . . . . . Recording as long as the alarm signal is
being input (minimum recording of 5
seconds)
TRIG. . . . Will switch between recording and
recording pause every time an alarm
trigger is received.
NOTE:
•
When set to TRIG., the alarm counter will not
register the alarm trigger inputs at the ALARM IN
terminal, and all the alarm recording settings will be
ignored.
5
Press the
]
button.
6
Press the
l
(or
j
) button to select the recording
speed.
8H. . . . . . 8-hour mode recording
NC . . . . . Recording at the speed already set
7
Press the PAUSE/SCAN button, the normal screen is
displayed.
°
The setting procedure is now completed.
NOTES:
•
During alarm recording all buttons are disabled.
•
If “OFF” is displayed on the digital display, alarm
recording is not possible in order to prevent the
recorded tape to be recorded over.
•
If an alarm trigger is received while alarm recording is
in progress, recording duration for the second alarm will
be calculated from that point. The alarm counter will
register the alarm, but it will not be found during alarm
scan or alarm search.
•
If there is a power failure during alarm recording, and
the power is restored within the recording set duration,
alarm recording will continue.
•
If the alarm scan functions will be used to review the
recordings, set the recording speed to 8-hour mode and
the recording duration to 20 seconds or more.
•
Even if OVERWRITE INHIB. in MENU3 (SET UP) is set
to “Y”, the tape will not be fast-forwarded before
recording starts.
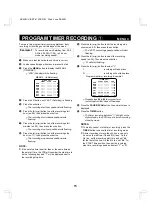
MENU 3 (Initial screen)
<SET UP>
REC TAPE END REW
ALARM DURATION 20S
ALARM SPEED 8H
TAPE IN STOP
OVERWRITE INHIB. N
RMOTE MODE1
WARNING OUT MODE1
CLOG DETECT. Y
NC4QG/U (SRT-612DC GB) Wed. June, 06/2001
18


