22
COMPUTER INPUT
(RGB Scart 21-Pin Video Input)
SELECTING INPUT SOURCE
MENU OPERATION
DIRECT OPERATION
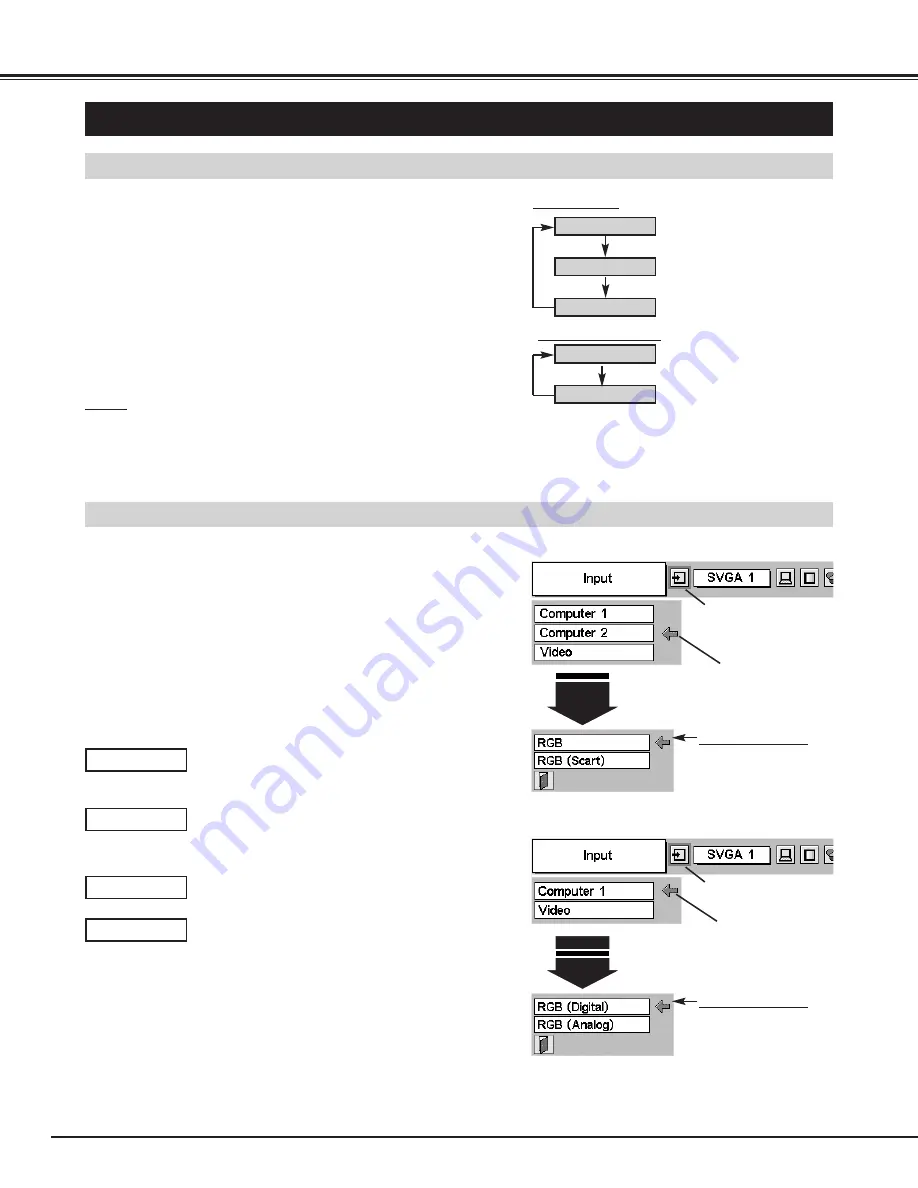
Choose either Computer 1 or Computer 2 by pressing the INPUT
button on the Top Control or press the COMPUTER button on the
Remote Control.
If the projector cannot reproduce proper image, select correct input
source through MENU OPERATION (see below).
Press the MENU button and the ON-SCREEN MENU will
appear. Press the POINT LEFT/RIGHT button to move the red
frame pointer to the INPUT Menu icon.
1
Move the pointer (red
arrow) to Computer 2 and
press the SELECT button.
Computer
Move the pointer to RGB
or RGB (Scart) and
press the SELECT but-
ton.
Source Select Menu
INPUT MENU
INPUT Menu icon
Press the POINT DOWN button to move the red arrow pointer to
either Computer 1 or Computer 2 (Only the Computer 1 is
displayed when the Monitor out is selected in the SETTING
Menu.), and then press the SELECT button. The Source Select
Menu will appear.
2
Move the pointer to the correct input source and then press the
SELECT button.
3
When digital signal is connected to DVI terminal,
select Digital.
RGB (Digital)
When analog signal is connected to DVI terminal,
select Analog.
RGB (Analog)
Move the pointer (red
arrow) to Computer 1 and
press the SELECT button.
Computer
Move the pointer to RGB
(Digital) or RGB
(Analog) and press the
SELECT button.
Source Select Menu
INPUT MENU
INPUT Menu icon
Computer 1
Video
Computer 2
COMPUTER button
Computer 1
Computer 2
When the input source is coming from a computer
through the COMPUTER IN 2 / MONITOR OUT
terminal, select RGB.
RGB
When the input source is coming from a DVD player
through the COMPUTER IN 2 / MONITOR OUT
terminal, select RGB (Scart).
RGB (Scart)
INPUT button
Computer 2 is not displayed when the COMPUTER
IN 2/MONITOR OUT terminal is used as Monitor out.
✽
✽
✽
Computer 2 is not displayed when the COMPUTER
IN 2/MONITOR OUT terminal is used as Monitor out.
✽
NOTE
●
Computer 2 can be selected when the COMPUTER IN 2 /
MONITOR OUT terminal is set as Computer 2 at the menu item
"Terminal" in the SETTING Menu. (Refer to page 36.)
Содержание PLC-SU25
Страница 1: ...Multimedia Projector MODEL PLC SU25 Owner s Manual ...
Страница 7: ...7 PREPARATION NAME OF EACH PART OF PROJECTOR ...
Страница 31: ......
Страница 48: ...Printed in Japan Part No 610 305 7156 1AA6P1P3911 MB3AA SANYO Electric Co Ltd ...


