


-8-
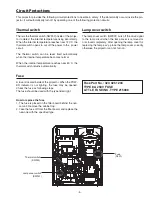
Lamp replacement
When the projection lamp of the projector reaches its end
of life, the Lamp replacement icon appears on the screen
and LAMP REPLACE indicator lights yellow. Replace the
lamp with a new one promptly. The timing when the LAMP
REPLACE indicator should light is depending on the lamp
mode.
For continued safety, replace with a lamp of the
same type. Do not drop a lamp or touch a glass
bulb! The glass can shatter and may cause injury.
Allow a projector to cool for at least 45 minutes
before you open the Lamp Cover. The inside of
the projector can become very hot.
CAutION
CAutION
1
3
4
2
6
5
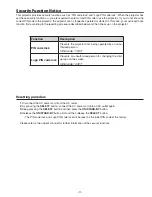
OrDEr rEPLACEMENt LAMP
Replacement lamp can be ordered through your dealer. When ordering a projection lamp, give the following
information to the dealer.
replacement Lamp type No.
: POA-LMP143
Service Parts No.
: 610 351 3744
top Panel
When replacing the lamp because it has stopped illuminating, there is a possibility that the lamp may be bro-
ken. If replacing the lamp of a projector which has been installed on the ceiling, you should always assume
that the lamp is broken, and you should stand to the side of the lamp cover, not underneath it. Remove the
lamp cover gently. Small pieces of glass may fall out when the lamp cover is opened. If pieces of glass get
into your eyes or mouth, seek medical advice immediately.
CAutION
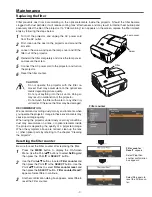
Lamp replacement icon
WArNING:
TURN OFF THE UV LAMP BEFORE
OPENING THE LAMP COVER
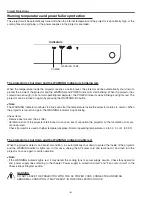
This indicator turns yellow
when the projection lamp
reaches the end of its life.
Note:
The Lamp replacement icon will not appear when the
Display function is set to Off, during Freeze, or No show.
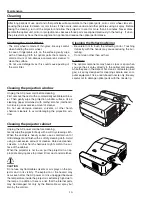
Maintenance
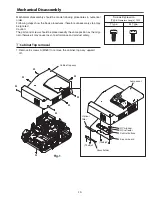
Follow these steps to replace the lamp.
Turn off the projector and unplug the AC power cord. Let
the projector cool for at least 45 minutes.
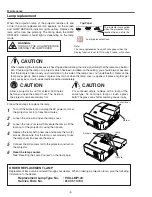
Loosen the two (2) screws that secure the lamp. Lift the
lamp out of the projector by using the handle.
Replace the lamp with a new one and secure the two (2)
screws. Make sure that the lamp is set properly. Close
the lamp cover and secure the screw.
Loosen the screw and open the lamp cover.
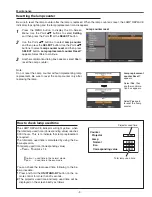
Connect the AC power cord to the projector and turn on
the projector.
reset the lamp counter.
See “Resetting the Lamp Counter” on the next page.
Screw
Screws
Handle
Lamp Cover
Lamp
Содержание PDG-DXL2000E
Страница 47: ... 47 IC Block Diagrams LV49152V Audio output IC001 LC87F2G08A Sub micom IC4501 ...
Страница 48: ... 48 IC Block Diagrams M62393 DAC IC7881 MR4010 Power switching IC631 ...
Страница 49: ... 49 IC Block Diagrams PIC18F67J60 Network IC8301 NJW1156 Audio selector IC5101 ...
Страница 82: ...Key No Part No Description Key No Part No Description Electrical Parts List 82 KV2 DXL2000E00 ...
Страница 83: ...Key No Part No Description Key No Part No Description 83 Electrical Parts List KV2 DXL2000E00 ...
Страница 84: ... KV2AC Apr 2011 DC 50 Printed in Japan SANYO Electric Co Ltd ...


