12
13. SECURING YOUR VAULT (CONTINUED)
TOOLS AND HARDWARE NEEDED TO SECURE
VAULT TO A WOOD OR CONCRETE SURFACE:
• DRILL
• 3/8� DRILL BIT
( FOR DRILLING ANCHOR HOLE )
or 3/16�
(FOR INSTALL W/ OUT ANCHOR)
• SOCKET WRENCH TO MATCH
BOLT HEAD SIZE
• 2 STEEL LAG BOLTS
(NOT INCLUDED)
- SIZE 1/4" X 1.50" TO 2.0" LONG
• 2 STEEL WASHERS (NOT INCLUDED)
- 1/4"
• 2 PLASTIC ANCHORS
(NOT INCLUDED)
- SIZE #10-12 X 1.5" TO 1.75" LONG
(FOR CONCRETE INSTALLATION)
• 4 PADS
(INCLUDED)
Use the recommended hardware or consult your hardware retailer for fastening
hardware for your particular mounting surface.
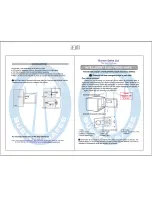
Open the vault door to provide access to the factory drilled bolt down holes that
are located under the protective foam liner.
To secure your vault to the floor, it will first be necessary to mark and drill pilot
holes in the floor surface.
Drill the appropriate diameter and depth of pilot holes based on the type of
hardware being used and the type of floor surface. When mounting on concrete we
recommend using a drill and a concrete drill bit to drill the two corresponding holes
in the mounting surface.
Secure the vault by threading anchor bolts through the factory drilled bolt down
holes in the vault and screw down tight with a ratchet wrench.
BOLT
WASHER
VAULT
FLOOR
MOUNTING
SURFACE
ANCHOR
FOR CONCRETE
INSTALLATION
14. MAINTAINING HINGES AND INTERNAL MECHANISMS
The hinges and internal locking mechanism are permanently lubricated, thus
needing no maintenance. Opening the door panel of your vault may void your
warranty. Always consult our customer service experts prior to doing so.
WASHERS
(NOT INCLUDED)
PADS
(INCLUDED)
LAG BOLTS
(NOT INCLUDED)
ANCHORS
(NOT INCLUDED)


