


Maintenance
75
ENGLISH
75
✤
At the end of a recording you must remove the power source.
✤
When recording with Lithium Ion battery Pack, leaving the pack on the camcorder can reduce the life span of the battery, Hence, it should be
remored from the camcorder.
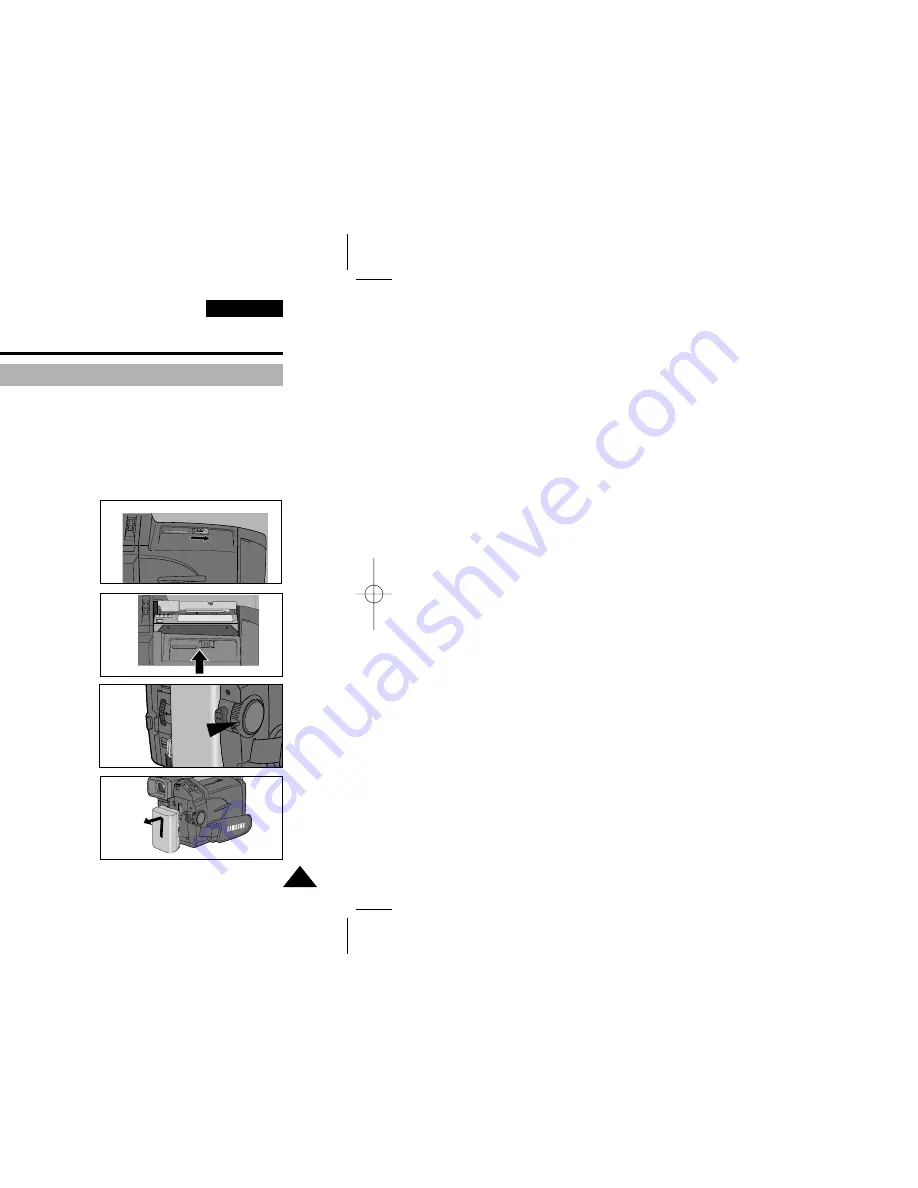
After completing a recording session
1. Slide the EJECT switch in the direction of the arrow
■
Opening the cassette door ejects the tape automatically.
■
Please wait while the tape is completely ejected.
2. After removing the tape, close the door and store the camcorder in a dust free environment.
■
Dust and other foreign materials can cause square-shaped noise or hesitative image.
3. Set the power switch to OFF mode.
4. Disconnect the power source or remove the Lithium Ion Battery Pack.
■
When connecting a power supply, separate it in reverse order by referring to page 21.
■
Hold down the BATT. RELEASE button and slide the battery pack in the direction of the arrow.
After finishing a recording
1
2
4
4
3
00542E VP-D10 UK (~P83) 3/13/03 10:25 AM Page 75
Содержание VP-D10
Страница 2: ... 9 10 11 12 13 14 15 16 18 19 20 21 22 25 26 28 29 29 30 31 32 33 34 34 35 36 37 39 40 42 43 44 4 ...
Страница 4: ...ge to the inside of the hinge that connects the LCD 1 2 3 4 5 90 90 90 90 ...
Страница 5: ...5 ENGLISH d er warm room with the cassette compartment er gets wet it may be damaged ...
Страница 6: ...block shaped noise distorts playback pictures appens clean the video heads with a dry type ...
Страница 7: ...ENGLISH 7 ...
Страница 11: ...11 ENGLISH n see page 53 ee page 52 or page 29 10 Viewfinder 9 TFT LCD monitor 8 EASY button 7 CUSTOM button ...
Страница 12: ...2 SPEAKER ...
Страница 18: ...ally on again ng START STOP SELF TIMER X2 SLOW F ADV A DUB ZERO MEMORY STILL PHOTO DISPLAY W T LF ER ...
Страница 20: ...cording nd he buckle a c b 1 2 ...
Страница 21: ...21 ENGLISH 2 1 3 ERA 4 b PLAYER ...
Страница 22: ...corder camcoder camcorder after it is fully charged 2 3 1 4 ...
Страница 23: ...23 ENGLISH C F 0 C or left in temperatures above 104 F 40 C for ...
Страница 24: ...k a fully charged ent when you mate continuous ged or not hich indicates a b c d e ...
Страница 25: ...a malfunction at 25 ENGLISH 1 3 2 4 Tape window Cassette holder Cassette door a SAVE b REC ...
Страница 26: ...2 4 3 ...
Страница 28: ......
Страница 30: ...CR see page 64 1 2 4 REW PLAYER ...
Страница 33: ...33 ENGLISH 33 ENGLISH setting ...
Страница 40: ...special effects effect that you wish to give b d c e f h j g i a ...
Страница 52: ...ched on F een installed EASY SP STBY 0 00 00 63MIN EASY ...
Страница 53: ...53 ENGLISH 53 ENGLISH ected n installed CUSTOM SP STBY 0 00 00 63MIN CUSTOM ...
Страница 55: ...55 ENGLISH 55 ENGLISH BLC on BLC off BLC ...
Страница 60: ...e released menu PHOTO SEARCH SP STILL FF REW RETURN SEL ENTER MENU PHOTO ...
Страница 62: ...level of brightness and assette dations g mmended red ...
Страница 63: ...63 ENGLISH CD screen to the Camcorder 1 2 3 4 5 ...
Страница 66: ...emote Control ...
Страница 71: ...71 ENGLISH PC without other optional add on he camcorder ...
Страница 72: ......
Страница 73: ...73 ENGLISH ent Format PDF CD 4 6 ...
Страница 75: ...75 ENGLISH he life span of the battery Hence it should be w 1 2 4 4 3 ...
Страница 76: ...76 ower es display square be dirty 1 2 3 4 ...
Страница 80: ...sette s m lens X out only ...
Страница 81: ...81 ENGLISH 81 ENGLISH V 50 60Hz ...
Страница 82: ... 77 59 36 65 ER 21 39 46 45 27 ROL 18 d tab 25 18 ED 43 58 58 64 37 71 29 61 37 E 42 68 37 P R S T U V W Z ...
Страница 84: ... AD68 00542E ...


